
User guide
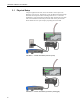
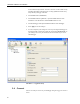
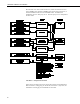

Table Of Contents
- Revision and Copyright Information
- Limited Warranty
- Assistance
- Precautions
- Table of Contents
- 1. Introduction
- 2. Cautionary Statements
- 3. Quickstart
- 4. Overview
- 5. Specifications
- 6. Configuring the NL200/201
- 7. Operation
- 8. Applications
- 9. Troubleshooting
- 10. Attribution
- Appendix A. Glossary
- Appendix B. Cables, Pinouts, LED Function, and Jumper
- Appendix C. NL200/201 Settings
- Appendix D. Sending a New OS to the NL200/201
- Campbell Scientific Companies
NL200/201 Network Link Interface
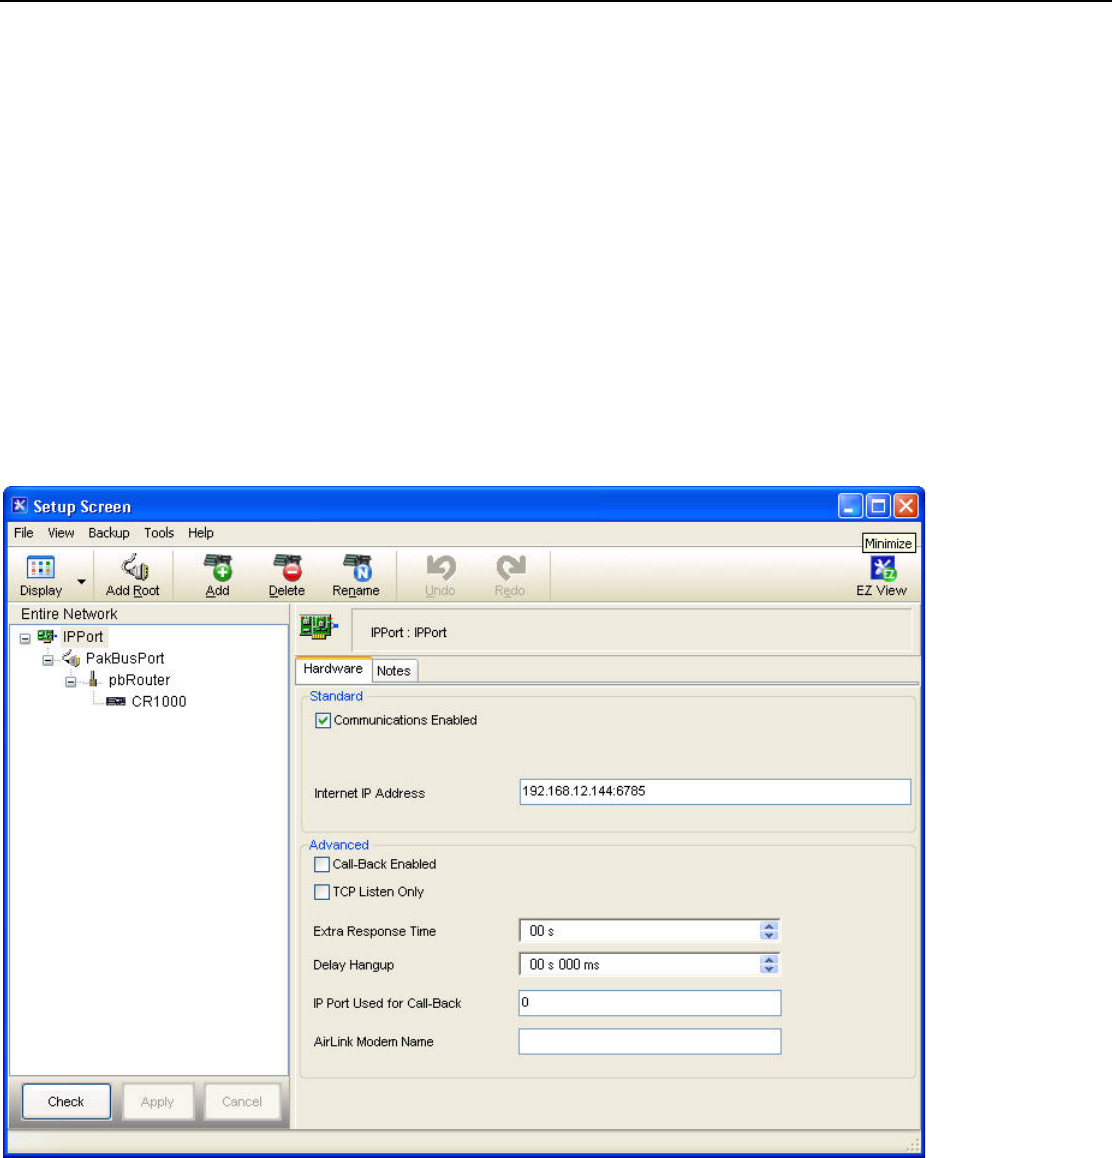
An IPv4 address may look like 192.168.1.100:6785. An IPv6 address may
look like [2001:db8::1234:5678]:6785. A fully qualified host name entry
may look like yourlogger.com:6785.
• Add a PakBus® Port (PakBusPort).
• Add a PakBus® Router (pbRouter). Input the PakBus address of the
NL200/201. The NL200/201’s default PakBus address is 678.
• Add the datalogger and input the PakBus® address of the datalogger.
• Press Apply to save the changes.
• You can verify that your settings are correct by selecting the datalogger in
the Network Map, selecting the Clock tab, and pressing Check Clocks. If
your settings are correct, you should see the current clock of your server
and datalogger.
FIGURE 3-3. LoggerNet setup
3.4 Connect
You are now ready to connect to your datalogger using the LoggerNet Connect
screen.
4