
User guide

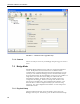
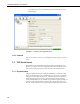

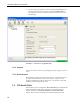
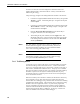
Table Of Contents
- Revision and Copyright Information
- Limited Warranty
- Assistance
- Precautions
- Table of Contents
- 1. Introduction
- 2. Cautionary Statements
- 3. Quickstart
- 4. Overview
- 5. Specifications
- 6. Configuring the NL200/201
- 7. Operation
- 8. Applications
- 9. Troubleshooting
- 10. Attribution
- Appendix A. Glossary
- Appendix B. Cables, Pinouts, LED Function, and Jumper
- Appendix C. NL200/201 Settings
- Appendix D. Sending a New OS to the NL200/201
- Campbell Scientific Companies

NL200/201 Network Link Interface
However, an allowed neighbors list can be useful in restricting
communication paths.
• On the Network Services tab:
o Make note of the PakBus\TCP Server Port. (The default
PakBus/TCP Server Port is 6785. Unless firewall issues exist, it is
not necessary to change the port from its default value.)
CS I/O PakBus® Router
• Connect to the NL200/201 in DevConfig (see Section 6, Configuring the
NL200/201).
• On the NL200 tab:
o Set Bridge Mode to disable.
• On the CS I/O tab:
o Set Configuration to PakBus.
o Set SDC address. (Note that if multiple peripherals are connected to
a datalogger’s CS I/O port, each must have a unique SDC address.)
o Set Beacon Interval and Verify Interval as described above. Often
the default values can be used.
• On the Network Services tab:
o Make note of the PakBus\TCP Server Port. (The default
PakBus/TCP Server Port is 6785. Unless firewall issues exist, it is
not necessary to change the port from its default value.)
7.1.3 LoggerNet Setup
• In the LoggerNet Setup screen, press Add Root and choose IPPort. Input
the NL200/201’s IP address and port number. The IP address and port
number are input on the same line separated by a colon.
• Add a PakBus® Port (PakBusPort).
• Add a PakBus® Router (pbRouter). Input the PakBus address of the
NL200/201. The NL200/201’s default PakBus address is 678.
• Add the datalogger and input the PakBus® address of the datalogger.
• Press Apply to save the changes.
13