
User Manual


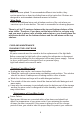
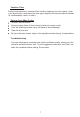

Table Of Contents
- Ò³Ãæ 1
- Ò³Ãæ 2
- Ò³Ãæ 3
- Ò³Ãæ 4
- Ò³Ãæ 5
- Ò³Ãæ 6
- Ò³Ãæ 7
- Ò³Ãæ 8
- Ò³Ãæ 9
- Ò³Ãæ 10
- Ò³Ãæ 11
- Ò³Ãæ 12
- Ò³Ãæ 13
- Ò³Ãæ 14
- Ò³Ãæ 15
- Ò³Ãæ 16
- Ò³Ãæ 17
- Ò³Ãæ 18
- Ò³Ãæ 19
- Ò³Ãæ 20
- Ò³Ãæ 21
- Ò³Ãæ 22
- Ò³Ãæ 23
- Ò³Ãæ 24
- Ò³Ãæ 25
- Ò³Ãæ 26
- Ò³Ãæ 27
- Ò³Ãæ 28
- Ò³Ãæ 29
- Ò³Ãæ 30
- Ò³Ãæ 31
- Ò³Ãæ 32
- Ò³Ãæ 33
- Ò³Ãæ 34
- Ò³Ãæ 35
- Ò³Ãæ 36
- Ò³Ãæ 37
- Ò³Ãæ 38
- Ò³Ãæ 39
- Ò³Ãæ 40
- Ò³Ãæ 41
- Ò³Ãæ 42
- Ò³Ãæ 43
- Ò³Ãæ 44
- Ò³Ãæ 45
- Ò³Ãæ 46
- Ò³Ãæ 47
- Ò³Ãæ 48
- Ò³Ãæ 49
- Ò³Ãæ 50
- Ò³Ãæ 51
- Ò³Ãæ 52
- Ò³Ãæ 53
- Ò³Ãæ 54
- Ò³Ãæ 55
- Ò³Ãæ 56
- Ò³Ãæ 57
- Ò³Ãæ 58
- Ò³Ãæ 59
- Ò³Ãæ 60
- Ò³Ãæ 61
- Ò³Ãæ 62
- Ò³Ãæ 63
- Ò³Ãæ 64
- Ò³Ãæ 65
- Ò³Ãæ 66
- Ò³Ãæ 67
- Ò³Ãæ 68
- Ò³Ãæ 69
- Ò³Ãæ 70
- Ò³Ãæ 71
- Ò³Ãæ 72
- Ò³Ãæ 73
- Ò³Ãæ 74
- Ò³Ãæ 75
- Ò³Ãæ 76
- Ò³Ãæ 77
- Ò³Ãæ 78
- Ò³Ãæ 79
- Ò³Ãæ 80
- Ò³Ãæ 81
- Ò³Ãæ 82
- Ò³Ãæ 83
- Ò³Ãæ 84
- Ò³Ãæ 85
- Ò³Ãæ 86
- Ò³Ãæ 87
- Ò³Ãæ 88
- Ò³Ãæ 89
- Ò³Ãæ 90
- Ò³Ãæ 91
- Ò³Ãæ 92
- Ò³Ãæ 93
- Ò³Ãæ 94
- Ò³Ãæ 95
- Ò³Ãæ 96
- Ò³Ãæ 97

Before reversing the door ,the power must be shut off.
All parts removed must be saved to do the reinstallation of the door.
NOTE:
This wine cooler has the capability of either opening the door from the left
or right side. The unit is delivered to you with the door opening from the
left side. Should you desire to reverse the opening direction, please
follow these instructions.
Reversing the Door Swing of Your Wine Cooler
4
This wine cellar has been built with the door hinges on the right. If you wish
to change the opening direction, follow the instructions below:
2. Remove the two screws (1) that hold the upper hinge (5) (right side) to the
frame. Take away the upper hinge (5).
3. Lift the door and place it on a padded surface to prevent scratching it.
4. Remove the two screws(8) that hold the lower hinge(2) and Make sure to
Remove the lower hinge(2).
5. Remove the left front leg (4) and transfer it to the right side.
6. Remove the hole cover plate(7) to the right side.
7.
Before placing this lower hinge(2), remove the bolt-pin (9) and reverse
the direction of the lower hinge(2). Then install the lower hinge (2) onto
the left side of the lower frame with two screws (8).
9. Set the door to its place making sure the door seat at the lower hinge(2).
10.While holding the door in the closed position secure the upper hinge (5) in the
top frame of left side with two screws (1). Please remember that do not tighten
the two screws(1) until the top of the door is levelled with the counter top.
1. Remove the upper hinge cover(6) first
11. Install the upper hinge cover(6) on the upper hinge..
8. Insert the bolt-pin(9) to the lower hinge (2).
Door opening from left side
Door opening from right side
44
88
33
77
22
99
11
66
5 5
88
33
99
22
44
77
11
66
55