
Manual

24
Canoga Perkins 9101 LAN Chassis
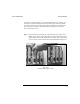
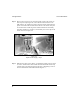
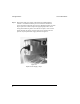
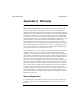
Step 3: With the P/S resting on the chassis, you should have ample room in which
to reach in and disconnect the P/S cable from the main PCB. Note the clip
(circled) on the P/S cable. Depress this clip prior to attempting to discon-
nect the cable from the main PCB. Reference Figure 4-3.
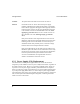
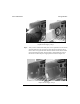
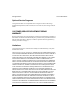
Step 2: Move so that you have access to the back side of your 9101 Chassis. If
the P/S you are replacing is DC, ensure that the Power Switch is in the
OFF position. (AC supplies do not have a Power Switch). Disconnect the
power cord. Remove the nut that fastens the P/S to the chassis and put it
in a location where it will not get lost. Pull back and down on the faulty
P/S (there should be no resistance), and carefully set it on the edge of the
chassis as shown in Figure 4-2.
Figure 4-2
Replace Power Supply - Step 2