9161 Network Interface Device User’s Manual
NOTICE Canoga Perkins has prepared this manual for use by customers and Canoga Perkins personnel as a guide for the proper installation, operation and/or maintenance of Canoga Perkins equipment. The drawings, specifications and information contained in this document are the property of Canoga Perkins and any unauthorized use or disclosure of such drawings, specifications and information is prohibited.
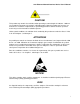
9161 Ethernet Network Interface Device User’s Manual CAUTION! This product may contain a laser diode emitter operating at a wavelength of 1300 nm - 1600 nm. Use of optical instruments (for example: collimating optics) with this product may increase eye hazard. Use of controls or adjustments or performing procedures other than those specified herein may result in hazardous radiation exposure.
9161 Ethernet Network Interface Device User’s Manual General Safety Considerations Installation The 9161 is suitable for installation in Network telecommunication facilities and locations where the National Electric Code (NEC) applies. Cabling The 9161 has been designed and tested and has passed all the pertinent sections of GR-1089 and GR-63 for Type 2 and Type 4 equipment. This equipment does not have direct electrical connection to outside plant equipment.
9161 Ethernet Network Interface Device User’s Manual Grounding The 9161 AC & DC models are suitable for installation as part of the Common Bonding Network (CBN). The 9161 AC and DC are provided with a safety ground connection which is capable of conducting any fault current likely to be imposed such as fault current from sources within the chassis. For the DC model use an approved 18ga insulated wire connected to the terminal block’s middle conductor.
9161 Ethernet Network Interface Device User’s Manual To Users of Digital Apparatus in CanadaThis Class A digital apparatus meets all requirements of the Canadian interference-causing equipment regulations. Aux utilisateurs des appareillages de Digital au CanadaCet appareil numérique de la classe A respecte toutes les exigences du règlement sur le matérial brouilleur du Canada. Special Accessories The 9161 does not require any special accessories to achieve compliance for emission and immunity criteria.
9145 Ethernet Network Interface Device User’s Manual Contents 1 Overview ............................................................................................... 1 1.1 Install the 9161 .................................................................................................. 3 2 Hardware Installation ........................................................................... 3 2.1 Power-Up, Hardware Functions, and LEDs ...................................................... 5 2.1.1 Alarms .
9145 Ethernet Network Interface Device User’s Manual 3.2 Managing the 9161 .......................................................................................... 16 3.2.1 Configure the 9161 for the System ........................................................................ 16 3.2.2 View Device Information ........................................................................................ 17 3.2.3 Manage the Date and Time .........................................................................
145 Ethernet Network Interface Device User’s Manual 4 Troubleshooting ................................................................................. 33 4.0.1 Link Loss Forwarding ............................................................................................ 34 4.1 Running Diagnostics ....................................................................................... 35 4.1.1 PING Testing .................................................................................................
Overview 9161 Ethernet Network Interface Device User’s Manual Chapter 1 Overview The 9161 is a 2-Port 10 Gbps Network Interface Device that provides intelligent optical demarcation and terminates managed transport at the point of delivery. In addition, the 9161 offers Layer 2 statistics, remote software upgrade, remote control and monitoring, and management through CanogaView.
Hardware Installation 9161 Ethernet Network Interface Device User’s Manual Install the 9161 Chapter 2 Hardware Installation This chapter describes how to set up and install the 9161 and the interface modules as well as the hardware features and functions of the 9161. Before setting up the 9161, make sure the serial cable (required to connect the chassis to a VT100 type terminal or PC) and the Ethernet and fiber cables needed for your system are available.
9161 Ethernet Network Interface Device User’s Manual Hardware Installation Install the 9161 3. Connect the power. The 9161 can be equipped for either redundant or non-redundant power supplies; AC or DC power. a. Plug the AC power cord into the socket at the rear of the 9161 and the wall socket. b. The 9161 is shipped with a compatible DC Power terminal block. Connect DC power to the 9161 as follows: NOTE: The DC Power Terminal Block is removable for ease of installation and replacement.
Hardware Installation 9161 Ethernet Network Interface Device User’s Manual Power-Up, Hardware Functions, and LEDs Connect the Optical Fiber cables to the XFP modules as follows: 1. Plug in the optical cable connectors with proper Tx to Rx or Rx to Tx orientation. 2. Ensure cable locks in place. 3. Label each cable and connector with the signal name and direction. Canoga Perkins recommends that you determine and record link attenuation and transmission power before starting normal link traffic.
9161 Ethernet Network Interface Device User’s Manual Hardware Installation Power-Up, Hardware Functions, and LEDs Table 2-1. 9161 Management LEDs green amber FAN P1/P2 fan status power supply status (primary/secondary) red green amber red on on on blinking off on on on off normal system self test/one fan failed more than one fan failed fans not installed power off normal operation Self test power failure/major alarm no power/power supply not installed Table 2-2.
Hardware Installation 9161 Ethernet Network Interface Device User’s Manual Power-Up, Hardware Functions, and LEDs 10G1 PORT 10G2 PORT Tx Rx Rx Tx 10G2 PORT x 10G1 PORT Tx Rx Rx Tx LOCAL DEVICE Local device Rx detects link loss Tx transmits RMTF to remote device Local device Rx turns OFF Remote device Rx LED turns red REMOTE DEVICE Figure 2-1. Remote Fault Signal 2.2.
Using the Software 9161 Network Interface Device User’s Manual Setting Up for Network Management Chapter 3 Using the Software You can manage the system through VT100 Terminal Emulation, which is accessible by a Telnet session, HyperTerminal or similar terminal emulation software, a standard SNMP network manager, and CanogaView. 3.1 Setting Up for Network Management Typically, the 9161 runs within the network on an Ethernet connection, communicating with your Network Management Platform. 3.1.
9161 Network Interface Device User’s Manual Using the Software Setting Up for Network Management 3.1.2 Set Up the Terminal Server for SLIP SLIP mode can be initiated and terminated from the console port, or in band using the VT100 under the IP setting on the System Menu. To terminate SLIP mode, press 3 times from the serial port. SLIP mode can also be terminated from the VT100 using the IP setting on the System Menu. Once SLIP mode has been set up, it will be initiated automatically upon power up.
Using the Software 9161 Network Interface Device User’s Manual Management User Interface 4. At the COM Properties dialog, on the Port Settings tab, check for these selections: • Bits per second: 9600 bps • Data bits: 8 • Parity: None • Stop bits: 1 • Flow control: None 5. Click Apply, then OK. HyperTerminal connects to the system and the VT100 terminal emulation starts. 3.
9161 Network Interface Device User’s Manual Using the Software Management User Interface Navigation instructions Model number Messages and Urgent status Menu Options Figure 3-1. General Screen Format 3.2.2 User Interface Organization The user interface consists of selectable, nested screens, described in this chapter and available in this order: Main Menu 1 System 1.1 System Information 1.1.1- System Name 1.1.2- Contact 1.1.3- Location 1.1.4- Customer 1.1.5- Information 1 1.1.6- Information 2 1.1.
Using the Software 9161 Network Interface Device User’s Manual Management User Interface 1.2 Module Information This screen only reports status of the following: ·Fan Status ·Temperature ·Power Supply Status 1 and 2 ·Mainboard 12v Voltage · Module types installed in the Ports. ·If no module is installed it will report an Empty Slot 1.3 IP Settings 1.3.1- Local IP Address 1.3.2- Subnet Mask 1.3.3- Gateway IP Address 1.3.4- Enable BOOTP Mode 1.3.5- Management VLAN ID 1.3.6- Management VLAN Double Tagged 1.
9161 Network Interface Device User’s Manual Using the Software Management User Interface 1.7 Account Configuration 1.7.1- View/Change Account 1.7.2- Add Account 1.7.3- Delete Account 1.8 Management Packets Control 1.8.1- 10G1 1.8.2- 10G2 1.9 Trap Configuration 1.9.1- Master Trap Control 1.9.2- Cold Start Traps 1.9.3- Link Loss Forwarding Traps 1.9.4- Remote Fault Received Traps 1.9.5- Monitor Systems Traps 1.9.6- Monitor Port Module Traps 1.9.7- VLAN Settings Traps 1.9.8- Link Up/Down Traps 1.9.
Using the Software 9161 Network Interface Device User’s Manual Management User Interface 2.3 Global Spanning Tree Report 2.3.1- View Interface Statistics 2.3.2- View Interface Status 2.4 VLAN Configuration 2.4.1- Create VLAN(s) 2.4.2- View/Change VLAN 2.4.3- Delete VLAN(s) 2.4.4- List From VLAN ID 2.4.5- VLAN Id Translation 2.4.6- VLAN Priority Translation 2.4.7- Configure Port VLAN 2.5 Double Tagging Configuration 2.5.1- Enable double tagging on port 2.5.2- Disable double tagging on port 2.5.
9161 Network Interface Device User’s Manual Using the Software Management User Interface 4.6 Dynamic ARP Table 4.6.1- View Previous Page 4.6.2- View Next Page 4.6.3- Clear Table 5 Diagnostics 5.1 Latency/Jitter Test 5.1.1- Test IP Address 5.1.2- Test Duration 5.1.3- Test Packets Size 5.1.4- Min Test Packets Size 5.1.5- Max Test Packet Size 5.1.6- Test Packet Timeout 5.1.7- Start/Stop Test 5.2 PING Generation 5.2.1- Ping Address 5.2.2- Ping Count 5.2.3- Ping Size 5.2.4- Start Pinging 5.
Using the Software 9161 Network Interface Device User’s Manual Management User Interface 3.2.3 Login and the 9161 Main Menu The first screen is the Login. If this is your initial setup and no user name or password has been set, type admin and press at the prompts for the username and password. Otherwise, type your username and press , then type your password and press .
9161 Network Interface Device User’s Manual Using the Software Managing the 9161 3.3 Managing the 9161 You can manage the hardware and software for the 9161, including communication access. 3.3.1 Configure the 9161 for the System The System Information screen provides various categories of optional information that system administrators may track. To access the System Information screen, and follow these steps: 1. From the System menu type 1, System Information, and press . 2.
Using the Software 9161 Network Interface Device User’s Manual Managing the 9161 3.3.2 View Device Information The Description Report shows the current information, including the device type and software information for the 9161. To access the Report menu, follow these steps: 1. From the Main menu, type 4, Reports, and press . 2. From the Reports menu, type 1, Device Description, and press .. 3. To return to the Main Menu, type 4. Figure 3-3. . 9161 Device Description Report 3.3.
9161 Network Interface Device User’s Manual Using the Software Managing the 9161 To set up synchronization with SNTP, follow these steps: 1. At the System menu, type 10, SNTP Configuration and press . 2. At the SNTP Client Configuration screen, type the number for a parameter and press , then follow the prompts on the screen. • SNTP Enable: Enable (yes) or disable (no) synchronized time • SNTP Server IP Address: Enter the address for the server; 0.0.0.
Using the Software 9161 Network Interface Device User’s Manual Managing the 9161 • Management VLAN double Tagged: Enable or disable double tagging for the VLAN • Telnet Host Verification: Enable or disable checking whether host is listed in host table; default is disabled, which allows access to all hosts 3. To return to the System menu, press . The SNMP agent allows access to up to 8 Host IP addresses. Set up and edit the Host information for the 9161 at the Host Access Table screen.
9161 Network Interface Device User’s Manual Using the Software Managing the 9161 These selections do not affect how the Major and Minor LEDs report alarms. Table 3-2. Trap Configuration Options Trap When enabled, sends a Trap if. . .
Using the Software 9161 Network Interface Device User’s Manual Managing Security 3.3.7 Update Software Each 9161 has two flash memory banks that store software: • The Active Flash Memory holds the software currently in use • The Inactive Flash Memory holds the new software from a download or the older version of software Software is downloaded to the inactive memory to avoid disrupting service. Resetting the 9161 and swapping banks will affect the traffic.
9161 Network Interface Device User’s Manual Using the Software Managing Security 3. At the Security Configuration screen, type the number for an item and press , then type a value or press to cycle through the options and press to select the value or option.
Using the Software 9161 Network Interface Device User’s Manual Managing Security 3.
9161 Network Interface Device User’s Manual Using the Software Managing Security 4. To delete a user, type 3, then follow the prompts to select the user name and confirm the choice; the User Accounts screen reappears. 5. To return to the Systems menu, press . 3.4.3 Change Your Password Whether you have supervisor, operator, or observer access, you can update your password for the domain in order to maintain system security. You cannot change the password for any other users.
Using the Software 9161 Network Interface Device User’s Manual Managing Security 3.4.5 Set Up Host Access The SNMP agent allows access to up to 8 Host IP addresses. Set up and edit the Host information for the 9161 at the Host Access Table screen. To access the Host Access Table, follow these steps: 1. From the System menu type 4, Host Table/ SNMP Settings, and press . 2.
9161 Network Interface Device User’s Manual Using the Software Managing Security c.
Using the Software 9161 Network Interface Device User’s Manual Managing the Network Interface 3.5 Managing the Network Interface The Switch Configuration menu offers options to set network parameters. Ethernet bridges or switches use the Spanning Tree Protocol (STP), an algorithm that creates a logical topology that connects all network segments and ensures only one path between any two stations (reference Table 3-3).
9161 Network Interface Device User’s Manual Using the Software Managing the Network Interface Figure 3-5. Double Tagging Example When setting up ports in the various switch configuration options, set up and configure options in this order: 1. Set up the physical layer, such as port speeds. 2. Set up STP parameters for the physical ports. 3. Set up the VLANS. 4. Set up the Multiple Spanning tree (MST) parameters. 5. When all aspects of the link are ready, connect cables and start the network services. 3.
Using the Software 9161 Network Interface Device User’s Manual Managing the Network Interface NOTE: The Network LED may be turned on and off manually to indicate the status of the Network 6. Network LED: on or off 7. LLF Partner: LLF Direction: 10G1, 10G2, or Disable 10G1 to 10G2, 10G2 to 10G1, Bidirectional, or disable 8. Remote Fault: enable or disable To view current statistics for traffic through a selected port, type 2, Port Statistics, then type the port name and press .
9161 Network Interface Device User’s Manual Using the Software Managing the Network Interface 3. To view or update parameters for a specific port, type 10, View/Change Interface, and press , then press to cycle through the port names. You can edit various parameters, such as Admin Mode, Priority, Path Cost, and Edge Port. 4. To return to the Switch Configuration menu, press . 3.5.3 Set Up VLANs Use the VLAN Configuration screen to view and set VLAN parameters for the 9161.
Using the Software 9161 Network Interface Device User’s Manual Managing the Network Interface 3.5.4 Set Up Optional Double Tagging If you are using the 9161 within a service provider environment, you can include VLANS from different customers that are connected to individual ports. You can view and set service provider ID tags for those ports at the Double Tagging Configuration screen, which lists the ports and associated PVIDs. The double tag is derived from the PVID.
9161 Network Interface Device User’s Manual Using the Software Managing the Network Interface 3.5.6 Check Global Spanning Tree Data Use the Global Spanning Tree Report screen to view Global STP parameters and interface statistics and status for the 9161. To access the Global Spanning Tree Report screen, follow these steps: 1. From the Switch Configuration menu, type 3, Global Spanning Tree Report, and press . 2.
Troubleshooting 9161 Ethernet Network Interface Device User’s Manual Optical Power Loss Chapter 4 Troubleshooting This chapter covers identifying fault conditions and determining corrective action. The front panel LEDs provide both normal and fault information. To aid troubleshooting, Tables 5-1and 5-2 list all LED functions and indications. 4.1 Optical Power Loss Whenever there is a significant signal loss, the Rx indictor turns off.
9161 Ethernet Network Interface Device User’s Manual Troubleshooting Fault Conditions Table 4-1.
Troubleshooting 9161 Ethernet Network Interface Device User’s Manual Running Diagnostics x 10G2 PORT 10G1 PORT Tx Rx Rx Tx FAULT NO DATA x Link loss detected on 10G1 Port Fault propogated to 10G2 Port 10G2 Port Tx stops transmitting data 10G2 Port Tx LED turns red 10G1 PORT TO 10G2 PORT 10G1 PORT 10G2 PORT Tx Rx Rx Tx x RMTF Link loss detected on 10G2Port Fault propogated to 10G1Port 10G1 Port stops transmitting data 10G1 Port LED turns red 10G2 PORT TO 10G1 PORT Figure 4-2.
9161 Ethernet Network Interface Device User’s Manual Troubleshooting Loopback Diagnostics When performing loopback diagnostics, the 9161 uses a unique MAC address, designated as the Loop Test MAC Address, which is displayed on the Loopback Setup Screen (reference Chapter 3). When in loopback mode, the 9161 filters and discards all service frames. The 9161 is configurable to swap the origination and destination MAC Addresses and to recalculate the looped frame's CRC.
Maintenance 9161 Ethernet Network Interface Device User’s Manual General Maintenance Chapter 5 Maintenance 5.1 General Maintenance Well maintained components and clearly identified cables help assure optimum system operation. Damaged fiber optic cables and dirty connectors are a common source of signal loss or attenuation. Fiber optics are especially susceptible to contamination. Inspect, clean, and test all components to maintain optimum performance.
9161 Ethernet Network Interface Device User’s Manual Maintenance Check Optical Power Levels 5. If the reading is low, repeat the measurement with a different test cable. If the power level is still not within range, call Canoga Perkins Technical Support. FIBER OPTIC TRANSMITTER FIBER OPTIC RECEIVER -7dBm λ = 1300 nm OPTICAL POWER METER Figure 5-1. Measuring Transmitter Output Power 5.2.2 Measuring Receiver Input Power To measure receiver input power, follow these steps (seeFigure 6-2): 1.
Maintenance 9161 Ethernet Network Interface Device User’s Manual -24dBm λ = 1300 nm LOCAL SITE OPTICAL POWER METER Check Optical Power Levels FIBER OPTIC TRANSMITTER FIBER OPTIC RECEIVER FIBER OPTIC RECEIVER FIBER OPTIC TRANSMITTER -24dBm λ = 1300 nm OPTICAL POWER METER REMOTE SITE Figure 5-2. Measuring Receiver Input Power 5.2.3 Calculating Fiber Link Attenuation Link attenuation measurement identifies potential problems with links that are on the threshold of receiver sensitivity.
Specifications 9161 Ethernet Network Interface Device User’s Manual 9161 Specifications Chapter 6 Specifications 6.1 9161 Specifications Standards: IEEE 802.3 Dimensions: 2.5 H x 17.0 W x 14.0 D (63.5 x 431.8 x 355.6 mm) Weight: 14 lb. (6.35 Kg) Operating Temperature: 0° to 50° C Operating Humidity: Up to 90% (non-condensing) Power Consumption: AC = 36W DC = 32W Optical Connectors: LC 6.1.1 Regulatory Compliance • ETL, cETL & LVD (UL 60950 CAN/CSA C22.2 No.
9161 Ethernet Network Interface Device User’s Manual Specifications 9161 XFP Module Model Numbers 6.1.2 EIA-232 Pinout 5 4 9 3 8 2 7 1 1 6 2 3 4 5 6 7 8 9 3 7 DCD RX DATA TX DATA DTR SIG GND DSR RTS CTS RI 6.2 9161 XFP Module Model Numbers 10GigE XFP Modules XFP1-0265 10 GBase-SR 850nm MM 300m LC XFP1-2265 10 GBase-LR 1310nm SM 10km LC XFP1-3465 10 GBase-ER 1550nm SM 40km LC XFP1-3665 10 GBase-ER 1550nm SM 80km LC NOTE: Reference http://product.canoga.
Warranty Information 9161 Ethernet Network Interface Device User’s Manual Appendix A Warranty Information Current Warranty information is available on-line in the Client Login Area of the Canoga Perkins web site (www.canoga.com) or by contacting Technical Support at 800-360-6642 (voice) or fiber@canoga.com (email).
CANOGA PERKINS CORPORATION 20600 Prairie Street Chatsworth, California 91311-6008 USA Phone: (818) 718-6300 FAX: (818) 718-6312 Web Site: www.canoga.com Email: fiber@canoga.