
User Manual


151
Selecting a Network Connection
Selecting a Network Connection
You can save up to 5 different network configuration profiles. You can select which one to use depending on
where you plan to use the camcorder. If you just saved a new network configuration (A 150), that network
configuration will already be automatically selected and this procedure is not required.
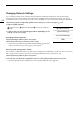
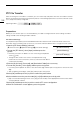
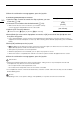
1 Open the [Select] submenu.
[w Other Functions] > [Network Settings] > [Connection Settings]
> [Select]
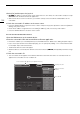
2 Select the desired configuration number and then press the
joystick.
• The camcorder will connect to the selected network only when you
activate a Wi-Fi function. The icon displayed on the top left of the
screen will indicate the type of network selected and the connection
status. Refer to the following table.
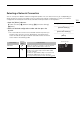
Connection type
Onscreen
display
Connection status
Infrastructure In yellow: The camcorder is connecting to or disconnecting from
the network. In white: The Wi-Fi function can be used.
Camera Access Point In yellow: Starting the camcorder’s access point. In white: The
camcorder’s access point is ready. Connect the Wi-Fi enabled
device to the camcorder.
• On the device: Open the Wi-Fi settings screen and select the
network name (SSID) that was set in the camcorder. If
necessary, enter the password set in the camcorder (A 149).
[w Other Functions]
[Network Settings]
[Connection Settings]
[Select]
Connection type