
Manual


Projection Procedure
65
Basic Guide Projection Procedure
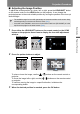
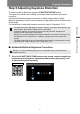
4:3 D. image shift
Select this when you use a screen with an aspect ratio of 4:3. Keystone correction
cannot be performed in this mode. However, it is possible to move the image left /
right when projecting level. For details about how to move the image, refer to
“Digital image shift” on page 98.
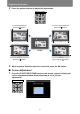
5 Press the OK button to accept your setting and then press the MENU
button.
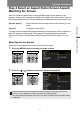
Resetting the Image Shift
Perform the following steps to reset the image shift adjustment. Access the [D. image
shift adjustment] window and press the
D.SHIFT/KEYSTONE
button to display the
[D. image shift reset] window. Next, select [OK] with the [ ] button, and then press the
OK
button.
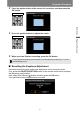
Select the Aspect
Select [Aspect] based on the input signal type, aspect ratio of the screen and
resolution. For more details about aspect ratios, refer to “Relationship between Aspect
and Screen Aspect” on page 175.
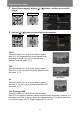
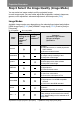
Types of Aspect Ratios
■ Auto
An image is projected at the aspect ratio of the input signal. Select this mode for
normal image projection.
■ 16:10
The image is projected using an input signal aspect ratio of 16:10. Select this if an
image of 16:10 aspect ratio cannot be correctly projected in [Auto] mode.
■ 16:9
The image is projected using an input signal aspect ratio of 16:9. Select this if an
image of 16:9 aspect ratio cannot be correctly projected in [Auto] mode.
■ 4:3
The image is projected using an input signal aspect ratio of 4:3. Select this if an
image of 4:3 aspect ratio cannot be correctly projected in [Auto] mode.
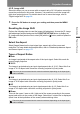
■ Zoom
This cuts the upper / lower or left / right part of the screen according to the screen
aspect and zooms in the center of the image. Select this if a letter box is displayed
(black lines at the top/bottom of the screen) when watching video.
There may be some cases when this cannot be selected, depending on the input signal
and/or resolution.
There may be some cases when this cannot be selected, depending on the input signal
and/or resolution.