
User Manual
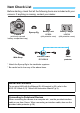
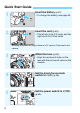

Table Of Contents
- EOS-1D X Mark II
- Introduction
- Getting Started
- Charging the Battery
- Installing and Removing the Battery
- Installing and Removing the Card
- Turning on the Power
- Setting the Date, Time, and Zone
- Selecting the Interface Language
- Attaching and Detaching a Lens
- Basic Operation
- Quick Control for Shooting Functions
- Menu Operations
- Before You Start
- Displaying the Grid in the Viewfinder
- Displaying the Electronic Level
- Setting the Viewfinder Information Display
- Help
- Setting the AF and Drive Modes
- Image Settings
- Selecting the Card for Recording and Playback
- Setting the Image-Recording Quality
- Setting the ISO Speed for Still Photos
- Selecting a Picture Style
- Customizing a Picture Style
- Registering a Picture Style
- Setting the White Balance
- Custom White Balance
- Setting the Color Temperature
- White Balance Correction
- Auto Correction of Brightness and Contrast
- Setting Noise Reduction
- Highlight Tone Priority
- Correction of Lens Aberrations
- Reducing Flicker
- Setting the Color Space
- Creating and Selecting a Folder
- Changing the File Name
- File Numbering Methods
- Setting Copyright Information
- GPS Settings
- Exposure Control for Photographic Expressions
- Flash Photography
- Shooting with the LCD Monitor (Live View Shooting)
- Shooting Movies
- Image Playback
- Image Playback
- INFO. Shooting Information Display
- Searching for Images Quickly
- Magnifying Images
- Rotating the Image
- Protecting Images
- Setting Ratings
- Recording and Playing back Voice Memos
- Quick Control for Playback
- Enjoying Movies
- Playing Back Movies
- Editing a Movie’s First and Last Scenes
- Grabbing a Frame from 4K Movies
- Slide Show (Auto Playback)
- Viewing Images on a TV Set
- Copying Images
- Erasing Images
- Changing Image Playback Settings
- Post-Processing Images
- Sensor Cleaning
- Transferring Images to a Computer and Print Ordering
- Customizing the Camera
- Reference
- Software Overview

8
Icons in this Manual
<6> : Indicates the Main Dial.
<5> : Indicates the Quick Control Dial.
<9> : Indicates the Multi-controller.
<0> : Indicates the Setting button.
9/4/7/8 : Indicates that each function remains active for
approx. 6 sec., 8 sec., 10 sec., or 16 sec. after you
let go of the button.
* In addition to the above, the icons and symbols used on the camera’s buttons
and displayed on the LCD monitor are also used in this manual when discussing
relevant operations and functionality.
3 : Indicates a function that can be changed by pressing the
<M> button to change its settings.
(p.**) : Reference page numbers for more information.
: Warning to prevent shooting problems.
: Supplemental information.
: Tips or advice for better shooting.
: Troubleshooting advice.
Basic Assumptions
All operations explained in this manual assume that the power switch
is already set to <1> (p.53).
It is assumed that all the menu settings and Custom Functions are
set to their defaults.
The illustrations in this manual show the camera attached with the
EF50mm f/1.4 USM lens as an example.
Conventions Used in this Manual