
Owner's Manual
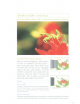

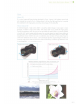
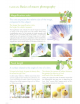
Table Of Contents
- Basic Instruction Manual
- Introduction
- Compatible Memory Cards
- Instruction Manual and CD-ROMs
- Table of Contents
- Using This Manual
- Quick Start Guide
- Supplied Accessories
- Parts & Controls
- Getting Started
- Attaching the Strap / Eyepiece Cover
- Charging the Battery
- Installing / Removing the Battery and Memory Card
- Turning On the Power
- Setting the Date, Time and Time Zone
- Selecting the Interface Language
- Attaching and Detaching a Lens
- Basic Operation
- Quick Control for Shooting Functions
- Menu Operations
- Formatting the Card
- Switching the LCD Monitor Display
- Feature Guide
- Basic Shooting and Image Playback
- Shooting with the LCD Monitor (Live View Shooting)
- Shooting Movies
- Image Playback
- Software Start Guide / Downloading Images to a Computer
- Index
- Instruction Manual
- Memmory Card Compatibility
- Table of Contents
- Supplied Accessories
- Parts & Controls
- Introduction
- Getting Started
- Charging the Battery
- Installing and Removing the Battery and Card
- Turning on the Power
- Setting the Date, Time, and Zone
- Selecting the Interface Language
- Attaching and Detaching a Lens
- Basic Operation
- Quick Control for Shooting Functions
- Menu Operations
- Formatting the Card
- Switching the LCD Monitor Display
- Feature Guide
- Basic Shooting and Image Playback
- Fully Automatic Shooting (Scene Intelligent Auto)
- Full Auto Techniques (Scene Intelligent Auto)
- Disabling Flash
- Creative Auto Shooting
- Shooting Portraits
- Shooting Landscapes
- Shooting Close-ups
- Shooting Moving Subjects
- Shooting Food
- Shooting Night Portraits
- Quick Control
- Shooting with Ambience Selection
- Shooting by Lighting or Scene Type
- Image Playback
- Creative Shooting
- Advanced Shooting
- Conveying the Subject’s Movement
- Changing the Depth of Field
- Manual Exposure
- Changing the Metering Mode
- Setting Exposure Compensation
- Auto Exposure Bracketing
- Locking the Exposure
- Locking the Flash Exposure
- Auto Correction of Brightness and Contrast
- Correcting the Image’s Dark Corners
- Customizing Image Characteristics
- Registering Preferred Image Characteristics
- Matching the Light Source
- Adjusting the Color Tone for the Light Source
- Setting the Color Reproduction Range
- Shooting with the LCD Monitor (Live View Shooting)
- Shooting Movies
- Handy Features
- Image Playback
- Post-Processing Images
- Printing Images
- Customizing the Camera
- Reference
- Software Start Guide / Downloading Images to a Computer
- Troubleshooting
- Specs
- Index
- Wireless Function Basic Instruction Manual
- Do More with Macro Booklet
- Lens Instruction Manual
- Flash Classroom Booklet
- Warranty

Tripod mount ring
Useful at
t'
IT' s I
ke
thes I
Perhaps
you
shoot
a
horizontal
composition
then
feel
like
taking
a
similar
photo
in
a
vertical
frammg.
With a
regular
tripod,
the
subject
position
through
the
vtewfinder
inevitably
shihs
and
the
photographer
has
to
refocus
from
the
start
. With a
tripod
mounl
ring,
however,
you
can
maintain
the
position
of
the
subject
in
the
viewfinder-
for
an
easy,
instant
frame
change
to
a
vertical,
horizontal,
or
even
an
angled
composition.
Terms
Wha
t
rs
o lrrpod mount rirg2
Tripods
ore
normally
attached
directly
to
the
camera
body.
Lenses
equipped
with
a
tripod
mount
ring
however
,
allow
the
tripod
to
be
attached
to
the
lens
rather
than
the
camera
body
.
Accordrngly,
the
camera
rotates
with
the
lens
ot
the
axis,
and
after
the
macro
lens
is
attached
,
the
hont/back
weight
distnbution
is
improved
.
The
result
s
steady,
blur-free
photography.
•
I
28
I