
User Manual


166
Exposure compensation can brighten (increased exposure) or darken
(decreased exposure) the standard exposure set by the camera.
Exposure compensation can be set in the <
d
>, <
s
>, and <
f
> shooting
modes. Although you can set the exposure compensation up to ±5 stops* in
1/3-stop increments, the exposure compensation indicator in the viewfinder and
on the LCD panel can only display the setting up to ±3 stops. If you want to set
the exposure compensation setting beyond ±3 stops, use the Quick Control
(p.50) or follow the instructions for [
z
2: Expo.comp./AEB
] on the next page.
If the <
a
> mode and the ISO Auto are both set, see page 163 to set the
exposure compensation.
* During Live View shooting, exposure compensation can be set up to ±3 stops.
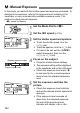
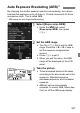
1
Check the exposure.
Press the shutter button halfway
(0) and check the exposure level
indicator.
2
Set the exposure compensation amount.
While looking in the viewfinder or at
the LCD panel, turn the <5> dial.
If it cannot be set, set the <R>
switch downward, then turn the <5>
dial.
If you set exposure compensation,
<O> will be displayed in the
viewfinder and on the LCD panel.
3
Take the picture.
To cancel the exposure compensation, set
the exposure compensation amount back
to <
E
>.
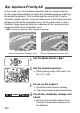
O Setting Exposure CompensationN
Increased exposure
for a brighter image
Decreased exposure
for a darker image
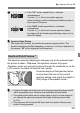
If [z2: Auto Lighting Optimizer] (p.142) is set to any setting other than
[Disable], the image may still look bright even if a decreased exposure
compensation for a darker image is set.
The exposure compensation amount will remain in effect even after you
set the power switch to <2>.
After setting the exposure compensation amount, you can prevent the
exposure compensation amount from changing accidentally by setting
the <R> switch upward.
If the exposure compensation amount exceeds ±3 stops, the end of the
exposure level indicator will display <I> or <J>.