
User Guide


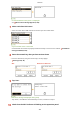
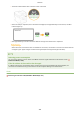
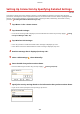

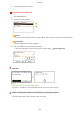

Table Of Contents
- Contents
- Important Safety Instructions
- Basic Operations
- Copying
- Faxing
- Configuring Initial Settings for Fax Functions
- Sending Faxes
- Receiving Faxes
- Sending and Receiving Faxes According to Your Purposes
- Checking Status and Log for Sent and Received Documents
- Importing/Exporting Address Book Data with the Supplied Software
- Sending Faxes from Your Computer (PC Fax)
- Using the Machine as a Printer
- Using the Machine as a Scanner
- Preparing to Use the Machine as a Scanner
- Scanning from the Machine
- Scanning from a Computer
- Convenient Scanning with a Machine-Based Operation
- Can Be Used Conveniently with a Mobile Device
- Network
- Connecting to a Network
- Viewing Network Settings
- Configuring the Machine for Printing or Faxing from a Computer
- Configuring Scan Settings (E-Mail/Shared Folders)
- Configuring the Machine for Your Network Environment
- Security
- Using Remote UI
- Setting Menu List
- Troubleshooting
- Maintenance
- Appendix
- SIL OPEN FONT LICENSE

If <Cannot nd the access point.> is displayed
See When an Error Message Appears(P. 549) .
7
Select a wireless LAN router.
● Select the r
outer whose SSID matches the one that you have written down.
If your wireless router is not found
Check whether the machine is pr
operly installed and ready to connect to the network.
Installation/
Settings Pr
oblems(P. 566)
8
Enter the network key that you have written down.
● Enter the network k
ey using the numeric keys, and tap <Apply>.
Entering Text(P. 38)
WEP WPA-PSK or WPA2-PSK
9
Tap <Yes>.
If an error message is displayed during setup
T
ap <Close>, check whether the network key is correct, and return to step 5.
10
Check that the Wi-Fi indicator is blinking on the operation panel.
Network
327