
User Guide

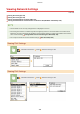
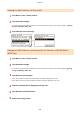
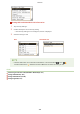
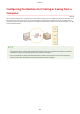
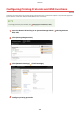
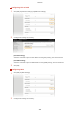
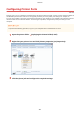
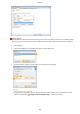
Table Of Contents
- Contents
- Important Safety Instructions
- Basic Operations
- Copying
- Faxing
- Configuring Initial Settings for Fax Functions
- Sending Faxes
- Receiving Faxes
- Sending and Receiving Faxes According to Your Purposes
- Checking Status and Log for Sent and Received Documents
- Importing/Exporting Address Book Data with the Supplied Software
- Sending Faxes from Your Computer (PC Fax)
- Using the Machine as a Printer
- Using the Machine as a Scanner
- Preparing to Use the Machine as a Scanner
- Scanning from the Machine
- Scanning from a Computer
- Convenient Scanning with a Machine-Based Operation
- Can Be Used Conveniently with a Mobile Device
- Network
- Connecting to a Network
- Viewing Network Settings
- Configuring the Machine for Printing or Faxing from a Computer
- Configuring Scan Settings (E-Mail/Shared Folders)
- Configuring the Machine for Your Network Environment
- Security
- Using Remote UI
- Setting Menu List
- Troubleshooting
- Maintenance
- Appendix
- SIL OPEN FONT LICENSE

Adding a port
If the IP addr
ess of the machine has been changed, add a new port. Adding a port is also an effective solution
when an incorrect port type was selected in the Windows printer folder during the printer driver installation.
1
Click [Add Port].
2
Select [Canon MFNP Port] in [Available port types] and click [New Port].
3
Click [Auto Detect], select the machine when it is detected, and click [Next].
If the machine is not detected
Click [Refr
esh]. If the problem persists, click [IP address] or [MAC address], enter the IP address or MAC
address of the machine (
Viewing Network Settings(P. 344) ), and then click [Ne
xt].
Network
352