
User's Manual


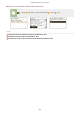

Table Of Contents
- Contents
- Important Safety Instructions
- Basic Operations
- Copying
- Faxing
- Configuring Initial Settings for Fax Functions
- Sending Faxes
- Receiving Faxes
- Sending and Receiving Faxes According to Your Purposes
- Checking Status and Log for Sent and Received Documents
- Importing/Exporting Address Book Data with the Supplied Software
- Sending Faxes from Your Computer (PC Fax)
- Using the Machine as a Printer
- Printing from a Computer
- Printing a Document
- Canceling Prints
- Checking the Printing Status
- Various Print Settings
- Enlarging or Reducing
- Switching 1-Sided and 2-Sided Printing (MF249dw / MF247dw)
- Collating Printouts by Page
- Printing Multiple Pages onto One Sheet
- Printing Posters
- Printing Booklet (MF249dw / MF247dw)
- Printing Borders
- Printing Dates and Page Numbers
- Printing Watermarks
- Selecting Document Type
- Saving Toner
- Combining and Printing Multiple Documents
- Configuring Print Settings to Your Needs
- Printing from a Computer
- Using the Machine as a Scanner
- Preparing to Use the Machine as a Scanner
- Scanning from the Machine
- Scanning from a Computer
- Convenient Scanning with a Machine-Based Operation (MF249dw / MF247dw)
- Can Be Used Conveniently with a Mobile Device
- Network
- Connecting to a Network
- Viewing Network Settings
- Configuring the Machine for Printing or Faxing from a Computer
- Configuring Scan Settings (E-Mail/Shared Folders) (MF249dw / MF247dw)
- Configuring the Machine for Your Network Environment
- Security
- Using Remote UI
- Setting Menu List
- Troubleshooting
- Maintenance
- Appendix
- SIL OPEN FONT LICENSE

● Selecting destinations dir
ectly by entering coded dial numbers. You can also specify previously used
destinations.
Selecting Destinations Directly by Entering Coded Dial Numbers(P. 276)
Specifying Previously Used Destinations(P. 281)
5
Specify the scanning settings as necessary.
● T
ap the settings.
Specifying Detailed Settings(P. 258)
● The le
name of a scanned document is automatically assigned based on the following format:
"communication management number (four digits)_sent date and time_document number (three
digits).le extension name."
Example of le names: If a one-page document is converted into a PDF le and sent on October 17, 2015
at 07:00:05 P.M.
"0045_151017190005_001.pdf"
● You cannot specify le names yourself.
6
Press
to start scanning.
➠ Scanning of the document starts.
● To cancel scanning, tap <Cancel> <Yes>. Canceling Sending Documents (E-Mail/Shared Folder)
(P
. 256)
When placing documents in the feeder in step 1
When scanning is complete, the documents are scanned to the shared folder.
When placing documents on the platen glass in step 1
When scanning is complete, follow the procedures below (except if you selected JPEG as a le format in step 5).
1
If there are additional pages of documents to be scanned, place the next document on the platen glass,
and pr
ess
.
● Repeat this step until you nish scanning all of the pages.
● When ther
e is only one page to be scanned, proceed to the next step.
2
Tap <Start TX>.
➠ The documents ar
e scanned to the shared folder.
Using the Machine as a Scanner
254