
Owner's Manual
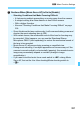
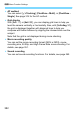
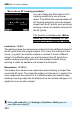
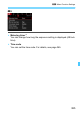
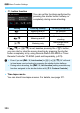
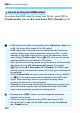
Table Of Contents
- Instruction Manual
- Camera Instruction Manual
- Table of Contents
- Supplied Accessories
- Parts & Controls
- Compatible Memory Cards
- Introduction
- Getting Started and Basic Camera Operations
- Charging the Battery
- Installing and Removing the Battery
- Installing and Removing the Card
- Turning on the Power
- Setting the Date, Time, and Zone
- Selecting the Interface Language
- Attaching and Detaching a Lens
- Basic Shooting Operations
- Quick Control for Shooting Functions
- Menu Operations
- Operating the Camera with Touch Screen
- Before You Start
- Displaying the Grid in the Viewfinder
- Displaying the Electronic Level
- Setting the Viewfinder Information Display
- INFO. Button Functions
- Setting Multi Function Lock
- Help
- Basic Shooting
- Setting the AF and Drive Modes
- Image Settings
- Selecting the Card for Recording and Playback
- Setting the Image-Recording Quality
- Setting the Dual Pixel RAW Function
- Setting the ISO Speed for Still Photos
- Selecting a Picture Style
- Customizing a Picture Style
- Registering a Picture Style
- Setting the White Balance
- White Balance Correction
- Auto Correction of Brightness and Contrast
- Setting Noise Reduction
- Highlight Tone Priority
- Correction of Lens Aberrations due to Optical Characteristics
- Reducing Flicker
- Setting the Color Space
- Creating and Selecting a Folder
- Changing the File Name
- File Numbering Methods
- Setting Copyright Information
- GPS Settings
- Advanced Operations for Photographic Effects
- Program AE
- Shutter-Priority AE
- Aperture-Priority AE
- Manual Exposure
- Selecting the Metering Mode
- Setting the Desired Exposure Compensation
- Auto Exposure Bracketing (AEB)
- Lock the Exposure for Shooting (AE Lock)
- Long (Bulb) Exposures
- HDR (High Dynamic Range) Shooting
- Multiple Exposures
- Mirror Lockup
- Using the Eyepiece Cover
- Using a Remote Switch
- Remote Control Shooting
- Interval Timer Shooting
- Flash Photography
- Shooting with the LCD Monitor (Live View Shooting)
- Shooting Movies
- Image Playback
- Image Playback
- Shooting Information Display
- Searching for Images Quickly
- Magnifying Images
- Comparing Images (Two-Image Display)
- Playing Back with the Touch Screen
- Rotating the Image
- Protecting Images
- Setting Ratings
- Quick Control for Playback
- Enjoying Movies
- Playing Back Movies
- Editing a Movie’s First and Last Scenes
- Grabbing a Frame from 4K Movies
- Slide Show (Auto Playback)
- Viewing Images on a TV Set
- Copying Images
- Erasing Images
- Changing Image Playback Settings
- Post-Processing Images
- Sensor Cleaning
- Transferring Images to a Computer and Print Ordering
- Customizing the Camera
- Reference
- Downloading Images to a Computer / Software
- Troubleshooting
- Specs
- Index
- Wi-Fi (Wireless Communication) Function Basic Instruction Manual
- Camera Instruction Manual
- Wi-Fi Function Instruction Manual
- Table of Contents
- Introduction
- Getting Started
- Easy Connection
- Advanced Connection
- When Connected
- Reference
- Troubleshooting
- Specs
- Index
- 24-105mm f/4L IS II USM Lens Instructions
- Scans of CD-ROMs
- Warranty

3 Menu Function Settings
388
To continue the HDMI output for longer than 30 min., select [a] or
[awithout info], then set [52: Auto Power Off] to [Disable] (p.76).
How to prolong the HDMI output
HDMI output in 4K quality is not possible. (Even if [Movie rec. size] is set
to H, the movie will be output in Full HD quality.)
HDMI output with no information will not display the card’s remaining
capacity, battery level, internal temperature warning (p.391), or other
warnings on the HDMI output device’s screen. Be particularly careful
when setting [awithout info]. When [A+a] is set, you can see the
warnings displayed on the camera’s LCD monitor.
When you are not shooting a movie, the power will turn off automatically
after the set time for [52: Auto power off] elapses. If you select
[A+a] and set [52: Auto power off] to [Disable], the HDMI output
will stop if you do not operate the camera for 30 min. (movie shooting will
be cancelled).
With [awithout info] set and you press the buttons such as <n>
or <m>, the setting screen may be displayed in the HDMI video
output. While recording a movie to an external recording device,
operating the buttons is not recommended.
Depending on the viewing environment, the brightness and color of the
movie shot with the camera may look different from that of the HDMI
video output recorded by an external recording device.
By pressing the <B> button, you can change the information
displayed on the screen.
A time code can be appended to the HDMI video output (p.367).
Sound will also be output for the HDMI output (except when [Sound
rec.: Disable] is set).