
User Manual


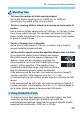

Table Of Contents
- Cover
- Introduction
- Getting Started and Basic Camera Operations
- Charging the Battery
- Installing and Removing the Battery
- Installing and Removing the Card
- Using the LCD Monitor
- Turning on the Power
- Setting the Date, Time, and Zone
- Selecting the Interface Language
- Attaching and Detaching a Lens
- Basic Shooting Operations
- Setting the Screen Display Level
- Quick Control for Shooting Functions
- Menu Operations and Configurations
- Operating the Camera with Touch Screen
- Formatting the Card
- Switching the LCD Monitor Display
- Displaying the Electronic Level
- Displaying the Grid
- Displaying the Flicker Detection
- Basic Shooting and Image Playback
- Fully Automatic Shooting (Scene Intelligent Auto)
- Full Auto Techniques (Scene Intelligent Auto)
- Shooting When You Cannot Use Flash
- Creative Auto Shooting
- Shooting Portraits
- Shooting Landscapes
- Shooting Close-ups
- Shooting Moving Subjects
- Special Scene Mode
- Shooting Group Photos
- Photographing Children
- Shooting Food
- Shooting Candlelight Portraits
- Shooting Night Portraits (With a Tripod)
- Shooting Night Scenes (Handheld)
- Shooting Backlit Scenes
- Shooting with Creative Filter Effects
- Quick Control
- Adjusting the Brightness
- Image Playback
- Setting the AF and Drive Modes
- Image Settings
- Setting the Image-Recording Quality
- Changing the Image’s Aspect Ratio
- Setting the ISO Speed for Still Photos
- Selecting a Picture Style
- Customizing a Picture Style
- Registering a Picture Style
- Matching the Light Source
- Adjusting the Color Tone for the Light Source
- Auto Correction of Brightness and Contrast
- Setting Noise Reduction
- Correction of Lens Aberrations due to Optical Characteristics
- Reducing Flicker
- Setting the Color Reproduction Range
- Advanced Operations for Photographic Effects
- Flash Photography
- Shooting with the LCD Monitor (Live View Shooting)
- Shooting Movies
- Handy Features
- Image Playback
- Searching for Images Quickly
- Magnifying Images
- Playing Back with the Touch Screen
- Rotating the Image
- Setting Ratings
- Setting Image Search Conditions
- Quick Control for Playback
- Enjoying Movies
- Playing Back Movies
- Editing a Movie’s First and Last Scenes
- Slide Show (Auto Playback)
- Viewing Images on a TV Set
- Protecting Images
- Erasing Images
- Digital Print Order Format (DPOF)
- Specifying Images for a Photobook
- Shooting Information Display
- Post-Processing Images
- Customizing the Camera
- Reference
- Software Start Guide / Downloading Images to a Computer

189
f: Changing the Depth of Field
When using an aperture with a high f/number or shooting in low
light scenes, note that camera shake can occur.
A higher aperture f/number will make the shutter speed slower.
Under low light, the shutter speed can be as long as 30 sec. In such
cases, increase the ISO speed and hold the camera steady or use a
tripod.
The depth of field depends not only on the aperture, but also on
the lens and on the subject distance.
Since wide-angle lenses have a wide depth of field (range of
acceptable focus in front of and behind the point of focus), you need
not set a high aperture f/number to obtain a sharp picture from the
foreground to the background. On the other hand, a telephoto lens
has a narrow depth of field.
And the closer the subject, the narrower the depth of field. A farther
subject will have a wider depth of field.
Set the aperture so that the shutter speed display does not
blink.
If you press the shutter button halfway and change
the aperture with the shutter speed displayed, the
shutter speed will also change to maintain the
same exposure (amount of light reaching the
image sensor). In this operation, if the shutter
speed exceeds the adjustable range, it will blink to
indicate that the standard exposure cannot be
obtained.
If the picture will be too dark, the “30"” (30 sec.) shutter speed
display will blink. If this happens, turn the <6> dial
counterclockwise to set a lower f/number or increase the ISO speed.
If the picture will be too bright, the “4000” (1/4000 sec.) shutter
speed display will blink. If this happens, turn the <6> dial
clockwise to set a higher f/number or decrease the ISO speed.
Shooting Tips