
User's Manual

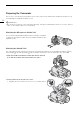

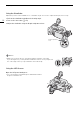

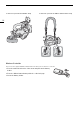


Table Of Contents
- Highlights of the XF405 / XF400
- Table of Contents
- Introduction
- Preparations
- Recording
- Recording Video and Photos
- Video Configuration: Resolution, Bit Rate and Frame Rate
- Dual Recording and Relay Recording
- Slow & Fast Motion Recording
- Adjusting the Focus
- Zooming
- Image Stabilization
- Automatic Gain Control (AGC) Limit
- Shooting Modes
- Adjusting the Exposure
- ND Filter
- White Balance
- Using Looks
- Setting the Time Code
- Setting the User Bit
- Recording Audio
- Using Headphones
- Color Bars/Audio Reference Signal
- Pre-Recording
- Infrared Recording
- Using the Optional RC-V100 Remote Controller
- Using the Optional GP-E2 GPS Receiver
- Customization
- Playback
- External Connections
- Network Functions
- Additional Information

29
Basic Operation of the Camcorder
Changing the Camcorder's Operating Mode
In mode, you can further select the camera mode to match your shooting style.
(Auto) mode
Set the mode switch to N. With this mode, the camcorder takes care of all the settings
while you concentrate on recording. This operating mode is suitable if you just prefer not to
bother with detailed camcorder settings.
(Manual) mode
Set the mode switch to n. With this mode, you can enjoy full access to menus, settings and
advanced functions.
Using the MENU Button and Joystick
You can navigate some of the camcorder’s menus and screens using the MENU button and joystick instead of
using the touch screen.
Joystick/SET button
When making a menu selection, push the joystick to move the
orange selection frame in the menu. Then, press the joystick
itself (in the manual, "press SET") to select the menu item
indicated by the orange selection frame.
MENU button
Press the button to open the setup menus and then press again
to close the menu after adjusting desired settings.