Getting Started Guía de inicio Read Safety and Important Information (addendum) first. Lea primero Información de seguridad e información importante (apéndice).
1 Installing the Printer............................................................page 1 Instalación de la impresora.............................................página 1 2 Connecting with Computer and Smartphone/Tablet...........page 4 Conexión con el ordenador y con el teléfono inteligente o la tableta.....................................................
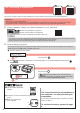
1. Checking Included Items Take out the C (color) cartridge from the package and remove the label. 3 Remove the protective tape. □ Modular cable □ Cartridge ENGLISH □ Power cord 2 □ Setup CD-ROM for Windows PC □ Ink bottle □ Safety and Important Information Do not touch. □ Getting Started (this manual) 2. Removing Packing Materials 1 2 4 Remove the packing materials (such as orange tape) from outside the printer. a O pen the scanning unit / cover.
. Pouring Ink 5 Pour all ink into the ink tank. Confirm that the ink has been filled to the upper limit line (A). This product requires careful handling of ink. Ink may splatter when the ink tanks are filled with ink. If ink gets on your clothes or belongings, it may not come off. 1 2 3 4 (A) Open the ink tank cover. 6 Replace the tank cap securely. 7 Close the ink tank cover. 8 Repeat steps 1 to 7 to pour all ink into the corresponding ink tanks on the right according to the label.
Close the scanning unit / cover. 4 If the following screen appears, select your country or region, and then press the OK button. 5 Confirm that all the ink tanks have ink in them. 6 Select Yes with the [ and ] buttons, and then press the OK button. ENGLISH 9 5. Turning on Printer 1 Connect the power cord. Back Do not connect any cables except the power cord yet. 2 Press the ON button.
. Preparing for Connection 1 To use the printer without connecting to a computer or smartphone Press the OK button. a Press the Stop button on the printer. b In the connection method selection screen, use the [ and ] buttons to select Do not connect, and then press the OK button. Preparing the ink starts. c Use the [ and ] buttons to select Yes, and then press the OK button. This takes about 5 to 6 minutes. Proceed to the next step. 2 d Wait until the following screen appears.
Using Setup CD-ROM (Windows Only) ENGLISH a Load the Setup CD-ROM in your computer. ■■ When using Windows 10 or Windows 8.1: b When the following message appears on the right side of your computer screen, click it. c If the following screen appears, click Run Msetup4.exe. When This Message Does Not Appear (or Has Disappeared) 1. Click File Explorer on the taskbar. or 2. Click This PC on the left side of the opened window. 3. Double-click the CD-ROM icon on the right side of the window.
iOS 7-B. Connecting to Smartphone Android You need a connection setup for each smartphone. Proceed with the setup from step 1 for each smartphone. Preparation • Turn on Wi-Fi on your smartphone. • If you have a wireless router, connect your smartphone to the wireless router you want to connect to the printer. * For operations, refer to manuals of your smartphone and the wireless router or contact those manufacturers. 1 Install the application software Canon PRINT Inkjet/SELPHY in your smartphone.
a Tap Settings on your smartphone's home screen, and tap Canon_ij_XXXX in the Wi-Fi settings. a Tap the installed application software. ENGLISH Procedures below vary depending on iOS or Android. Select your operating system and proceed to its procedure. b Follow the on-screen instructions to register the printer. If Canon_ij_XXXX does not appear on the list, see "Troubleshooting" below to operate the printer, and then repeat step a. b Tap the installed application software.
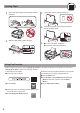
Loading Paper 1 2 Open the paper support and the paper support extension. Slide the right paper guide to the end. 3 Load paper with the print side facing up. 4 Slide the right paper guide to align it with the side of the paper stack. 5 a P ull out the paper output tray. b O pen the output tray extension. b a Using Fax Function Before using the fax function, refer to Setting Up the FAX to set up the fax function of your printer.
1. Comprobación de los elementos suministrados Saque el cartucho C (color) del paquete y retire la etiqueta. 3 Retire la cinta protectora. □ Cable modular □ Cartucho D-ROM de instalación □C para Windows PC □ Frasco de tinta □ Información de seguridad e información importante No tocar. 4 □ Guía de inicio (este manual) ESPAÑOL □ Cable de alimentación 2 Inserte el cartucho C (color) en la parte izquierda. 2.
4. Verter la tinta 5 Vierta toda la tinta en el depósito de tinta. Confirme que se ha llenado la tinta hasta la línea de límite superior (A). Este producto un tratamiento cuidadoso de la tinta, ya que puede salpicar cuando se rellenan de tinta los depósitos de tinta. Es posible que las manchas de tinta no salgan de la ropa u otras pertenencias. 1 2 3 4 (A) Abra la cubierta del depósito de tinta. Agarre y retire la tapa del depósito del depósito de tinta.
9 Cierre la cubierta/unidad de escaneado. 4 Si aparece la siguiente pantalla, seleccione su país o región y, a continuación, pulse el botón OK. 5 Confirme que todos los depósitos de tinta contengan tinta. 6 Seleccione Sí (Yes) con los botones [ y ] y, a continuación, pulse el botón OK. 1 ESPAÑOL 5. Encender la impresora Conecte el cable de alimentación. Atrás No conecte ningún cable excepto el de alimentación. 2 Pulse el botón ACTIVADO (ON).
6. Preparación para la conexión 1 Para usar la impresora sin conectarla a un ordenador o teléfono inteligente Pulse el botón OK. a Pulse el botón Parar (Stop) de la impresora. b En la pantalla de selección del método de conexión, use los botones [ y ] para seleccionar No conectar (Do not connect), y pulse el botón OK. Preparando la inicialización de tinta. c Use los botones [ y ] para seleccionar Sí (Yes), y a continuación pulse el botón OK. Este proceso tardará de 5 a 6 minutos en completarse.
Uso del CD-ROM de instalación (solo para Windows) a Cargue el CD-ROM de instalación en su ordenador. c Si aparece la siguiente pantalla, haga clic en Ejecutar Msetup4.exe (Run Msetup4.exe). d Si se muestra el cuadro de diálogo Control de cuentas de usuario (User Account Control), haga clic en Sí (Yes). Si este mensaje no se muestra (o ya no aparece) 1. Haga clic en el Explorador de archivos (File Explorer) de la barra de tareas. o ESPAÑOL ■■ Si utiliza Windows 10 o Windows 8.
iOS 7-B. Conexión con un teléfono inteligente Android Necesita una configuración de conexión para cada teléfono inteligente. Siga con la configuración a partir del paso 1 para cada teléfono inteligente. Preparativos • Active la Wi-Fi en su teléfono inteligente. • Si dispone de un router inalámbrico, conecte su teléfono inteligente al router inalámbrico para conectar con la impresora.
Los procedimientos que se indican a continuación pueden variar en función del iOS o Android. Seleccione su sistema operativo y sigua el procedimiento indicado. a Toque Ajustes (Settings) en la pantalla de inicio de su teléfono inteligente y después toque Canon_ij_XXXX en los ajustes de Wi-Fi. a Puntee el software de la aplicación instalado. Si Canon_ij_XXXX no aparece en la lista, consulte la sección "Solución de problemas" a continuación para hacer funcionar la impresora y repita el paso a.
Carga del papel 1 2 Abra el soporte del papel y la extensión del soporte del papel. Deslice la guía del papel derecha hacia el final. 3 Cargue papel con la cara imprimible hacia arriba. 4 Deslice la guía del papel derecha para alinearla con el lado de la pila de papel. 5 a E xtraiga la bandeja de salida del papel. b A bra la extensión de la bandeja de salida.
How-To Video Library Videoteca sobre procedimientos RMC (Regulatory Model Code): K10472
Access Online Manual Acceso al Manual en línea From browser Desde el navegador From desktop shortcut Windows 10 Desde el acceso directo del escritorio From browser Desde el navegador QT6-2261-V01 XXXXXXXX © CANON INC.