
User Manual
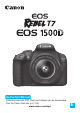

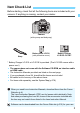
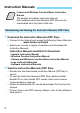
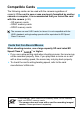

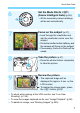

Table Of Contents
- Cover
- Introduction
- Getting Started
- Charging the Battery
- Installing and Removing the Battery and Card
- Turning on the Power
- Setting the Date, Time, and Zone
- Selecting the Interface Language
- Attaching and Detaching a Lens
- Basic Operation
- Quick Control for Shooting Functions
- Menu Operations
- Formatting the Card
- Switching the LCD Monitor Display
- Feature Guide
- Basic Shooting and Image Playback
- Fully Automatic Shooting (Scene Intelligent Auto)
- Full Auto Techniques (Scene Intelligent Auto)
- Disabling Flash
- Creative Auto Shooting
- Shooting Portraits
- Shooting Landscapes
- Shooting Close-ups
- Shooting Moving Subjects
- Shooting Food
- Shooting Night Portraits
- Quick Control
- Shooting with Ambience Selection
- Shooting by Lighting or Scene Type
- Image Playback
- Creative Shooting
- Advanced Shooting
- Conveying the Subject’s Movement
- Changing the Depth of Field
- Manual Exposure
- Changing the Metering Mode
- Setting Exposure Compensation
- Auto Exposure Bracketing
- Locking the Exposure
- Locking the Flash Exposure
- Auto Correction of Brightness and Contrast
- Correcting the Image’s Dark Corners
- Customizing Image Characteristics
- Registering Preferred Image Characteristics
- Matching the Light Source
- Adjusting the Color Tone for the Light Source
- Setting the Color Reproduction Range
- Shooting with the LCD Monitor (Live View Shooting)
- Shooting Movies
- Handy Features
- Image Playback
- Post-Processing Images
- Printing Images
- Customizing the Camera
- Reference
- Software Start Guide / Downloading Images to a Computer

7
Quick Start Guide
6
Set the Mode Dial to <A>
(Scene Intelligent Auto) (p.58).
All the necessary camera settings
will be set automatically.
7
Focus on the subject (p.47).
Look through the viewfinder and
aim the viewfinder center over the
subject.
Press the shutter button halfway, and
the camera will focus on the subject.
If necessary, the built-in flash will be
raised.
8
Take the picture (p.47).
Press the shutter button completely
to take the picture.
9
Review the picture.
The captured image will be
displayed for approx. 2 sec. on the
LCD monitor.
To display the image again, press
the <x> button (p.83).
To shoot while looking at the LCD monitor, see “Live View
Shooting” (p.139).
To view the images captured so far, see “Image Playback” (p.83).
To delete an image, see “Erasing Images” (p.230).