
Owner's Manual
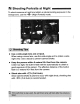
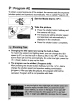
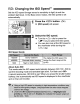
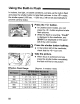
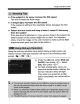
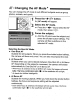
Table Of Contents
- Pocket Guide
- Owners Manual
- Image Quality
- Restore Default Settings (Menu Item)
- Date & Time Set
- Conventions Used in This Manual
- Table of Contents
- Supplied Accessories
- Parts & Controls
- Quick Start
- Getting Started
- Basic Shooting & Playback
- Advanced Shooting Techniques
- Program AE
- ISO Speed
- Using the Flash
- Changing Auto Focus Mode
- Selecting the Auto Focus Point
- Continuous Shooting
- Image Quality
- Selecting a Picture Style
- Action Shots
- Depth of Field
- Manual Exposure
- Automatic Depth of Field
- Metering Mode
- Exposure Compensation
- Auto Exposure Bracketing
- Customizing the Picture Style
- Defining a New Picture Style
- Setting the Color Space
- AE Lock
- FE Lock
- White Balance
- White Balance Correction
- Preventing Camera Shake
- Live View Shooting
- Handy Features
- Silencing the Beeper
- Card Reminder
- Image Review Time
- Auto Power-Off Time
- LCD Monitor Brightness
- File Numbering Method
- Auto Rotate
- Checking Camera Function Settings
- Restore Default Settings
- Preventing the LCD from Turning Off Automatically
- Changing the Shooting Settings Screen Color
- Flash Control
- Automatic Sensor Cleaning
- Appending Dust Delete Data
- Manual Sensor Cleaning
- Image Playback
- Printing Images
- Transferring Images to a Computer
- Customizing the Camera
- Automatic Sensor Cleaning
- Appending Dust Delete Data
- Manual Sensor Cleaning
- Reference
- Troubleshooting
- Error Codes
- System Accessory Map
- Specs
- Index
- Software Note - Install Software Before Connecting to a Computer
- Software Guide
- Scans of Supplied CD-ROMS
- Do More with Macro
- Great Photography IS Easy
- Warranty

Using the Built-in Flash
•
If
the
subject
is
far
away,
increase
the
ISO speed.
!This will increase the flash range. -
• In
bright
light,
decrease
the
ISO speed.
:If
the exposure setting in the viewfinder blinks, decrease the ISO
-.
speed.
• Detach
the
lens
hood
and
keep
at
least
1 meter/3.3 feet
away
:
from
the
su
bject.
!
If
the lens hood is attached'or if
you
are too close to the subject, the
"
.-
-.
-.
-'
: bottom portion
of
the picture
might~urn
out dark. For important
. shots,' check the image on the LCD monitor to make sure the flash
~
exposure looks good (not dark at the bottom). .
I -
Using the red-eye reduction lamp before taking a flash picture can
reduce red eye. Red-eye reduction will work in any shooting mode
except
<~>
~crJ>
<~>.
-.
Under
the
[0·]
tab, select [Red-eye
On/Off],
then press
<§
>. Select
[On], then press
<@
>. '
• For flash photography, when you
press the shl:Jtter bu.tton halfway, the
red~eye
reduction lamp will light. -
Then when you press the shutter
-,
_button completely, the picture will be
taken.
I