
ImageBrowser 6.1 Instruction Manual


26
1
2
3
4
Introduction
Table of
Contents
Basic
Operation
Advanced
Operation
High-Level
Functions
Reference
Preferences
Contents
Lookup
Index
6
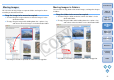
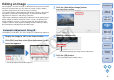
Save as a separate image.
In the viewer window, click [Save].
The save dialog box appears.
7
Enter a new name, specify the save location and then
click the [Save] button.
The edited image is saved as a separate image from the original
image.
Enter the new name Specify the save location
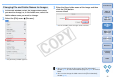
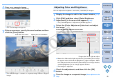
You can adjust the brightness and color (saturation) of images.
1
Display the image to edit in the viewer window (p.16).
2
Click [Edit] and then select [Color/Brightness
Adjustment] in the menu that appears
(p.25).
The [Color/Brightness Adjustment] window appears.
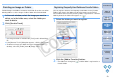
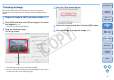
3
Select the [Color Adjustment] tab sheet and adjust
the image.
Move the slider to the right to make the [Saturation] of an image
to appear more vivid and the [Brightness] appear brighter. Move
the slider to the left to make the [Saturation] of an image weaker,
and the [Brightness] of an image appears darker.
The image is adjusted.
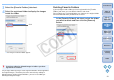
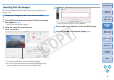
4
Check the adjustments and then click the [OK]
button.
5
Save the image as a separate image (Description on the
left)
.
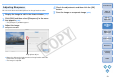
Adjusting Color and Brightness
Color/Brightness Adjustment window
Drag to the left or right to adjust