
Facsimile User's Guide
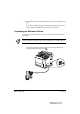
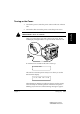


Table Of Contents
- Contents
- Chapter 1 Welcome !
- Chapter 2 Setting Up
- Chapter 3 Getting Started
- Chapter 4 Setting Up and Using Speed Dialing
- Chapter 5 Using the Fax as a Copier
- Chapter 6 Sending Documents
- Chapter 7 Receiving Documents
- Chapter 8 Using the Memory Features
- Chapter 9 Using a Relay Network
- Chapter 10 Using Confidential Mailboxes
- Chapter 11 Setting Up and Using Polling
- Chapter 12 Other Special Features
- Chapter 13 Restricting Use of the Fax
- Chapter 14 Printing Reports and Lists
- Chapter 15 Maintenance & Frequently Asked Questions
- Chapter 16 Summary of Important Settings
- Appendix A Specifications
- Appendix B Documents You Can Scan
- Glossary
- Index
Setting Up
Chapter 2 Setting Up 2-41
LASER CLASS 3170 Series.
CFYA/YAH/YAN 120v US V1.0
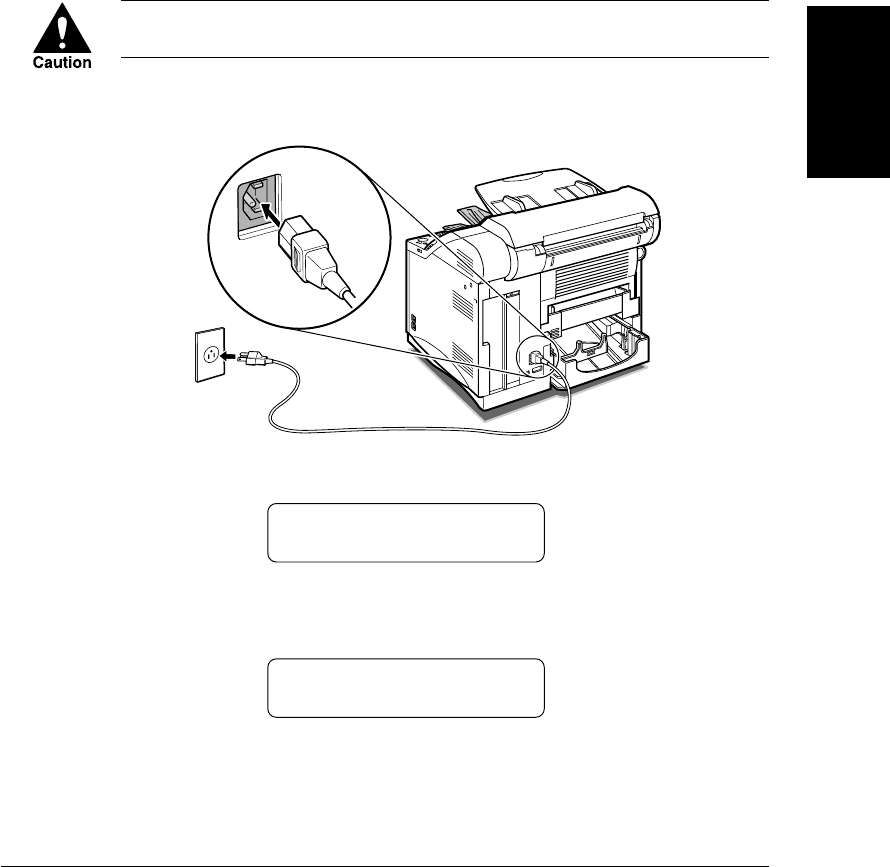
Turning on the Power
1.
Connect the power cord to the power socket on the rear of the fax
unit.
2.
Connect the other end of the power cord to the power source.
THE FAX MUST BE CONNECTED TO A PROPERLY GROUNDED,
THREE-PRONG 120 V AC OUTLET.
After you connect the power cord to the power source, the fax
LCD display will light. There is no power switch on the fax unit.
It will take a few seconds for the unit to warm up.
PLEASE WAIT
The unit has warmed up and is ready to use when you see the
date and time display.
12/31/1999 FRI 12:20
When the date is displayed on the LCD, the fax is in the standby
mode and ready for normal operation. If the Error lamp starts
blinking red, wait for one of the following messages to appear.