
Owner's Manual

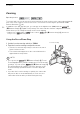


Table Of Contents
- Instruction Manual
- Highlights of the Camcorder
- Table of contents
- 1. Introduction
- 2. Preparations
- 3. Recording
- Recording Clips and Photos
- Video Configuration: Resolution, Bit Rate and Frame Rate
- Slow & Fast Motion Recording
- Shooting Modes
- Exposure Adjustment
- Automatic Gain Control (AGC) Limit
- White Balance
- Using Looks
- Zooming
- Focus Adjustment
- Image Stabilization
- Setting the Time Code
- Setting the User Bit
- Recording Audio
- Selecting the Audio Recording Format
- Audio Settings and Recorded Audio Channels
- Connecting an External Microphone or External Audio Input Source to the Camcorder
- Using Line Input or an External Microphone Connected to an INPUT Terminal
- Audio Recording Level (INPUT Terminals)
- Adjusting the Microphone’s Sensitivity (INPUT terminals)
- Microphone Attenuator (INPUT terminals)
- Using the Built-in Microphone or an External Microphone Connected to the MIC Terminal
- Audio Recording Level (Built-in Microphone/MIC Terminal)
- Microphone Sensitivity (Built-in Microphone)
- Microphone Attenuator (Built-in Microphone or MIC Terminal)
- Low-Cut Filter (Built-in Microphone or MIC Terminal)
- Using Headphones
- Color Bars/Audio Reference Signal
- Pre-Recording
- Onscreen Displays
- Infrared Recording
- Using the Optional RC-V100 Remote Controller
- Using the GP-E2 GPS Receiver
- 4. Customization
- 5. Playback
- 6. External Connections
- 7. Saving Clips
- 8. Additional Information
- Quick Guide
- Important Usage Instructions
- Precautions About the Battery Pack
- Supplied Accessories
- Table of Contents
- Names of Parts
- Charging the Battery Pack
- Basic Preparations
- Setting the Date, Time and Language
- Using SD Cards
- Recording Clips and Photos
- Playing Back and Saving Clips and Photos
- Connecting to an External Monitor
- Onscreen Icons and Displays
- Safety Instructions and Handling Precautions
- Others
- Abridged Specifications
- Additional Information
- Warranty

Using Looks
51
Using Looks
You have the option of adding a “look” to your recordings. A look is a combination of various picture
settings, such as color depth and sharpness, that can enhance the recording's visual quality.
This function can only be used when the shooting mode is set to ’, ‚, “ or n.
1 Open the looks screen.
[FUNC] > [ Looks]
2 Adjust the detailed settings.
[i] > Select [–] or [+] to adjust the value
• You can also drag your finger along the adjustment bar.
• The sharpness, contrast and color depth can be adjusted as follows:
[Sharpness]: 0 (softer image) to 7 (sharper image)
[Contrast]: –4 (low contrast) to +4 (high contrast)
[Color Depth]: –4 (shallower colors) to +4 (richer colors)
3 Select [X].
NOTES
• Looks are not available during infrared mode.
Operating modes: