
Owner's Manual


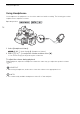


Table Of Contents
- Instruction Manual
- Highlights of the Camcorder
- Table of contents
- 1. Introduction
- 2. Preparations
- 3. Recording
- Recording Clips and Photos
- Video Configuration: Resolution, Bit Rate and Frame Rate
- Slow & Fast Motion Recording
- Shooting Modes
- Exposure Adjustment
- Automatic Gain Control (AGC) Limit
- White Balance
- Using Looks
- Zooming
- Focus Adjustment
- Image Stabilization
- Setting the Time Code
- Setting the User Bit
- Recording Audio
- Selecting the Audio Recording Format
- Audio Settings and Recorded Audio Channels
- Connecting an External Microphone or External Audio Input Source to the Camcorder
- Using Line Input or an External Microphone Connected to an INPUT Terminal
- Audio Recording Level (INPUT Terminals)
- Adjusting the Microphone’s Sensitivity (INPUT terminals)
- Microphone Attenuator (INPUT terminals)
- Using the Built-in Microphone or an External Microphone Connected to the MIC Terminal
- Audio Recording Level (Built-in Microphone/MIC Terminal)
- Microphone Sensitivity (Built-in Microphone)
- Microphone Attenuator (Built-in Microphone or MIC Terminal)
- Low-Cut Filter (Built-in Microphone or MIC Terminal)
- Using Headphones
- Color Bars/Audio Reference Signal
- Pre-Recording
- Onscreen Displays
- Infrared Recording
- Using the Optional RC-V100 Remote Controller
- Using the GP-E2 GPS Receiver
- 4. Customization
- 5. Playback
- 6. External Connections
- 7. Saving Clips
- 8. Additional Information
- Quick Guide
- Important Usage Instructions
- Precautions About the Battery Pack
- Supplied Accessories
- Table of Contents
- Names of Parts
- Charging the Battery Pack
- Basic Preparations
- Setting the Date, Time and Language
- Using SD Cards
- Recording Clips and Photos
- Playing Back and Saving Clips and Photos
- Connecting to an External Monitor
- Onscreen Icons and Displays
- Safety Instructions and Handling Precautions
- Others
- Abridged Specifications
- Additional Information
- Warranty

Infrared Recording
80
Infrared Recording
Using the infrared mode, the camcorder becomes more sensitive to infrared light, allowing you to
record in dark locations. You can also use the handle unit's infrared light to keep shooting even in very
dark conditions. Also, you can select whether the brighter areas of the picture appear in green or
white.
1 Set the INFRARED switch to ON.
• ; and = appear at the top left of the screen.
2 To change the color of highlights in the infrared picture,
select [IR Rec Color].
> [v % Camera Setup] > [IR Rec Color]
3 Select [± White] or [² Green] and then select [X].
4 To turn on the infrared light, select [IR Light].
> [v $ Camera Setup] > [IR Light]
5 Select [i On] and then select [X].
• = changes to .
NOTES
• While infrared mode is activated, the following apply.
- The aperture remains fully open and the ND filter remains retracted. Additionally, the camcorder
switches to automatic shutter speed and gain.
- Exposure adjustment, AGC limit, backlight correction (both automatic and constant) and face
detection & tracking are deactivated.
- The camcorder switches to autofocus initially but you can change the focus mode to manual
focus. The focusing distance display is grayed out.
- The white balance switches to a setting for infrared mode.
- The shooting mode and looks cannot be set.
• Depending on the light source, autofocus may not work well while zooming.
• In infrared mode the camcorder's sensor is considerably more sensitive to near-infrared light. Do not
point the lens at strong light or heat sources when infrared recording is activated. If there are such
light/heat sources in the picture, be sure to shield the lens before switching the camcorder to
infrared mode.
• If you set an assignable button to [< IR Light] (A 85), you can press the button to turn the infrared
light on/off.
Operating modes: