
Owner's Manual
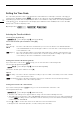
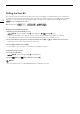
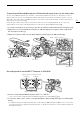
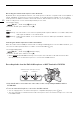
Table Of Contents
- Instruction Manual
- Highlights of the Camcorder
- Table of Contents
- Introduction
- Preparations
- Recording
- Recording Video and Photos
- Video Configuration: Video Format, Resolution, Bit Rate and Frame Rate
- Slow & Fast Motion Recording
- Adjusting the Focus
- Zooming
- Image Stabilization
- Automatic Gain Control (AGC) Limit
- Shooting Modes
- Adjusting the Exposure
- ND Filter
- White Balance
- Using Looks
- Setting the Time Code
- Setting the User Bit
- Recording Audio
- Selecting the Audio Format of MP4 Clips
- Audio Settings and Recorded Audio Channels
- Connecting an External Microphone or External Audio Input Source to the Camcorder
- Recording Audio from the INPUT Terminals to CH1/CH2
- Recording Audio from the Built-In Microphone or MIC Terminal to CH1/CH2
- Adjusting the Audio Recording Level
- Advanced Audio Input Settings
- Using Headphones
- Color Bars/Audio Reference Signal
- Pre-Recording
- Infrared Recording
- Using the Optional RC-V100 Remote Controller
- Using the Optional GP-E2 GPS Receiver
- Customization
- Playback
- External Connections
- Saving Clips
- Additional Information
- Quick Guide
- Warranty

73
Using Looks
Using Looks
The camcorder can shoot using looks — combinations of settings that affect the characteristics of the image
produced. The camcorder offers a number of preset looks, some of whose settings you can adjust to your
preference. This function can only be used when the shooting mode is set to ’, ‚, “ or n.
1 Open the looks screen.
[FUNC] > [* Looks]
* Default option. The button will show the icon of the look currently in use.
2 Select the desired option.
• To use the preset look as is, skip to step 4.
3 If necessary, adjust the detailed settings.
[i] > Select [–] or [+] to adjust the value
• You can also drag your finger along the adjustment bar.
• The sharpness, contrast and color depth can be adjusted as follows:
[Sharpness]: 0 (softer image) to 7 (sharper image)
[Contrast]*: –4 (low contrast) to +4 (high contrast)
[Color Depth]**: –4 (shallower colors) to +4 (richer colors)
4 Select [X].
* Not available for [ Wide DR]. ** Not available for [ Monochrome].
Options
NOTES
NOTES
• When using the [ Wide DR] look, the lowest available gain setting is 9.0 dB. As such, when shooting
outdoors in daylight or other bright surroundings, the subject may appear bright because the camcorder
cannot achieve the optimal exposure.
• Looks are not available when infrared recording is activated.
Operating modes:
[ Standard]: Standard look for general shooting situations.
[ Neutral]: Produces an image with a more natural sense of perceived resolution.
[ Wide DR]: Applies a gamma curve with a wide dynamic range and colors appropriate for this gamma
curve.
[ Monochrome]:
Produces a black & white picture.