
Owner's Manual
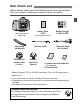


Table Of Contents
- Instruction Manual
- Conventions Used in This Manual
- Table of Contents
- Supplied Accessories
- Parts & Controls
- Quick Start Guide
- Getting Started
- Attaching Camera Strap
- Charging the Battery
- Installing / Removing the Battery
- Using the LCD Monitor
- Power On
- Setting Date & Time
- Setting the Language
- Installing and Removing SD Card
- Mounting / Detaching a Lens
- Lens Hood
- Image Stabilizer
- Basic Operation
- Using the Quick Control Screen
- Menu Operations
- Before You Start
- Basic Shooting
- Setting the AF and Drive Modes
- Image Settings
- Image-Recording Quality
- ISO Speed
- Selecting a Picture Style
- Customizing a Picture Style
- Registering a Picture Style
- Setting the White Balance
- White Balance Correction
- Auto Lighting Optimizer
- Lens Peripheral Illumination Correction
- Creating and Selecting a Folder
- File Numbering Methods
- Setting Copyright Information
- Setting the Color Space
- Advanced Operations
- Using a Flash
- Shooting with the LCD Monitor
- Shooting Movies
- Image Playback
- Image Playback
- Shooting Information Display
- Searching for Images Quickly
- Magnified View
- Rotating the Image
- Setting Ratings
- Quick Control During Playback
- Enjoying Movies
- Playing Movies
- Editing the Movie’s First and Last Scenes
- Slide Show
- Viewing the Images on a TV
- Protecting Images
- Erasing Images
- Changing Image Playback Settings
- Post-Processing Images
- Sensor Cleaning
- Printing Images
- Customizing the Camera
- Optional Accessories
- Chart of Available Functions per Mode
- Menu Settings
- Troubleshooting
- Error Codes
- System Accessory Map
- Specs
- Index
- Software Start Guide
- Pocket Guide
- Correction to Instruction Manual
- Scans of Supplied CD-ROMs
- Great Photography IS Easy
- Do More with Macro
- Camera Warranty Information

4
Icons in this Manual
<6> : Indicates the Main Dial.
<5> : Indicates the Quick Control Dial.
<9> <V> <U> : Indicates the Multi-controller and the push
direction.
<0> : Indicates the setting button.
0, 9, 7, 8 : Indicates that the respective function remains
active for 4 sec., 6 sec., 10 sec., or 16 sec.
respectively after you let go of the button.
* In this manual, the icons and markings indicating the camera’s buttons, dials,
and settings correspond to the icons and markings on the camera and on the
LCD monitor.
3 : Indicates a function which can be changed by pressing the
<M> button and changing the setting.
M : If shown on the upper right of the page, it indicates that the
function is available only in the Creative Zone modes (p.20).
(p.**) : Reference page numbers for more information.
: Tip or advice for better shooting.
: Problem-solving advice.
: Warning to prevent shooting problems.
: Supplemental information.
Basic Assumptions
All operations explained in this manual assume that the power switch
is already set to <1> (p.28).
It is assumed that all the menu settings and Custom Functions are
set to the default.
For explanatory purposes, the instructions show the camera attached
with an EF-S18-135mm f/3.5-5.6 IS lens.
Conventions Used in this Manual