INSTRUCTION MANUAL E E The “Quick Reference Guide” and “Software Start Guide” are provided at end of this manual.
Introduction The EOS REBEL T2i/EOS 550D is a high-performance, digital singlelens reflex camera featuring a fine-detail CMOS sensor with 18.0 effective megapixels, DIGIC 4, high-precision and high-speed 9-point AF, approx. 3.7 fps continuous shooting, Live View shooting, and Full HD (Full High-Definition) movie shooting. The camera is highly responsive for shooting at anytime, provides many functions fitted for advanced shooting, and offers many other features.
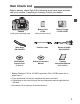
Item Check List Before starting, check that all the following items have been included with your camera. If anything is missing, contact your dealer. Camera (with eyecup and body cap) Wide Strap EW-100DB III EOS DIGITAL Solution Disk (Software) Battery Pack LP-E8 (with protective cover) Interface cable Software Instruction Manual Battery Charger LC-E8/LC-E8E* Stereo AV Cable AVC-DC400ST Camera Instruction Manual (this booklet) * Battery Charger LC-E8 or LC-E8E is provided.
Conventions Used in this Manual Icons in this Manual <6> : Indicates the Main Dial. : Indicates the cross keys. <0> : Indicates the setting button. 0, 9, 7, 8 : Indicates that the respective function remains active for 4 sec., 6 sec., 10 sec., or 16 sec. respectively after you let go of the button. * In this manual, the icons and markings indicating the camera’s buttons, dials, and settings correspond to the icons and markings on the camera and on the LCD monitor.
Chapters For first-time DSLR users, Chapters 1 and 2 explain the camera’s basic operations and shooting procedures. Introduction 2 Camera basics. 1 2 3 4 5 6 7 8 9 10 11 Getting Started Basic Shooting and Image Playback 23 45 Fully automatic shooting for different subjects. Creative Shooting 59 Basic shoo ing features for specific types of subjects. Advanced Shooting 77 Advanced shoo ing features.
Contents Introduction 2 tem Check List.................................................................................................. 3 Conventions Used in this Manual ...................................................................... 4 Chapters ............................................................................................................ 5 Contents at a Glance....................................................................................... 10 Handling Precautions ..............
Contents 3 Creative Shooting 59 d: Program AE................................................................................................60 Z: Changing the ISO Speed .........................................................................62 D Using the Built-in Flash ................................................................................64 E: Changing the AF Mode .............................................................................66 S Selecting the AF Point .......................
Contents 5 Shooting with the LCD Monitor (Live View Shooting) 107 A Shooting with the LCD Monitor ............................................................... 108 Shooting Function Settings ........................................................................... 111 Using AF to Focus ......................................................................................... 113 Focusing Manually.........................................................................................
Contents Slide Show (Auto Playback)...........................................................................165 Viewing the Images on TV .............................................................................167 K Protecting Images ....................................................................................170 L Erasing Images .........................................................................................171 B Shooting Information Display ..........................................
Contents at a Glance Shooting Î p.45 - 57 (Basic Zone modes) Shoot automatically Shoot continuously Î p.50, 53, 70 (i Continuous shooting) Take a picture of yourself in a group Î p.71 (j Self-timer) Freeze the action Blur the action Î p.78 (s Shutter-priority AE) Blur the background Keep the background in sharp focus Î p.80 (f Aperture-priority AE) Adjust the image brightness (exposure) Î p.87 (Exposure compensation) Shoot in low light Î p.46, 62, 64 (D Flash photography) Shoot without flash Î p.
Make a large-size print of the picture Î p.72 (73, 83, 1) Take many pictures Î p.72 (76, 86) Focusing Change the point of focus Î p.68 (S AF point selection) Shoot a moving subject Î p.53, 67 (AI Servo AF) Playback View the images with the camera Î p.58 (x Playback) Search for pictures quickly Î p.156 (H Index display) Prevent important images from accidental deletion Î p.170 (K Image protect) Delete unnecessary images Î p.171 (L Delete) View the images on a TV set Î p.
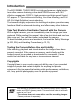
Handling Precautions Camera Care This camera is a precision instrument. Do not drop it or subject it to physical shock. The camera is not waterproof and cannot be used underwater. If you accidentally drop the camera into water, promptly consult your nearest Canon Service Center. Wipe off any water droplets with a dry cloth. If the camera has been exposed to salty air, wipe it with a well-wrung wet cloth. Never leave the camera near any hing having a strong magnetic field such as a magnet or electric motor.
Handling Precautions LCD Monitor Although the LCD monitor is manufactured with very high precision technology with over 99.99% effective pixels, there might be a few dead pixels among the remaining 0.01% or less pixels. Dead pixels displaying only black or red, etc., are not a malfunction. They do not affect the images recorded. If the LCD monitor is left on for a prolonged period, screen burn-in may occur where you see remnants of what was displayed.
Quick Start Guide Insert the battery. (p.26) 1 2 3 4 5 14 To charge the battery, see page 24. White index Red index Attach the lens. (p.33) Align the lens’ white or red index with the camera’s index in the matching color. Set the lens focus mode switch to . (p.33) Open the slot cover and insert a card. (p.31) With the card’s label facing you, insert it into the slot. Set the power switch to <1>. (p.27) When the LCD monitor displays the Date/Time setting screen, see page 29.
Quick Start Guide 6 Set the Mode Dial to <1> (Full Auto). (p.46) All the necessary camera settings will be set automatically. 7 Focus the subject. (p.37) 8 Take the picture. (p.37) 9 Look through the viewfinder and aim the viewfinder center over the subject. Press the shutter button halfway, and the camera will focus the subject. If necessary, the built-in flash will popup automatically. Press the shutter button completely to take the picture. Review the picture. (p.
Nomenclature The names in bold indicate the parts mentioned up until the “Basic Shooting and Image Playback” section. Built-in flash/AF-assist beam (p.64/147) Mode Dial (p.20) Power switch (p.27) EF Lens mount index (p.33) ISO speed setting button (p.62) EF-S Lens mount index (p.33) Flash-sync contacts <6> Main Dial (p.4) Hot shoe (p.206) Focal plane mark (p.52) Shutter button (p.37) Strap mount (p.23) Red-eye reduction/ Self-timer lamp (p.65/71) Microphone (p.134) Flash button (p.
Nomenclature Eyecup (p.205) Dioptric adjustment knob (p.36) Live View shooting/ Movie shooting button (p.108/124) Viewfinder eyepiece Display-off sensor (p.146) AE lock/ FE lock button/ Index/Reduce button (p.97/98/156/158,183) Shooting settings display button (p.44,110,126, 143,173) AF point selection/ Magnify button (p.68/158,183) Menu button (p.40) Speaker (p.162) LCD monitor (p.40,139) Card slot cover (p.31) DC cord hole (p.
Nomenclature Shooting Settings Display Exposure level indicator Exposure compensation amount (p.87) Aperture c Main Dial pointer (p.77) AEB range (p.89) ISO speed (p.62) Shutter speed Flash exposure compensation (p.88) Highlight tone priority (p.194) Picture Style (p.75) Shooting mode Auto Lighting Optimizer (p.103) Image-recording quality (p.72) 73 Large/Fine 83 Large/Normal Drive mode (p.
Nomenclature Viewfinder Information Spot metering circle AF point activation indicator < > AF points Focusing screen ISO speed <2> White balance correction AE lock/ AEB in-progress Focus confirmation light Max.
Nomenclature Mode Dial The Mode Dial includes the Basic Zone modes, Creative Zone modes, and Movie shooting mode. Creative Zone These modes give you more control for shooting various subjects. d : Program AE (p.60) s : Shutter-priority AE (p.78) f : Aperture-priority AE (p.80) a : Manual exposure (p.83) 8: Automatic depth-of-field AE (p.85) Basic Zone All you do is press the shutter button. Fully-automatic shooting suiting the subject. 1: Full Auto (p.46) C: Creative Auto (p.
Nomenclature Lens Lens without a distance scale Focusing ring (p.69,120) Focus mode switch (p.33) Zoom ring (p.34) Hood mount (p.231) Zoom position index (p.34) Filter thread (front of lens) (p.231) Image Stabilizer switch (p.35) Lens mount index (p.33) Contacts (p.13) Lens with a distance scale Hood mount (p.231) Focus mode switch (p.33) Zoom position index (p.34) Distance scale Filter thread (front of lens) (p.231) Zoom ring (p.34) Focusing ring (p.69,120) Image Stabilizer switch (p.
Nomenclature Battery Charger LC-E8 Charger for Battery Pack LP-E8 (p.24). Power plug Battery pack slot Charge lamp Full-charge lamp This power unit is intended to be correctly orientated in a vertical or floor mount position. IMPORTANT SAFETY INSTRUCTIONS-SAVE THESE INSTRUCTIONS. DANGER-TO REDUCE THE RISK OF FIRE OR ELECTRIC SHOCK, CAREFULLY FOLLOW THESE INSTRUCTIONS. For connection to a supply not in the U.S.A., use an attachment plug adapter of the proper configuration for the power outlet.
Getting Started This chapter explains preparatory steps before you start shooting and basic camera operations. Attaching the Strap Pass the end of the strap through the camera’s strap mount eyelet from the bottom. Then pass it through the strap’s buckle as shown in the illustration. Pull the strap to take up any slack and make sure the strap will not loosen from the buckle. The eyepiece cover is also attached to the strap (p.205).
Charging the Battery 1 Remove the protective cover. the battery. 2 Attach As shown in the illustration, attach the battery securely. To detach the battery, follow the above procedure in reverse. LC-E8 the battery. 3 Recharge For LC-E8 As shown by the arrow, flip out the battery charger’s prongs and insert the prongs into a power outlet. For LC-E8E LC-E8E Connect the power cord to the charger and insert the plug into the power outlet. X Recharging starts automatically and the charge lamp turns orange.
Charging the Battery Tips for Using the Battery and Charger Recharge the battery on the day before or on the day it is to be used. Even during storage, a charged battery will gradually discharge and lose its power. After recharging the battery, detach it and unplug the charger from the power outlet. When not using the camera, remove the battery. If the battery is left in the camera for a prolonged period, a small amount of power current is released, resulting in excess discharge and shorter battery life.
Installing and Removing the Battery Installing the Battery Load a fully charged Battery Pack LP-E8 into the camera. 1 Open the battery compartment cover. Slide the lever as shown by the arrow and open the cover. the battery. 2 Insert Insert the end with the battery contacts. Insert the battery until it locks in place. the cover. 3 Close Press the cover until it snaps shut. Removing the Battery Open the cover and remove the battery.
Turning on the Power If the date/time setting screen appears when you turn on the power switch, see page 29 to set the date/time. <1> : The camera turns on. <2> : The camera is turned off and does not operate. Set to this position when not using the camera. About the Automatic Self-Cleaning Sensor Whenever you set the power switch to <1> or <2>, the sensor cleaning will be executed automatically. During the sensor cleaning, the LCD monitor will display .
Turning on the Power Checking the Battery Level When the power switch is set to <1>, the battery level will be indicated in one of four levels: z : Battery level is OK. x : Battery level is slightly down, but adequate power remains. c : Battery will be exhausted soon. n : Battery must be recharged. Battery Life Temperature At 23°C / 73°F At 0°C / 32°F No Flash Approx. 550 shots Approx. 470 shots 50% Flash Use Approx. 440 shots Approx.
3 Setting the Date and Time When you turn on the power for the first time or if the date/time has been reset, the Date/Time setting screen will appear. Follow steps 3 and 4 to set the date/time. Note that the date/time appended to recorded images will be based on this date/time setting. Be sure to set the correct date/time. 1 Display the menu. Press the button to display the menu. the [6] tab, select [Date/ 2 Under Time]. Press the key to select the [6] tab.
3 Selecting the Interface Language 1 Display the menu. Press the button to display the menu. the [6] tab, select 2 Under [LanguageK]. Press the key to select the [6] tab. Press the key to select [LanguageK] (the third item from the top), then press <0>. the desired language. 3 SetPress the key to select the language, then press <0>. X The interface language will change. Press the button to return to the shooting settings display.
Installing and Removing the SD Card The captured images are recorded onto the card (sold separately). Make sure the card’s write protect switch is set upward to enable writing/erasing. Installing the Card 1 Write protect switch Open the cover. Slide the cover as shown by the arrow to open it. the card. 2 Insert As shown by the illustration, face the card’s label side toward you and insert it until it clicks in place. the cover.
Installing and Removing the SD Card Removing the Card 1 Open the cover. Set the power switch to <2>. Check that “Recording...” is not displayed on the LCD monitor. Make sure the access lamp is off, then open the cover. Access lamp the card. 2 Remove Gently push in the card, then let go. The card will stick out. Pull the card straight out, then close the cover.
Attaching and Detaching a Lens Attaching a Lens 1 Remove the caps. Remove the rear lens cap and the body cap by turning them as shown by the arrows. the lens. 2 Attach Align the lens’ red or white index with White index the camera’s index matching the same color. Turn the lens as shown by the arrow until it snaps in place. Red index the lens, set the focus mode 3 On switch to (autofocus). If it is set to (manual focus), autofocus will not operate. 4 Remove the front lens cap.
Attaching and Detaching a Lens About Zooming To zoom, turn the zoom ring on the lens with your fingers. If you want to zoom, do it before focusing. Turning the zoom ring after achieving focus may throw off the focus slightly. Detaching the Lens While pressing the lens release button, turn the lens as shown by the arrows. Turn the lens until it stops, then detach it. Attach the rear lens cap to the detached lens. Do not look at the sun directly through any lens. Doing so may cause loss of vision.
About the Lens Image Stabilizer When you use the IS lens’ built-in Image Stabilizer, camera shake is corrected to obtain a less blurred shot. The procedure explained here is based on the EF-S18-55mm f/3.5-5.6 IS lens as an example. * IS stands for Image Stabilizer. 1 Set the IS switch to <1>. Set also the camera’s power switch to <1>. the shutter button halfway. 2 Press X The Image Stabilizer will operate. the picture.
Basic Operation Adjusting the Viewfinder Clarity Turn the dioptric adjustment knob. Turn the knob left or right until the nine AF points in the viewfinder look sharp. If the camera’s dioptric adjustment s ill cannot provide a sharp viewfinder image, using Dioptric Adjustment Lens E (10 types, sold separately) is recommended. Holding the Camera To obtain sharp images, hold the camera still to minimize camera shake. Horizontal shooting Vertical shooting 1.
Basic Operation Shutter Button The shutter button has two steps. You can press the shutter button halfway. Then you can further press the shutter button completely. Pressing halfway This activates autofocusing and automatic exposure metering that sets the shutter speed and aperture. The exposure setting (shutter speed and aperture) is displayed in the viewfinder (0). Pressing completely This releases the shutter and takes the picture.
Q Using the Quick Control Screen You can directly select and set the shooting functions displayed on the LCD monitor. This is called the Quick Control screen. 1 Display the Quick Control screen. When the shooting settings are displayed, press the button. X The Quick Control screen will activate (7). the desired setting. 2 SetPress the key to select the Basic Zone modes function to be set. In the Basic Zone modes (except C), you can select certain drive modes (p.
Q Using the Quick Control Screen Quick Control Screen Nomenclature Aperture (p 80) Shutter speed (p.78) Exposure compensation/ AEB setting (p.89) Shooting mode* (p.20) Image-recording quality (p.72) Picture Style (p.75) White balance (p.99) ISO speed (p.62) Highlight tone priority* (p.194) Flash exposure compensation (p.88) Auto Lighting Optimizer (p.103) Drive mode (p.70) Metering mode (p.86) AF mode (p.66) Asterisked functions cannot be set with the Quick Control screen.
3 Menu Operations You can set various functions with the menus such as the image-recording quality, date/time, etc. While looking at the LCD monitor, use the button, cross keys, and <0> button on the camera back. button <0> button LCD monitor Cross keys Menu Screen Basic Zone modes Movie shooting mode * In Basic Zone modes and Movie shooting mode, the tabs and menu options displayed will be different.
3 Menu Operations Menu Setting Procedure 1 Display the menu. Press the button to display the menu. a tab. 2 Select Press the key to select a tab. You can also turn the <6> dial to select a tab. the desired item. 3 Select Press the key to select the item, then press <0>. the setting. 4 Select Press the or key to select the desired setting. (Some settings require you to press either the or key to select it.) The current setting is indicated in blue. the desired setting.
3 Formatting the Card If the card is new or was previously formatted by another camera or computer, format the card with the camera. When the card is formatted, all images and data in the card will be erased. Even protected images will be erased, so make sure there is nothing you need to keep. If necessary, transfer the images to a computer, etc., before formatting the card. 1 Select [Format]. Under the [5] tab, select [Format], then press <0>. the card. 2 Format Select [OK], then press <0>.
3 Formatting the Card Execute [Format] in the following cases: The card is new. The card was formatted by a different camera or a computer. The card is full with images or data. A card-related error is displayed (p.224). About Low-level Formatting Do low-level formatting if the card’s recording or reading speed seems slow. Since low-level formatting will erase all recordable sectors in the card, the formatting will take slightly longer than normal formatting.
Switching the LCD Monitor Display The LCD monitor can display the shooting settings screen, menu screen, image, etc. Shooting Settings Displayed when the camera is turned on. When your eye nears the viewfinder eyepiece, the display-off sensor (p.17, 146) turns off the LCD monitor automatically. This prevents the bright LCD monitor from interfering with your view. The LCD monitor turns on again when your eye leaves the viewfinder eyepiece.
Basic Shooting and Image Playback This chapter explains how to use the Basic Zone modes on the Mode Dial for best results and how to playback images. With the Basic Zone modes, all you do is point and shoot and the camera sets everything automatically (p.210). Also, to prevent botched pictures due to mistaken operations, major shooting settings cannot be changed in the fully-automatic modes. The settings (functions set automatically) which cannot be set by the user are grayed out.
1 Fully Automatic Shooting 1 AF point Set the Mode Dial to <1>. any AF point over the 2 Aim subject. All the AF points will be used to focus, and generally the closest object will be focused. Aiming the center AF point over the subject will make focusing easier. the subject. 3 Focus Press the shutter button halfway, and the lens will adjust the focus. X The dot inside the AF point achieving focus flashes briefly in red.
1 Fully Automatic Shooting FAQ The focus confirmation light blinks and focus is not achieved. Aim the AF point over an area having good contrast, then press the shutter button halfway (p.202). If you are too close to the subject, move away and try again. Sometimes multiple AF points flash simultaneously. This indicates that focus has been achieved at all those AF points. When the AF point covering the desired subject flashes, take the picture. The beeper continues to beep softly.
1 Full Auto Techniques Recomposing the Shot Depending on the scene, position the subject toward the left or right to create a balanced background and good perspective. In the <1> (Full Auto) mode, while you press the shutter button halfway to focus a still subject, the focus will be locked. You can then recompose the shot and press the shutter button completely to take the picture. This is called “focus lock”. Focus lock is also possible in other Basic Zone modes (except <5> Sports).
7 Disabling Flash In places where flash photography is prohibited, use the <7> (Flash Off) mode. This mode is also effective for candlelight scenes when you want to capture the ambient light. Shooting Tips If the numeric display in the viewfinder blinks, take care to prevent camera shake. Under low light when camera shake is prone to occur, the viewfinder’s shutter speed display will blink. Hold the camera steady or use a tripod.
2 Shooting Portraits The <2> (Portrait) mode blurs the background to make the human subject stand out. It also makes flesh tones and the hair look softer than with the <1> (Full Auto) mode. Shooting Tips The farther the distance between the subject and background, the better. The further the distance between the subject and background, the more blurred the background will look. The subject will also stand out better in front of a plain, dark background. Use a telephoto lens.
3 Shooting Landscapes Use the <3> (Landscape) mode for wide scenery, night scenes, or to have everything in focus from near to far. The greens and blues also become more vivid and sharper than with <1> (Full Auto). Shooting Tips With a zoom lens, use the wide-angle end. When using the wide-angle end of a zoom lens, objects near and far will be in focus better than at the telephoto end. It also adds breadth to landscapes. Shooting night scenes.
4 Shooting Close-ups When you want to photograph flowers or small things up close, use the <4> (Close-up) mode. To make small things appear much larger, use a macro lens (sold separately). Shooting Tips Use a simple background. A simple background makes the flower, etc., stand out better. Move to the subject as close as possible. Check the lens for its minimum focusing distance. Some lenses have indications such as <40.25m/0.8ft>.
5 Shooting Moving Subjects To photograph a moving subject, whether it is a child running or a moving vehicle, use the <5> (Sports) mode. Shooting Tips Use a telephoto lens. Using a telephoto lens is recommended so you can shoot from afar. Use the center AF point to focus. Aim the center AF point over the subject, then press the shutter button halfway to auto focus. During autofocusing, the beeper will continue beeping softly. If focus cannot be achieved, the focus confirmation light will blink.
6 Shooting Portraits at Night To shoot someone at night and obtain a natural-looking exposure in the background, use the <6> (Night Portrait) mode. Shooting Tips Use a wide-angle lens and a tripod. When using a zoom lens, use the wide-angle end to obtain a wide night view. Also, use a tripod to prevent camera shake. Keep the person within 5 meters/16.4 feet from the camera. Under low light, the built-in flash will fire automatically to obtain a good exposure of the person.
C Creative Auto Shooting Basic Zone modes except (Creative Auto) take care of everything, whereas the Creative Auto mode enables you to easily change the picture’s brightness, depth of field, color tone (Picture Style), etc. The default settings are the same as the <1> (Full Auto) mode. * CA stands for Creative Auto. 1 Set the Mode Dial to . X The Creative Auto screen appears on the LCD monitor. the button. 2 Press You can use the key to select the function (7).
C Creative Auto Shooting Shutter speed and aperture (1) (2) (3) (4) (5) (6) Possible shots Battery check (1) Flash firing (Auto flash), (Flash on), or (Flash off) can be selected. If you set (Flash off), see “Disabling Flash” on page 49. (2) Blurring/sharpening the background If you move the index mark toward the left, the background will look more blurred. If you move it toward the right, the background will look more in focus.
C Creative Auto Shooting (4) Image effects Besides the standard image effect, you can set it for portraits, landscapes, or black-and-white photos. (p.75: Picture Style)
(Standard): Standard image effect applicable to most scenes. (Smooth skin tones): Effective for close-ups of women or children. (Vivid blues and greens): For impressive landscapes. (Monochrome image): Creates black-and-white photos.
x Image Playback The easiest way to playback images is explained below. For more details on the playback procedure, see page 155. 1 Playback the image. When you press the button, the last captured image will be displayed. the image. 2 Select To view images starting with the last image, press the key. To view images starting with the first (oldest) image, press the key. Each time you press the button, the display format will change.
Creative Shooting In the Basic Zone modes, to prevent spoiled shots, most functions are set automatically and cannot be changed. In the (Program AE) mode, you can set various functions and be more creative. In the (Program AE) mode, the camera sets the shutter speed and aperture automatically to obtain a standard exposure. The difference between the Basic Zone modes and is explained on page 210. * stands for Program. * AE stands for Auto Exposure.
d: Program AE To obtain a good exposure of the subject, the camera sets the exposure (shutter speed and aperture) automatically. This is called Program AE. 1 Set the Mode Dial to . the subject. 2 Focus Look through the viewfinder and aim the selected AF point over the subject. Then press the shutter button halfway.
d: Program AE Shooting Tips Change the ISO speed or use the built-in flash. To match the subject and ambient lighting level, you can change the ISO speed (p.62) or use the built-in flash (p.64). In the mode, the built-in flash will not fire automatically. So under low light, press the (Flash) button to pop up the built-in flash. The program can be shifted.
Z: Changing the ISO SpeedN Set the ISO speed (image sensor’s sensitivity to light) to suit the ambient light level. In the Basic Zone modes, the ISO speed is set automatically (p.63). 1 Press the button. (9) X [ISO speed] will appear. the ISO speed. 2 SetTurn the <6> dial or press the key to select the ISO speed. You can also set the ISO speed in the viewfinder while turning the <6> dial. With “AUTO” selected, the ISO speed will be set automatically (p.63).
Z: Changing the ISO SpeedN About “AUTO” for Automatic ISO Speed If the ISO speed is set to “AUTO”, the actual ISO speed to be set will be displayed when you press the shutter button halfway. As indicated below, the ISO speed will be set automatically to suit the shooting mode.
D Using the Built-in Flash In indoors, low light, or backlit conditions in daylight, just pop up the built-in flash and press the shutter button to take flash pictures. In the mode, the shutter speed (1/60 sec. - 1/200 sec.) will be set automatically to prevent camera shake. 1 Press the button. In Creative Zone modes, you can press the button anytime to take flash pictures. While the flash is recycling, “DbuSY” is displayed in the viewfinder, and [BUSYD] is displayed on the LCD monitor.
D Using the Built-in Flash Shooting Tips If the subject is far away, increase the ISO speed. By increasing the ISO speed, you can extend the flash range. In bright light, decrease the ISO speed. If the exposure setting in the viewfinder blinks, decrease the ISO speed. Detach the lens hood and keep at least 1 meter/3.3 feet away from the subject. If the lens has a hood attached or you are too close to the subject, the bottom of the picture might look dark due to the obstructed flash.
E: Changing the AF ModeN You can select the AF mode suiting the shooting conditions or subject. In the Basic Zone modes, the optimum AF mode is set automatically. 1 On the lens, set the focus mode switch to . the button. 2 Press X [AF mode] will appear. the AF mode. 3 Select Press the key to select the AF mode, then press <0>. the subject. 4 Focus Aim the AF point over the subject and press the shutter button halfway. The camera will then autofocus in the selected AF mode.
E: Changing the AF ModeN If focus cannot be achieved, the focus confirmation light in the viewfinder will blink. If this occurs, a picture cannot be taken even if the shutter button is pressed completely. Recompose he picture and try to focus again. Or see “When Autofocus Fails” (p.202). If the [1 Beep] menu is set to [Disable], the beeper will not sound when focus is achieved. AI Servo AF for Moving Subjects This AF mode is for moving subjects when the focusing distance keeps changing.
S Selecting the AF PointN In the Basic Zone modes, all the AF points are active. Generally, the AF point covering the closest subject will be selected to focus. Therefore, the camera sometimes may not focus the subject you want. With the (Program AE), , , and modes, you can select one AF point to focus where you want. 1 Press the button. (9) X The selected AF point will be displayed on the LCD monitor and in the viewfinder.
S Selecting the AF PointN Shooting Tips When shooting a portrait up close, use One-Shot AF and focus the eyes. If you focus the eyes first, you can then recompose and the face will remain sharp. If it is difficult to focus, select and use the center AF point. The center AF point is the most sensitive among the nine AF points. Also, with a fast lens from f/1.0 to f/2.8, high-precision focusing is possible with the center AF point.
i Continuous ShootingN You can shoot up to about 3.7 shots per sec. This is effective for shooting a child running toward you or capturing the different facial expressions. 1 Press the button. . 2 Select Press the key to select , then press <0>. picture. 3 TakeThethecamera shoots continuously while you hold down the shutter button fully. Shooting Tips Also set the AF mode matching the subject.
j Using the Self-timer 1 Press the button. the self-timer. 2 Select Press the key to select the desired self-timer, then press <0>. Q: 10-sec. self-timer The remote control can also be used. (p.204) l: 2-sec. self-timerN (p.106) q: 10-sec. self-timer plus continuous shots Press the key to set he number of multiple shots (2 to 10) to be taken wi h the self-timer. picture. 3 TakeLookthethrough he viewfinder, focus the subject, then press the shutter button completely.
3 Setting the Image-recording Quality You can select the number of megapixels to record (approx. 17.9, 8.0, or 4.5 megapixels) and the image quality. 1 Select [Quality]. Under the [1] tab, select [Quality], then press <0>. X [Quality] will appear. the image-recording quality. 2 Select For your reference, the respective quality’s megapixel count (***M), image size in pixels (****x****), and the number of possible shots [***] will be displayed. Select the desired quality, then press <0>.
3 Setting the Image-recording Quality FAQ I want to select the image-recording quality matching the paper size for printing. Refer to the diagram on the left when Paper size choosing the image-recording quality. If A3 (42x29.7cm/16.5x11.7in.) you want to crop the image, selecting a 73 higher quality (more pixels) such as 73, 83 A4 (29.7x21cm/ 1 83, 1, or 1+73 is recommended. 11.7x8.3in.) 76 86 74 84 1+73 17.8x12.7cm/7.0x5.0in. 14.8x10cm/5.8x3.9in.
3 Setting the Image-recording Quality About 1 1 is the raw image data before it is made into 73 or other images. Although 1 images require software like Digital Photo Professional (provided) so they can be displayed on the computer, they also offer flexibility for image adjustments possible only with 1. 1 is effective when you want to precisely adjust the image yourself or shoot an important subject. About 1+73 1+73 records both a 1 and 73 image with a single shot.
A Selecting a Picture StyleN By selecting a Picture Style, you can obtain image effects matching your photographic expression or the subject. 1 Press the button. X [Picture Style] will appear. a Picture Style. 2 Select Press the key to select a Picture Style, then press <0>. the picture. 3 TakeFocus and press the shutter button completely. The picture will be taken with the selected Picture Style applied. Picture Style Effects P Standard (C: Standard) The image looks vivid, sharp, and crisp.
A Selecting a Picture StyleN S Neutral This Picture Style is for users who prefer to process images with their computer. For natural colors and subdued images. U Faithful This Picture Style is for users who prefer to process images with their computer. When the subject is captured under a color temperature of 5200K, the color is adjusted colorimetrically to match the subject’s color. The image is dull and subdued. V Monochrome (C: Monochrome image) Creates black-and-white images.
Advanced Shooting This chapter builds on the previous chapter and introduces more ways to shoot creatively. The first half of this chapter explains how to use the <8> modes on the Mode Dial. Except for <8>, all the shooting modes can be used in combination with the functions introduced in Chapter 3. The second half of this chapter, starting with “Changing the Metering Mode” explains the methods to adjust the exposure and the Picture Styles.
s: Action Shots You can either freeze the action or create motion blur with the (Shutter-priority AE) mode on the Mode Dial. * stands for Time value. Frozen action (Fast shutter speed: 1/2000 sec.) 1 Blurred motion (Slow shutter speed: 1/30 sec.) Set the Mode Dial to . the desired shutter speed. 2 SetSee “Shooting Tips” for advice on setting the shutter speed. Turning the <6> dial to the right sets a faster shutter speed, and turning it to the left sets a slower one. the picture.
s: Action Shots Shooting Tips To freeze the action or moving subject. Use a fast shutter speed such as 1/4000 sec. to 1/500 sec. To blur a running child or animal giving the impression of fast movement. Use a medium shutter speed such as 1/250 sec. to 1/30 sec. Follow the moving subject through the viewfinder and press the shutter button to take the picture. If you use a telephoto lens, hold it steady to prevent camera shake. How to blur a flowing river or water fountain.
f: Changing the Depth of Field To obtain a blurry background or to make everything near and far look sharp, set the Mode Dial to (Aperture-priority AE) to adjust the depth of field (range of acceptable focus). * stands for Aperture value which is the size of the diaphragm hole inside the lens. Sharp foreground and background (With a high aperture f-number: f/32) 1 Blurred background (With a low aperture f-number: f/5.6) Set the Mode Dial to . desired aperture.
f: Changing the Depth of Field Shooting Tips When using an aperture with a high f-number, note that camera shake can occur in low light scenes. A higher aperture f-number will make the shutter speed slower. Under low light, the shutter speed can be as long as 30 sec. In such cases, increase the ISO speed and hold the camera steady or use a tripod. The depth of field depends not only on the aperture, but also the lens and subject distance.
f: Changing the Depth of Field Using the Built-in Flash To obtain a correct flash exposure, the flash output will be set automatically to match the set aperture (autoflash exposure). The shutter speed will be set automatically between 1/200 sec. - 30 sec. to suit the scene’s brightness. In low light, the main subject is exposed with the automatic flash, and the background is exposed with a slow shutter speed set automatically.
a: Manual Exposure You can set both the shutter speed and aperture manually as desired. With flash, the flash exposure will be set automatically to match the aperture that was set. The flash sync speed can be set within 1/200 sec. to 1/30 sec. or to bulb. * stands for Manual. 1 Set the Mode Dial to . the shutter speed and 2 Set aperture. <6> + <6> Standard exposure index Exposure level mark To set the shutter speed, turn the <6> dial.
a: Manual Exposure Bulb Exposures In step 2 on the preceding page, turn the <6> dial to the left to set . A bu b exposure keeps the shutter open for as long as you hold down the shutter button. It can be used to photograph fireworks, etc. The elapsed exposure time will be displayed on the LCD monitor. Since bulb exposures produce more noise than usual, the image might look a little grainy. You can reduce this noise by setting the [7 Custom Functions (C.Fn)] menu’s [Long exp.
8: Automatic Depth-of-Field AE Objects in the foreground and background will be in focus automatically. All the AF points will function to detect the subject, and the aperture required to attain the necessary depth of field will be set automatically. * <8> stands for Auto-Depth of field. This mode sets the depth of field automatically. 1 Set the Mode Dial to <8>. the subject. 2 Focus Aim the AF points over the subjects and press the shutter button halfway (0).
q Changing the Metering ModeN The metering mode measures the subject’s brightness to determine the correct exposure. Normally, evaluative metering is recommended. 1 Select [Metering mode]. Under the [2] tab, select [Metering mode], then press <0>. the metering mode. 2 SetPress the key to select the metering mode, then press <0>. q Evaluative metering This is an all-around metering mode suited for portraits and even backlit subjects. The camera sets the exposure automatically to suit the scene.
Setting Exposure CompensationN O Setting Exposure Compensation Set exposure compensa ion if the exposure (wi hout flash) does not come out as desired. This feature can be used in Crea ive Zone modes (except ). Although you can set the exposure compensation up to ±5 stops in 1/3-stop increments, the exposure compensation indicator in the viewfinder can only display he setting up to ±2 stops. If you want to set the exposure compensation beyond ±2 stops, you should follow he instructions for [2 Exp. comp.
Setting Exposure CompensationN y Flash Exposure CompensationN Set flash exposure compensation if the flash exposure of the subject does not come out as desired. You can set the flash exposure compensation up to ±2 stops in 1/3-stop increments. 1 Display the Quick Control screen. With the shooting settings displayed, press the button (p.38). X The Quick Control screen will activate (7). [y]. 2 Select Press the key to select [y*]. X [Flash exposure comp.] will be displayed at the bottom.
3 Auto Exposure BracketingN This feature takes exposure compensation a step further by varying the exposure automatically with three shots (±2 stops in 1/3-stop increments) as shown below. You can then choose the best exposure. This is called AEB (Auto Exposure Bracketing). Standard exposure Darker exposure (Decreased exposure) 1 Brighter exposure (Increased exposure) Select [Expo. comp./AEB]. Under the [2] tab, select [Expo. comp./AEB], then press <0>. the AEB amount.
3 Auto Exposure BracketingN Canceling AEB Follow steps 1 and 2 to turn off the AEB amount display. The AEB setting will be canceled automatically if the power switch is set to <2>, flash recycling is complete, etc. Shooting Tips Using AEB with continuous shooting. If continuous shooting (p.70) has been set and you press the shutter button completely, the three bracketed shots will be taken continuously in this sequence: Standard exposure, decreased exposure, and increased exposure.
A Customizing a Picture StyleN You can customize a Picture Style by adjusting individual parameters like [Sharpness] and [Contrast]. To see the resulting effects, take test shots. To customize [Monochrome], see page 93. 1 Select [Picture Style]. Under the [2] tab, select [Picture Style], then press <0>. X The Picture Style selection screen will appear. a Picture Style. 2 Select Select a Picture Style, then press the button. X The Detail set. screen will appear. a parameter.
A Customizing a Picture StyleN Parameter Settings and Effects Sharpness Adjusts the sharpness of the image. To make it less sharp, set it toward the E end. The closer it is to E, the softer the image will look. To make it sharper, set it toward the F end. The closer it is to F, the sharper the image will look. Contrast Adjusts the image contrast and the vividness of colors. To decrease the contrast, set it toward the minus end. The closer it is to G, the blander the image will look.
A Customizing a Picture StyleN Monochrome Adjustment For Monochrome, you can also set [Filter effect] and [Toning effect] in addition to [Sharpness] and [Contrast] explained on the preceding page. kFilter Effect With a filter effect applied to a monochrome image, you can make white clouds or green trees stand out more. Filter Sample Effects N: None Normal black-and-white image with no filter effects. Ye: Yellow The blue sky will look more natural, and he white clouds will look crisper.
A Registering a Picture StyleN You can select a base Picture Style such as [Portrait] or [Landscape], adjust its parameters as desired and register it under [User Def. 1], [User Def. 2], or [User Def. 3]. You can create Picture Styles whose parameter settings such as for sharpness and contrast are different. You can also adjust the parameters of a Picture Style which has been registered to the camera with the provided software. 1 Select [Picture Style].
A Registering a Picture StyleN a parameter. 5 Select Select a parameter such as [Sharpness], then press <0>. the parameter. 6 SetPress the key to adjust the parameter as desired, then press <0>. For details, see “Customizing a Picture Style” on pages 91-93. Press the button to register the new Picture Style. The Picture Style selection screen will then reappear. X The base Picture Style will be indicated on the right of [User Def. *].
3 Setting the Color SpaceN The color space refers to the range of reproducible colors. With this camera, you can set the color space to sRGB or Adobe RGB for captured images. For normal shooting, sRGB is recommended. In Basic Zone modes, sRGB is set automatically. 1 Select [Color space]. Under the [2] tab, select [Color space], then press <0>. the desired color space. 2 SetSelect [sRGB] or [Adobe RGB], then press <0>.
A AE LockN Use AE lock when the area of focus is to be different from the exposure metering area or when you want to take multiple shots at the same exposure setting. Press the button to lock the exposure, then recompose and take the shot. This is called AE lock. It is effective for backlit subjects. 1 Focus the subject. Press the shutter button halfway. X The exposure setting will be displayed. the button.
A FE LockN FE lock locks the flash exposure setting over the desired area of the subject. This feature can also be used with a Canon EX-series Speedlite. * FE stands for Flash Exposure. 1 Press the button to pop-up the built-in flash. Press the shutter button halfway and look in the viewfinder to check that the icon is lit. Spot metering circle 2 Focus the subject. the button. (8) 3 Press Aim the spot-metering circle over the subject, then press the button.
B: Setting the White BalanceN White balance (WB) is for making the white areas look white. Normally, the (Auto) setting will obtain the correct white balance. If naturallooking colors cannot be obtained with , you can select the white balance to match the light source or set it manually by shooting a white object. In Basic Zone modes, will be set automatically. the button. 1 Press X [White balance] will appear. the white balance.
B: Setting the White BalanceN [Custom White Balance]. 2 Select Under the [2] tab, select [Custom White Balance], then press <0>. X The custom white balance selection screen will appear. the white balance data. 3 Import Select the image that was captured in step 1, then press <0>. X On the dialog screen which appears, select [OK] and the data will be imported. When the menu reappears, press the button to exit the menu. the custom white balance. 4 Select Press the button.
2 White Balance CorrectionN You can correct the white balance that has been set. This adjustment will have the same effect as using a commercially-available color temperature conversion filter or color compensating filter. Each color can be corrected to one of nine levels. This is for advanced users who are familiar with using color temperature conversion or color compensating filters. White Balance Correction 1 Select [WB Shift/BKT]. Under the [2] tab, select [WB Shift/ BKT], then press <0>.
2 White Balance CorrectionN White Balance Auto Bracketing With just one shot, three images having a different color balance can be recorded simultaneously. Based on the color temperature of the current white balance setting, the image will be bracketed with a blue/amber bias or magenta/green bias. This is called white balance bracketing (WB-BKT). White balance bracketing is possible up to ±3 levels in single-level increments. Set the white balance bracketing amount.
3 Auto Lighting OptimizerN If the image comes out dark or the contrast is low, the brightness and contrast can be corrected automatically. With JPEG images, the correction is done when the image is captured. For RAW images, it can be corrected with Digital Photo Professional (provided software). The default setting is [Standard]. 1 Select [Auto Lighting Optimizer]. Under the [2] tab, select [Auto Lighting Optimizer], then press <0>. the correction setting.
3 Lens Peripheral Illumination Correction Due to the lens characteristics, the four corners of the picture might look darker. This is called lens light fall-off or drop in peripheral illumination. With JPEG images, the correction is done when the image is captured. For RAW images, it can be corrected with Digital Photo Professional (provided software). The default setting is [Enable]. 1 Select [Peripheral illumin. correct.]. Under the [1] tab, select [Peripheral illumin. correct.], then press <0>.
3 Lens Peripheral Illumination Correction About the Lens Correction Data The camera already contains lens peripheral illumination correction data for approx. 25 lenses. In step 2, if you select [Enable], the peripheral light correction will be applied automatically for any lens whose correction data has been registered in the camera. With EOS Utility (provided software), you can check which lenses have their correction data registered in the camera.
Preventing Camera ShakeN The camera’s mechanical shake caused by the reflex mirror action can blur images taken with a super telephoto lens or close-up (macro) lens. In such cases, mirror lockup is effective. Mirror lockup is enabled by selecting the [7 Custom Functions (C.Fn)] menu’s [Mirror lockup] and setting it to [1: Enable] (p.195). 1 Focus the subject, press the shutter button completely. X The mirror will swing up. 2 Press the shutter button completely again.
Shooting with the LCD Monitor (Live View Shooting) You can shoot while viewing the image on the camera’s LCD monitor. This is called “Live View shooting.” Live View shooting is effective for still subjects which do not move. If you handhold the camera and shoot while viewing the LCD monitor, camera shake can cause blurred images. Using a tripod is recommended.
A Shooting with the LCD Monitor 1 Display the Live View image. Press the button. X The Live View image will appear on the LCD monitor. The Live View image will closely reflect the brightness level of the actual image you capture. The image’s field of view is approx. 100%. the subject. 2 Focus Before shooting, focus with AF or manual focus (p.113-120). When you press the shutter button halfway, the camera will focus with the current AF mode. the picture. 3 TakePress the shutter button completely.
A Shooting with the LCD Monitor To Enable Live View Shooting Under [6 Live View function settings], set [Live View shoot.] to [Enable]. Battery Life with Live View Shooting [Approx. number of shots] Temperature Shooting Conditions No Flash 50% Flash Use At 23°C / 73°F 200 180 At 0°C / 32°F 170 150 The figures above are based on a fully-charged Battery Pack LP-E8 and CIPA (Camera & Imaging Products Association) tes ing standards. Continuous Live View shooting is possible for approx. 1 hr. 30 min.
A Shooting with the LCD Monitor About the Information Display Each time you press the button, the information display will change.
Shooting Function Settings Function settings particular to Live View shooting are explained here. Q Quick Control While the image is displayed on the LCD monitor, pressing the button will enable you to set the image-recording quality, drive mode, and AF mode. In Creative Zone modes, you can also set the white balance, Picture Style, and Auto Lighting Optimizer. 1 Press the button. X The settable functions will be highlighted in blue. When is selected, the AF points will also be displayed.
Shooting Function Settings 3 Menu Function Settings The menu options under the [6] tab’s [Live View function settings] menu are explained below. The functions settable in this menu screen only apply during Live View shooting. These functions do not take effect during viewfinder shooting. Grid display With [Grid 1l] or [Grid 2m], you can display grid lines. Metering timer You can change how long the exposure setting is displayed (AE lock time). AF mode You can select [Live mode] (p.113), [u Live mode] (p.
Using AF to Focus Selecting the AF Mode The AF modes available are [Live mode], [u Live mode] (face detection, p.114), and [Quick mode] (p.118). If you want to achieve precise focus, set the lens focus mode switch to , magnify the image, and focus manually (p.120). Select the AF mode. Under [6 Live View function settings], select [AF mode]. While the Live View image is displayed, you can press the button to select the AF mode on the Quick Control screen.
Using AF to Focus the subject. 3 Focus Aim the AF point over the subject and press the shutter button halfway. X When focus is achieved, the AF point will turn green and the beeper will sound. X If focus is not achieved, the AF point will turn orange. the picture. 4 TakeCheck the focus and exposure, then press the shutter button completely to take the picture (p.108). u (Face detection) Live Mode: c With the same AF method as the Live mode, human faces are detected and focused.
Using AF to Focus the subject. 2 Focus Press the shutter button halfway and the camera will focus the face covered by the < > frame. X When focus is achieved, the AF point will turn green and the beeper will sound. X If focus is not achieved, the AF point will turn orange. If a face cannot be detected, the AF point < > will be displayed and AF will be executed at the center. the picture. 3 TakeCheck the focus and exposure, then press the shutter button completely to take the picture (p.108).
Using AF to Focus Live Mode and u (Face Detection) Live Mode Notes AF operation Focusing will take slightly longer. Even when focus has been achieved, pressing the shutter button halfway will focus again. The image brightness may change during and after the AF operation. If the light source changes while the Live View image is displayed, the screen might flicker and focusing can be difficult. If this happens, stop the Live View shooting and autofocus under the actual light source first.
Using AF to Focus Shooting conditions which can make focusing difficult: Low-contrast subjects such as the blue sky and solid-color, flat surfaces. Subjects in low light. Stripes and other patterns where there is contrast only in the horizontal direction. Under a light source whose brightness, color, or pattern keeps changing. Night scenes or points of light. Under fluorescent lighting or when the image flickers. Extremely small subjects. Subjects at the edge of the picture.
Using AF to Focus Quick Mode: f The dedicated AF sensor is used to focus in the One-Shot AF mode (p.66), using the same AF method as with viewfinder shooting. Although you can focus the target area quickly, the Live View image will be interrupted momentarily during the AF operation. AF point 1 Display the Live View image. Press the button. X The Live View image will appear on the LCD monitor. The small boxes on the screen are the AF points, and the larger box is the magnifying frame.
Using AF to Focus the subject. 3 Focus Aim the AF point over the subject and press the shutter button halfway. X The Live View image will turn off, the reflex mirror will go back down, and AF will be executed. X When focus is achieved, the beeper will sound and the Live View image will reappear. X The AF point used to focus will light in red. the picture. 4 TakeCheck the focus and exposure, then press the shutter button completely to take the picture (p.108).
Focusing Manually You can magnify the image and focus precisely manually. 1 Set the lens focus mode switch to . Turn the lens focusing ring to focus roughly. the magnifying frame. 2 Move Press the key to move the Magnifying frame magnifying frame to the position where you want to focus. To return the magnifying frame to the center, press the button. the image. 3 Magnify Press the button. X The part within the magnifying frame will be magnified.
Notes About the Live View Image Under low or bright light conditions, the Live View image might not reflect the brightness of the captured image. If the light source within the image changes, the screen might flicker. If this happens, stop and resume he Live View shooting under the actual light source to be used. If you point the camera in a different direction, it might throw off the Live View image’s correct brightness momentarily. Wait until the brightness level stabilizes before shooting.
Notes About the Shooting Results When you shoot continuously with the Live View function for a long period, the camera’s internal temperature may increase and it can degrade image quality. Terminate Live View shooting when not shooting images. Before taking a long exposure, stop Live View shooting temporarily and wait several minutes before shooting. This is to prevent image degradation. Live View shooting in high temperatures and at high ISO speeds may cause noise or irregular colors.
Shooting Movies Set the Mode Dial to to shoot movies. The movie recording format will be MOV. Cards which can record movies When shooting movies, use a large-capacity SD card rated SD Speed Class 6 “ ” or higher. If you use a slow-writing card when shooting movies, the movie might not be recorded properly. And if you playback a movie on a card having a slow reading speed, the movie might not playback properly. To check the card’s read/write speed, refer to the card manufacturer’s Web site.
k Shooting Movies Connecting the camera to a TV set is recommended to playback movies (p.167, 169). Autoexposure Shooting 1 Set the Mode Dial to . X The reflex mirror will make a sound, then the image will appear on the LCD monitor. the subject. 2 Focus Before shooting a movie, autofocus or manual focus (p.113-120). When you press the shutter button halfway, the camera will focus with the current AF mode. the movie. 3 Shooting Press the button to start shooting a movie.
k Shooting Movies One continuous movie will be recorded as one file. During movie shooting, the top, bottom, left, and right parts of the screen will have a semi-transparent mask. The area enclosed by the semitransparent mask will be the movie image that is recorded. The semitransparent mask size will change depending on the [n Movie rec. size] setting (p.131). If you use Movie crop, the unrecorded image areas will be displayed in black mask. AE lock is possible by pressing the button (p.97).
k Shooting Movies About the Information Display Each time you press the button, the information display will change.
k Shooting Movies Manual Exposure Shooting You can manually set the shutter speed, aperture, and ISO speed for movie shooting. Using manual exposure to shoot movies is for advanced users. 1 Set the Mode Dial to . X The reflex mirror will make a sound, then the image will appear on the LCD monitor. [Movie exposure]. 2 Select Under the [o] tab, select [Movie exposure], then press <0>. [Manual]. 3 Select Select [Manual], then press <0>. <6> + <6> the shutter speed and 4 Set aperture.
k Shooting Movies and shoot the movie. 6 Focus The procedure is the same as steps 2 and 3 for “Autoexposure Shooting” (p.124). With manual exposure shooting, AE lock and exposure compensation cannot be set. Changing the aperture during movie shooting is not recommended since variations in the exposure, due to the drive of the lens aperture, will be recorded. If you use a lens whose aperture changes while you zoom, you should not zoom while shooting a movie.
k Shooting Movies Shooting Still Photos While shooting a movie, you can also take a still photo by pressing the shutter button completely. Taking still photos during movie shooting The still photo will record the entire screen including the semitransparent mask. If you take a still photo during movie shooting, the movie will have a still moment lasting approx. 1 sec.
Shooting Function Settings Function settings particular to movie shooting are explained here. Q Quick Control While the image is displayed on the LCD monitor, pressing the button will enable you to set the white balance, Picture Style, Auto Lighting Optimizer, image-recording quality (for still photos), movierecording size, and AF mode. 1 Press the button. X The settable functions will be highlighted in blue. When is selected, the AF points will also be displayed. a function and set it.
Shooting Function Settings [n] Menu Movie-recording size You can select the movie’s image size [****x****] and frame rate [9] (frames recorded per second). The 9 (frame rate) displayed on the [Movie rec. size] screen switches automatically depending on the [6 Video system] setting. • Image size [1920x1080] [1280x720] [640x480] : Full HD (Full High-Definition) recording quality. : HD (High-Definition) recording quality. : Standard-definition recording quality. The aspect ratio will be 4:3.
Shooting Function Settings Total Movie Recording Time and File Size Per Minute Movie-recording Size Total Recording Time File Size 4GB Card 16GB Card 12 min. 49 min. 330 MB/min. 12 min. 49 min. 330 MB/min. 24 min. 1 hr. 39 min. 165 MB/min. 6 [1920x1080] 5 4 [1280x720] 8 7 8 [640x480] [Crop 640x480] 7 After you start shooting a movie, the movie shooting will stop automatically if the file size reaches 4 GB or if the movie length reaches 29 min. 59 sec.
Shooting Function Settings kShutter/AE lock button You can change the function assigned to the AE lock button and to when you press the shutter button halfway. • AF/AE lock: Normal function. Press the shutter button halfway to execute AF. Press the button for AE lock. • AE lock/AF: Press the shutter button halfway for AE lock. For AF, press the button. Convenient when you want to focus and meter at different parts of the picture.
Shooting Function Settings [o] Menu Movie exposure Normally, set this option to [Auto]. Setting [Movie exposure] to [Manual] enables you to manually set the ISO speed, shutter speed, and aperture for movie shooting (p.127). Grid display With [Grid 1l] or [Grid 2m], you can display grid lines. Metering timer You can change how long the exposure setting is displayed (AE lock time). Sound recording When the sound recording is set to [On], monaural sound will be recorded with the built-in microphone.
[2 Shooting 2] Menu The functions settable in this menu screen only apply when the Mode Dial is set to . These functions do not take effect in other shooting modes. Notes on Movie Shooting Recording and Image Quality If the attached lens has an Image Stabilizer, the Image Stabilizer will operate at all times even if you do not press the shutter button halfway. The Image Stabilizer will thereby consume battery power and may shorten the total movie shoo ing time or decrease he number of possible shots.
Notes on Movie Shooting Camera’s internal temperature increase and image degradation If he camera’s internal temperature becomes high, the icon may appear on the screen. When not shooting, turn off the camera. If you take still photos while the icon is displayed on the screen, the image quality may be degraded. The image quality of movies is not affected.
Handy Features Silencing the Beeper (p.138) Card Reminder (p.138) Setting the Image Review Time (p.138) Setting the Auto Power-off Time (p.139) Adjusting the LCD Monitor Brightness (p.139) File Numbering Methods (p.140) Auto Rotation of Vertical Images (p.142) Checking Camera Settings (p.143) Reverting the Camera to the Default Settings (p.144) Preventing the LCD Monitor from Turning off Automatically (p.146) Changing the Shooting Settings Screen Color (p.146) Setting the Flash (p.
Handy Features 3 Silencing the Beeper You can prevent the beeper from sounding when focus is achieved or during self-timer operation. Under the [1] tab, select [Beep], then press <0>. Select [Disable], then press <0>. 3 Card Reminder This prevents shooting if there is no card in the camera. Under the [1] tab, select [Release shutter without card], then press <0>. Select [Disable], then press <0>.
Handy Features 3 Setting the Auto Power-off Time To save battery power, the camera turns off automatically after the set time of idle operation elapses. You can set this auto power-off time. When the camera has turned off due to auto power off, you can wake up the camera by pressing the shutter button halfway or any of the following buttons: etc. If [Off] has been set, either turn off the camera yourself or press the button to turn off the shooting settings display to save battery power.
Handy Features 3 File Numbering Methods The file number is l ke the frame number on a roll of film. The captured images are assigned a sequential file number from 0001 to 9999 and saved in one folder. You can change how the file number is assigned. The file number will appear on a computer in this format: IMG_0001.JPG. Under the [5] tab, select [File numbering], then press <0>. The available settings are descr bed below. Select one, then press <0>.
Handy Features [Auto reset]: Resets the file numbering to 0001 whenever the card is replaced. Each time you replace the card, the file numbering restarts from 0001. This is convenient if you want to organize images according to cards. If the replacement card contains images recorded previously, the file numbering of the new images might continue from the file numbering of the existing images in the card. To restart the file numbering from 0001, you should use a newly-formatted card.
Handy Features 3 Auto Rotation of Vertical Images Vertical images are rotated automatically so they are displayed vertically on the camera’s LCD monitor and computer instead of horizontally. The setting of this feature can be changed. Under the [5] tab, select [Auto rotate], then press <0>. The available settings are described below. Select one, then press <0>. [OnPD] : The vertical image is automatically rotated during playback on both the camera’s LCD monitor and on the computer.
Handy Features B Checking Camera Settings While the menu is displayed, press the button to display the camera’s major function settings. While the menu is displayed, press the button to display the settings. Press the button again to return to the menu. Press the shutter button halfway to return to the shooting settings display. Settings Display Card remaining capacity Color space (p.96) WB correction (p.101)/ WB bracketing (p.102) Live View shooting (p.107) Red-eye reduction (p.
Handy Features 3 Reverting the Camera to the Default SettingsN This is for reverting all the camera’s shooting settings and Custom Functions to the default settings. This works in the and other Creative Zone modes. 1 Select [Clear settings]. Under the [7] tab, select [Clear settings], then press <0>. the desired setting. 2 Select To revert the shooting settings to the default, select [Clear all camera settings], then press <0>.
Handy Features Shooting Settings AF mode One-Shot AF AF point selection Automatic selection q (Evaluative Metering mode metering) ISO speed AUTO (Auto) Drive mode u (Single shooting) Exposure Canceled compensation/AEB Flash exposure compensation 0 (Zero) Custom Functions Unchanged Camera Settings Image-recording Settings Quality Picture Style Auto Lighting Optimizer 73 Standard Peripheral illumination correction Enable/ Correction data retained Color space White balance WB correction WB-BKT File n
Handy Features 3 Preventing the LCD Monitor from Turning off Automatically This prevents the display-off sensor from turning off the shooting settings display automatically when your eye nears the viewfinder eyepiece. Select [LCD auto off]. Under the [5] tab, select [LCD auto off], then press <0>. Select [Disable], then press <0>. 3 Changing the Shooting Settings Screen Color You can change the background color of the shooting settings screen. Select [Screen color].
3 Setting the FlashN The built-in flash and external Speedlite settings can be set with the menu. The [External flash ***] menu options for external Speedlites are applicable only to an attached EX-series Speedlite compatible with the respective functions. The setting procedure is the same as setting a camera menu function. Select [Flash control]. Under the [1] tab, select [Flash control], then press <0>. X The flash control screen will appear. [Flash firing] Normally, set this to [Enable].
3 Setting the FlashN [Built-in flash func. setting] and [External flash func. setting] Settable Functions Function Flash mode [Built-in flash func. setting] [External flash func. setting] Page E-TTL II (Fixed) k 148 k Shutter sync. FEB* 148 k – – Flash exposure compensation k 88 E-TTL II k 149 Zoom* – k – Wireless setting* – k – * Regarding [FEB] (Flash exposure bracketing), [Zoom], and [Wireless set.], refer to the Speedlite’s instruction manual.
3 Setting the FlashN Flash exposure compensation See “y Flash Exposure Compensation” on page 88. E-TTL II For normal flash exposures, set it to [Evaluative]. If [Average] is set, the flash exposure will be averaged for the entire metered scene as with an external metering flash. Since flash exposure compensation may be necessary depending on the scene, this setting is for advanced users. Clear flash settings On the [External flash func.
f Automatic Sensor Cleaning Whenever you set the power switch to <1> or <2>, the Self Cleaning Sensor Unit operates to automatically shake off the dust on the front of the sensor. Normally, you need not pay attention to this operation. However, you can execute the sensor cleaning at anytime as well as disable it. Cleaning the Sensor Now 1 Select [Sensor cleaning]. Under the [6] tab, select [Sensor cleaning], then press <0>. [Clean nowf]. 2 Select Select [Clean nowf], then press <0>.
3 Appending Dust Delete DataN Normally, the Self Cleaning Sensor Unit will eliminate most of the dust that might be vis ble on captured images. However, in case vis ble dust still remains, you can append the Dust Delete Data to the image for erasing the dust spots later. The Dust Delete Data is used by Digital Photo Professional (provided software) to erase the dust spots automatically. Preparation Get a solid-white object (paper, etc.). Set the lens focal length to 50mm or longer.
3 Appending Dust Delete DataN a solid-white object. 3 Photograph At a distance of 20 cm - 30 cm (0.7 ft. - 1.0 ft.), fill the viewfinder with a patternless, solid-white object and take a picture. X The picture will be taken in the aperture-priority AE mode with an aperture of f/22. Since the image will not be saved, the data can still be obtained even if there is no card in the camera. X When the picture is taken, the camera will start obtaining the Dust Delete Data.
3 Manual Sensor CleaningN Dust which could not be removed by the automatic sensor cleaning can be removed manually with a blower, etc. The surface of the image sensor is extremely delicate. If the sensor needs to be cleaned directly, having it done by a Canon Service Center is recommended. Before cleaning the sensor, detach the lens from the camera. 1 Select [Sensor cleaning]. Under the [6] tab, select [Sensor cleaning], then press <0>. [Clean manually]. 2 Select Select [Clean manually], then press <0>.
3 Manual Sensor CleaningN While cleaning the sensor, never do any of the following. If the power is cut off, the shutter will close and the shutter curtains and image sensor might get damaged. • Setting the power switch to <2>. • Opening the battery compartment cover. • Opening the card slot cover. The surface of the image sensor is extremely delicate. Clean the sensor with care. Use a plain blower without any brush attached. A brush can scratch the sensor.
Image Playback This chapter explains features related to viewing photos and movies, going into more detail than in Chapter 2 “Basic Shooting and Image Playback” which explained the playback procedure. Here you will find explanations about how to playback and erase photos and movies with the camera and viewing them on a TV set.
x Searching for Images Quickly H Display Multiple Images on One Screen (Index display) Search for images quickly with the index display showing four or nine images on one screen. 1 Playback the image. When you press the button, the last captured image will be displayed. to the index display. 2 Switch Press the button. X The 4-image index display will appear. The currently-selected image will be highlighted in a blue frame. Press the button again to switch to the 9-image index display.
x Searching for Images Quickly I Jump through Images (Jump display) With the single image display, you can turn the <6> dial to jump through the images. 1 Select the jump method. In the [4 Image jump w/6] menu, select the desired jump method from [1 image/10 images/100 images/ Date/Movies/Stills], then press <0>. by jumping. 2 Browse Press the button to playback the image. On the single-image display, turn the <6> dial. X The jump display will proceed according to the selected jump method.
u/y Magnified View You can magnify a shot image by 1.5x to 10x on the LCD monitor. 1 Magnified area position Magnify the image. During image playback, press the button. X The image will be magnified. If you hold down the button, the image will continue to be magnified until it reaches the maximum magnification. Press the button to reduce the magnification. If you hold down the button, the magnification will continue to reduce to the single image display. around the image.
b Rotating the Image You can rotate the displayed image to the desired orientation. 1 Select [Rotate]. Under the [3] tab, select [Rotate], then press <0>. the image. 2 Select Press the key to select the image to be rotated. You can also select an image on the index display. the image. 3 Rotate Each time you press <0>, the image will rotate clockwise as follows: 90° o 270° o 0° To rotate another image, repeat steps 2 and 3. To exit and return to the menu, press the button.
k Enjoying Movies Basically, there are the following three ways to playback the movies you shot. Playback on a TV set (p.167, 169) Use the provided AV cable or an HDMI Cable HTC-100 (sold separately) to connect the camera to a TV set. Then you can playback the captured movies and photos on the TV. If you have a High-Definition TV set and connect your camera with an HDMI cable, you can watch Full HD (Full HighDefinition: 1920x1080) and HD (HighDefinition: 1280x720) movies with higher image quality.
k Enjoying Movies Playback and Editing with a Personal Computer (See the PDF file instruction manual for ZoomBrowser EX/ImageBrowser) The movie files recorded in the card can be transferred to a personal computer and played or edited with ZoomBrowser EX/ImageBrowser (provided software). You can also extract a single frame from a movie and save it as a still photo. For smooth movie playback, use a high-performance personal computer.
k Playing Movies 1 Playback the image. Press the button to display the image. a movie. 2 Select Press the key to select a movie. With the single-image display, the <1s> icon displayed on the upper left indicates that it is a movie. During the index display, the perforation on the left edge of the image indicates that it is a movie. As movies cannot be played on the index display, press <0> to switch to the single-image display. <0>. 3 Press On the single-image display, press <0>.
k Playing Movies Function Playback Description 2 Exit 7 Play Returns to the single-image display. 8 Slow motion Adjust the slow motion speed by pressing the key. The slow-motion speed is indicated on the upper right. 5 First frame Displays the movie’s first frame. 3 Previous frame Each time you press <0>, a single previous frame is displayed. If you hold down <0>, it will rewind the movie. 6 Next frame Each time you press <0>, the movie will play frame-byframe.
X Editing the Movie’s First and Last Scenes You can edit out the first and last scenes of a movie in 1-sec. increments. 1 On the movie playback screen, select [X]. X The editing screen will be displayed. the part to be edited out. 2 Specify Select either [U] (Cut beginning) or [V] (Cut end), then press <0>. Press the key to see the previous or next frames. Holding it down will fast forward the frames. After deciding which part to edit out, press <0>.
3 Slide Show (Auto Playback) You can playback the images in the card as an automatic slide show. 1 Number of images to be played Select [Slide show]. Under the [3] tab, select [Slide show], then press <0>. the images to be played 2 Select back. Press the key to select the top menu item, then press <0>. Press the key to select one of the following: [jAll images/iDate/ kMovies/zStills]. Then press <0>. If you selected [iDate], press the button while is highlighted.
3 Slide Show (Auto Playback) the play time and repeat option. 3 SetPress the key to select [Set up], then press <0>. For still photos, set the [Display time] and [Repeat] options, then press the button. [Display time] [Repeat] the slide show. 4 StartPress the key to select [Start], then press <0>. X After [Loading image...] is displayed, the slide show will start. slide show. 5 QuitTo the quit the slide show and return to the setting screen, press the button.
Viewing the Images on TV You can also view the still photos and movies on a TV set. Before connecting or disconnecting the cable between the camera and television, turn off the camera and television. * Adjust the movie’s sound volume with the TV set. * Depending on the TV set, part of the image displayed might be cut off. Viewing on HD (High-Definition) TV Sets The HDMI Cable HTC-100 (sold separately) is required. 1 Connect the HDMI cable to the camera.
Viewing the Images on TV Do not connect any other device’s output to the camera’s terminal. Doing so may cause a malfunction. Some TVs might not be able to display the captured images. In such a case, use he provided AV cable to connect to the TV. The camera’s terminal and terminal cannot be used at the same time. For HDMI CEC TV sets When a TV set compatible with HDMI CEC* is connected to the camera with the HDMI cable, you can use the TV set’s remote control for playback operations.
Viewing the Images on TV Some TV sets require you to first enable the HDMI CEC connec ion. For details, see the TV set’s instruc ion manual. Certain TV sets, even hose compatible with HDMI CEC, may not operate properly. In such a case, set the camera’s [4 Ctrl over HDMI] menu option to [Disable], and use the camera to control the playback opera ion. Viewing on Non-HD (High-Definition) TV Sets 1 Connect the provided AV cable to the camera. Connect the AV cable to the camera’s terminal.
K Protecting Images Protecting an image prevents it from being erased accidentally. 1 Image protect icon Select [Protect images]. Under the [3] tab, select [Protect images], then press <0>. X The protect setting screen will appear. the image and protect it. 2 Select Press the key to select the image to be protected, then press <0>. X When an image is protected, the icon will appear on the top of the screen. To cancel the image protection, press <0> again. The icon will disappear.
L Erasing Images You can either select and erase images one by one or erase them in one batch. Protected images (p.170) will not be erased. Once an image is erased, it cannot be recovered. Make sure you no longer need the image before erasing it. To prevent important images from being erased accidentally, protect them. Erasing a 1+73 image will erase both the RAW and JPEG images. Erasing a Single Image 1 Playback the image to be erased. the button.
L Erasing Images [Select and erase images]. 2 Select Select [Select and erase images], then press <0>. X The images will be displayed. To display the three-image display, press the button. To return to the single-image display, press the button. the images to be erased. 3 Select Select the images to be erased and press the key. X The icon will be displayed on the upper left. To erase other images, repeat step 3. the images. 4 Erase Press the button. Select [OK], then press <0>.
B Shooting Information Display When you press the button during single-image playback, you can switch the shooting information display. The most detailed shooting information is shown below.
B Shooting Information Display About the Histogram The brightness histogram display shows the exposure level distribution and overall brightness. The RGB histogram display is for checking the color saturation and gradation. The display can be switched with the [4 Histogram] menu. Sample Histograms [Brightness] Display This histogram is a graph showing the distribution of the image’s brightness level.
Printing Images Printing (p.176) You can connect the camera directly to a printer and print out the images in the card. The camera is compatible with “wPictBridge” which is the standard for direct printing. Digital Print Order Format (DPOF) (p.185) DPOF (Digital Print Order Format) enables you to print images recorded in the card according to your printing instructions such as the image selection, quantity to print, etc. You can print multiple images in one batch or give the print order to a photofinisher.
Preparing to Print The direct printing procedure is done entirely with the camera while you look at the LCD monitor. Connecting the Camera to a Printer 1 Set the camera’s power switch to <2>. the printer. 2 SetForupdetails, see the printer’s instruction manual. the camera to a 3 Connecting printer. Use the interface cable provided with the camera. When connecting the cable plug to the camera’s terminal, the cable plug’s icon must face the front side of the camera.
Preparing to Print wPictBridge the image. 6 Playback Press the button. X The image will appear, and the icon will appear on the upper left to indicate that the camera is connected to a printer. Movies cannot be printed. The camera cannot be used with printers compatible only with CP Direct or Bubble Jet Direct. Do not use any interface cable other than the one provided. If there is a long beeping sound in step 5, it indicates a problem with the printer.
wPrinting The screen display and setting options will differ depending on the printer. Some settings might not be available. For details, see the printer’s instruction manual. Printer-connected icon 1 Select the image to be printed. Check that the icon is displayed on the upper left of the LCD monitor. Press the key to select the image to be printed. <0>. 2 Press X The print setting screen will appear. Print setting screen Sets the printing effects (p.180).
wPrinting QSetting the Paper Size Select the size of the paper loaded in the printer, then press <0>. X The paper type screen will appear. YSetting the Paper Type Select the type of the paper loaded in the printer, then press <0>. When using a Canon printer and Canon paper, read the printer’s instruction manual to check what paper types can be used. X The page layout screen will appear. USetting the Page Layout Select the page layout, then press <0>. X The print setting screen will reappear.
wPrinting effects. 4 SetSettheasprinting necessary. If you need not set any printing effects, go to step 5. What is displayed on the screen differs depending on the printer. Select the option on the upper right (circled in the screenshot), then press <0>. Select the desired printing effect, then press <0>. If the icon is displayed next to , you can also adjust the printing effect (p.182). Printing Effect Description EOn The image will be printed according to the printer’s standard colors.
wPrinting the date and file number 5 Set imprinting. Set as necessary. Select , then press <0>. Set as desired, then press <0>. of copies. 6 SetSettheasnumber necessary. Select , then press <0>. Set the number of copies, then press <0>. printing. 7 StartSelect [Print], then press <0>. With Easy printing, you can print another image using the same set ings. Just select the image and press the button. With Easy printing, the number of copies will always be 1.
wPrinting e Adjustment of Printing Effects In step 4 on page 180, select the printing effect. When the icon is displayed next to , press the button. You can then adjust the printing effect. What can be adjusted or what is displayed will depend on the selection made in step 4. Brightness The image brightness can be adjusted. Adjust levels When you select [Manual], you can change the histogram’s distr bution and adjust the image’s brightness and contrast.
wPrinting Trimming the Image Tilt correction You can crop the image and print only the trimmed portion as if the image was recomposed. Do the trimming right before printing. If you set the trimming and then set the print settings, you may have to set the trimming again. 1 On the print setting screen, select [Trimming]. 2 Set the trimming frame size, position, and aspect ratio. The image area within the trimming frame will be printed. The trimming frame’s aspect ratio can be changed with [Paper settings].
wPrinting Depending on the printer, the trimmed image area might not be printed as you specified. The smaller you make the trimming frame, he grainier the picture will look on the print. While trimming the image, look at the camera’s LCD monitor. If you look at the image on a TV screen, the trimming frame might not be displayed accurately. Handling Printer Errors If you resolve a printer error (no ink, no paper, etc.
W Digital Print Order Format (DPOF) You can set the print type, date imprinting, and file No. imprinting. The print settings will be applied to all print-ordered images. (They cannot be set individually for each image.) Setting the Printing Options 1 Select [Print order]. Under the [3] tab, select [Print order], then press <0>. [Set up]. 2 Select Select [Set up], then press <0>. as desired. 3 SetSetthetheoption [Print type], [Date], and [File No.]. Select the option to be set, then press <0>.
W Digital Print Order Format (DPOF) Print type Date File number K L K L Standard Prints one image on one sheet. Index Multiple thumbnail images are printed on one sheet. Both Prints both the standard and index prints. On Off On Off [On] imprints the recorded date on the print. [On] imprints the file No. on the print. 4 Exit the setting. Press the <7> button. X The print order screen will reappear. Next, select [Sel.Image] or [All image] to order the images to be printed.
W Digital Print Order Format (DPOF) Print Ordering Sel.Image Select and order images one by one. To display the three-image display, press the button. To return to the single-image display, press the button. After completing the print order, press the button to save the print order to the card. Quantity Total images selected Check mark Index icon [Standard] [Both] Press the key to set the number of copies to be printed for the displayed image.
W Direct Printing with DPOF With a PictBridge printer, you can easily print images with DPOF. 1 Prepare to print. See page 176. Follow the “Connecting the Camera to a Printer” procedure up to step 5. 2 Under the [3] tab, select [Print order]. 3 Select [Print]. [Print] will be displayed only if the camera is connected to the printer and printing is possible. 4 Set the [Paper settings]. (p.178) Set the printing effects (p.180) if necessary. 5 Select [OK]. Before printing, be sure to set the paper size.
Customizing the Camera Cre at iv You can customize various camera features to suit your picture-taking preferences. You can do it with Custom Functions. Custom Functions can be set and used only in Creative Zone modes.
3 Setting Custom FunctionsN 1 Custom Function No. Select [Custom Functions (C.Fn)]. Under the [7] tab, select [Custom Functions (C.Fn)], then press <0>. the Custom Function No. 2 Select Press the key to select the Custom Function No., then press <0>. the setting as desired. 3 Change Press the key to select the setting (number), then press <0>. Repeat steps 2 and 3 if you want to set other Custom Functions.
3 Setting Custom FunctionsN Custom Functions A LV shooting C.Fn I: Exposure 1 Exposure level increments 2 ISO expansion 3 Flash sync. speed in Av mode k p.192 k k * The C.Fn I -1 setting will also be applied to movie shooting. C.Fn II: Image 4 Long exposure noise reduction p.193 5 High ISO speed noise reduction 6 Highlight tone priority k k p.194 k k C.Fn III: Autofocus/Drive 7 AF-assist beam firing p.194 8 Mirror lockup p.195 C.
3 Custom Function SettingsN Custom Functions are organized into four groups based on the function type: C.Fn I: Exposure, C.Fn II: Image, C.Fn III: Autofocus/Drive, C.Fn IV: Operation/Others. C.Fn I: Exposure C.Fn-1 Exposure level increments 0: 1/3-stop 1: 1/2-stop Sets 1/2-stop increments for the shutter speed, aperture, exposure compensation, AEB, flash exposure compensation, etc. Effective when you prefer to control the exposure in less fine increments than 1/3-stop increments.
3 Custom Function SettingsN When 1 or 2 is set, high-speed sync cannot be used with an external Speedlite. C.Fn II: Image C.Fn-4 Long exposure noise reduction 0: Off 1: Auto For 1 sec. or longer exposures, noise reduction is performed automatically if noise typical of long exposures is detected. This [Auto] setting is effective in most cases. 2: On Noise reduction is performed for all exposures of 1 sec. or longer.
3 Custom Function SettingsN C.Fn-6 Highlight tone priority 0: Disable 1: Enable Improves the highlight detail. The dynamic range is expanded from the standard 18% gray to bright highlights. The gradation between the grays and highlights becomes smoother. With setting 1, the [Disable] setting automatically takes effect for the Auto Lighting Optimizer (p.103) and it cannot be changed. With setting 1, noise may become slightly more pronounced han usual.
3 Custom Function SettingsN C.Fn-8 Mirror lockup 0: Disable 1: Enable Prevents camera vibrations caused by the reflex mirror action which can disturb shooting with super telephoto lenses or close-up (macro) shooting. See page 106 for the mirror lockup procedure. C.Fn IV: Operation/Others C.Fn-9 Shutter/AE lock button 0: AF/AE lock 1: AE lock/AF Convenient when you want to focus and meter separately. Press the button to autofocus, and press the shutter button halfway to apply AE lock.
3 Custom Function SettingsN C.Fn-10 Assign SET button You can assign a frequently-used function to <0>. Press <0> when the camera is shooting-ready. 0: Normal (disabled) 1: Image quality Press <0> to display the image-recording quality setting screen on the LCD monitor. Press the key to select the image-recording quality, then press <0>. 2: Flash exposure compensation When you press <0>, the flash exposure compensation setting screen will appear.
3 Custom Function SettingsN C.Fn-12 Add image verification data 0: Disable 1: Enable Data for verifying whether the image is original or not is appended to the image automatically. When the shooting information of an image appended with the verification data is displayed (p.173), the icon will appear. To verify whether the image is original, the Original Data Security Kit OSK-E3 (sold separately) is required.
3 Registering My MenuN Under the My Menu tab, you can register up to six menu options and Custom Functions whose settings you change frequently. 1 Select [My Menu settings]. Under the [9] tab, select [My Menu settings], then press <0>. [Register to My Menu]. 2 Select Select [Register to My Menu], then press <0>. the desired items. 3 Register Select the item to be registered, then press <0>. On the confirmation dialog, select [OK] and press <0> to register the item.
3 Setting Copyright InformationN When you set the copyright information, it will be appended to the image as Exif information. 1 Select [Copyright information]. Under the [7] tab, select [Copyright information], then press <0>. the desired option. 2 Select Press the key to select either [Enter author’s name] or [Enter copyright details], then press <0>. X The text entry screen will appear. Select [Display copyright info.] to check the copyright information currently set.
3 Setting Copyright InformationN Text Entry Procedure Changing the entry area Press the button to toggle between the top and bottom entry areas. Moving the cursor Press the key to move the cursor. Entering text In the bottom area, press the key to select a character, then press <0> to enter it. Deleting a character Press the button to delete a character. Exiting After completing the text entry, press the button to return to the screen in step 2.
Reference This chapter provides reference information for camera features, system accessories, etc. The back of this chapter also has an index to make it easier to look up needed information.
When Autofocus Fails Autofocus can fail to achieve focus (the focus confirmation light blinks) with certain subjects such as the following: Subjects difficult to focus Very low-contrast subjects (Example: Blue sky, solid-color walls, etc.) Subjects in very low light Extremely backlit or reflective subjects (Example: Car with a highly reflective body, etc.) Near and far subjects covered by an AF point (Example: Animal in a cage, etc.
Using a Household Power Outlet With the AC Adapter Kit ACK-E8 (sold separately), you can connect the camera to a household power outlet and not worry about the battery level. 1 Connect the power cord. Connect the power cord as shown in the illustration. After using the camera, unplug the power plug from the power outlet. the DC Coupler. 2 Connect Connect the cord’s plug to the DC Coupler. the DC Coupler. 3 Insert Open the cover and insert the DC Coupler until it locks in place. in the DC cord.
Remote Control Shooting Remote Controller RC-6 (Sold separately) This remote controller enables you to take pictures wirelessly up to about 5 meters/16.4 feet from the camera. You can either shoot immediately or use a 2-sec. delay. Remote control sensor Set the self-timer to (p.71). Point the remote controller toward the camera’s remote control sensor and press the transmit button. X The camera will autofocus. X When focus is achieved, the self-timer lamp will light and the picture will be taken.
Remote Control Shooting Remote Switch RS-60E3 (Sold separately) This remote switch has a 60 cm/2.0 feet cord and enables you to press the shutter button halfway or completely. It connects to the camera’s remote control terminal. Using the Eyepiece Cover If you take a picture without looking at the viewfinder, light entering the eyepiece can throw off the exposure. To prevent this, use the eyepiece cover (p.23) attached to the camera strap.
External Speedlites EOS-dedicated, EX-series Speedlites Basically operates like a built-in flash for easy operation. When an EX-series Speedlite (sold separately) is attached to the camera, almost all the autoflash control is done by the camera. In other words, it is like a high-output flash attached externally in place of the built-in flash. For detailed instructions, see the EX-series Speedlite’s instruction manual. This camera is a Type-A camera that can use all the features of EX-series Speedlites.
External Speedlites Canon Speedlites other than the EX-series With an EZ/E/EG/ML/TL-series Speedlite set in TTL or A-TTL autoflash mode, the flash can be fired at full output only. Set the camera’s shooting mode to (manual exposure) or (aperture-priority AE) and adjust the aperture setting before shooting. When using a Speedlite which has manual flash mode, shoot in the manual flash mode.
Using Eye-Fi Cards With a commercially-available Eye-Fi card already set up, you can automatically transfer captured images to a personal computer or upload them to an online service via a wireless LAN. The image transfer is a function of the Eye-Fi card. To set up, use the card and to troubleshoot any image transfer problems, refer to the EyeFi card’s instruction manual or inquire the card’s manufacturer. This product is not guaranteed to support Eye-Fi card functions (including wireless transfer).
Using Eye-Fi Cards the [Access point SSID:]. 5 Check Check that an access point is displayed for [Access point SSID:]. You can also check the Eye-Fi card’s MAC address and firmware version. Press the button three times to exit the menu. the picture. 6 Take X The picture is transferred and the Transmission status icon icon switches from gray (Not connected) to the icons below. For transferred images, is displayed in the detailed information display (p.58).
Function Availability Table according to Shooting Modes o: Set automatically k: User selectable Basic Zone Mode Dial 1 7 2 3 4 5 6 C d sf a 8 Quality ISO speed k k k k k k k k k k k k k RAW k k k k k k k k k k k k k RAW + 73 k k k k k k k k k k k k k Auto o o k Stills k k k k k k k k k k k k*1 k k k k k k k k k k k k k k k k k k k k k Neutral k k k k k k Faithful k k k k k k Monochrome k k k k k k k User Defined k k k k k k k k k k k k Preset WB k k k k k
Function Availability Table according to Shooting Modes Basic Zone Mode Dial Movie shooting Creative Zone 1 7 2 3 4 5 6 C d sf a 8 o k k k k k Partial k k k k k Spot k k k k k Center-weighted average k k k k k Evaluative o o o o o o o Metering mode Exposure Program shift 2 k* k Exposure compensation k*3 k k k k AEB k k k k k AE lock k k k k Depth-of-field preview k k k k k k k k k k k k k k k k k k k k k k k k k k k k k k k k k k k k k k k k k k k k k k k Sin
Menu Settings 1 Shooting 1 (Red) Page Quality 73 / 83 / 74 / 84 / 76 / 86 / 1+73 / 1 72 Beep Enable / Disable 138 Release shutter without card Enable / Disable 138 Image review Off / 2 sec. / 4 sec. / 8 sec. / Hold 138 Peripheral illumination correction Enable / Disable 104 Red-eye reduction Disable / Enable 65 Flash control Flash firing / Built-in flash function setting / External flash function set ing / External flash C.Fn setting / Clear external flash C.
Menu Settings y Shooting 3 (Red) Page Dust Delete Data Obtains data to be used to erase dust spots 151 ISO Auto Max. 400 / Max. 800 / Max. 1600 / Max. 3200 / Max.
Menu Settings 6 Set-up 2 (Yellow) Page LCD brightness Seven brightness levels provided 139 Date/Time Set the date (year, month, day) and time (hour, min., sec.
Menu Settings Movie Shooting Mode Menu n Movie 1 (Red) Page Movie recording size 1920x1080 (6 / 5 / 4) / 1280x720 (8 / 7) / 640x480 (8 / 7) / Crop 640x480 (8 / 7) 131 AF mode Live mode / u Live mode / Quick mode 132 AF during k Disable / Enable 132 kShutter/AE lock button AF/AE lock / AE lock/AF / AF/AF lock, no AE lock / AE/AF, no AE lock 133 Remote control Disable / Enable 133 Movie exposure Auto / Manual 134 Grid display Off / Grid 1l / Grid 2m 134 Metering timer 4 sec. / 16 sec.
System Map ST-E2 270EX Eyepiece Extender EP-EX15ll 430EX II 580EX II Macro Ring Lite MR-14EX Macro Twin Lite MT-24EX Bundled Accessories Rubber Frame Ef E-series Dioptric Adjustment Lenses Wide Strap EW-100DB lll Eyecup Ef Angle Finder C AC Adapter Kit ACK E8 Semi Hard Case EH19-L Battery Pack LP-E8 Battery Charger LC-E8 or LC-E8E DC Coupler DR-E8 Battery Grip BG-E8 216 Battery Magazine BGM-E8L for two LP-E8 battery packs Battery Magazine BGM-E8A for size-AA/LR6 batteries Compact Power Ad
System Map Remote Controller RC-6 Remote Switch RS-60E3 EF lenses EF-S lenses External microphone HDMI Cable HTC-100 TV/Video Stereo AV Cable AVC-DC400ST EOS DIGITAL Software Instruction Solution Disk Manual PictBridge-compatible printer Interface Cable Interface Cable IFC-200U/500U Computer USB port Original Data Security Kit OSK-E3 Card reader SD memory card/ SDHC memory card/ SDXC memory card PCMCIA adapter Windows 7 Windows Vista Windows XP Mac OS X PC card slot 217
Troubleshooting Guide If a problem occurs, first refer to this Troubleshooting Guide. If this Troubleshooting Guide does not resolve the problem, contact your dealer or nearest Canon Service Center. Power-Related Problems The battery cannot be recharged with the battery charger provided. Do not recharge any battery pack other than a genuine Canon Battery Pack LP-E8. The camera does not operate even when the power switch is set to <1>. The battery is not properly installed in the camera (p.26).
Troubleshooting Guide The battery becomes exhausted quickly. Use a fully-charged battery pack (p.24). The rechargeable battery pack performance will degrade over repeated use. Purchase a new one. If you use Live View shooting or shoot movies for a prolonged period (p.107, 123), the number of possible shots will decrease. The camera turns off by itself. Auto power off is in effect. If you do not want auto power off to take effect, set [5 Auto power off] to [Off].
Troubleshooting Guide The card cannot be used. If a card error message is displayed, see page 42 or 224. The maximum burst during continuous shooting is lower. Set the [7 Custom Functions (C.Fn ] menu’s [High ISO speed noise reduction] to [Standard], [Low], or [Disable]. If it is set to [Strong], the maximum burst during continuous shooting will greatly decrease (p.193). If you shoot something that has fine detail (field of grass, etc.
Troubleshooting Guide The built-in flash does not fire. If you shoot continuously with the built-in flash at short intervals, the flash might stop operating to protect the flash unit. The camera makes a noise when it is shaken. The built-in flash’s pop-up mechanism moves slightly. This is normal. The shutter makes two shooting sounds during Live View shooting. If you use flash, the shutter will make two sounds each time you shoot (p.109). The movie shooting terminates by itself.
Troubleshooting Guide Display & Operation Problems The LCD monitor does not display a clear image. If the LCD monitor is dirty, use a soft cloth to clean it. In low or high temperatures, the LCD monitor display may seem slow or might look black. It will return to normal at room temperature. The menu screen shows few tabs and options. In Basic Zone modes and in movie shooting mode, certain tabs and menu options are not displayed. Set the shooting mode to a Creative Zone mode (p.40).
Troubleshooting Guide The shooting date and time displayed is incorrect. The correct date and time has not been set (p.29). No image appears on the TV screen. Make sure the AV cable or HDMI cable’s plug is inserted all the way in (p.167, 169). Set the video OUT system (NTSC/PAL) to the same video system as the TV set (p.214). Use the AV cable that came with the camera (p.169). The card reader does not detect the card.
Error Codes Error No. If there is a problem with the camera, an error message will appear. Follow the onscreen instructions. Countermeasures No. Error Message & Solution Communications between the camera and lens is faulty. Clean the lens contacts. 01 Î Clean the electrical contacts on the camera and lens and use a Canon lens (p.13, 16). Card cannot be accessed. Reinsert/change card or format card with camera. 02 Î Remove and insert the card again, replace the card, or format the card (p.31, 42).
Specifications • Type Type: Recording media: Image sensor size: Compatible lenses: Lens mount: Digital, single-lens reflex, AF/AE camera with built-in flash SD memory card, SDHC memory card, SDXC memory card 22.3 x 14.9 mm Canon EF lenses (including EF-S lenses) (35mm-equivalent focal length is approx. 1.6 times the lens focal leng h) Canon EF mount • Image Sensor Type: Effective pixels: Aspect ratio: Dust delete feature: CMOS sensor Approx. 18.
Specifications • Viewfinder Type: Eye-level pentamirror Coverage: Vertical/Horizontal approx. 95% Magnification: Approx. 0.87x (-1 m-1 with 50mm lens at infinity) Eye point: Approx. 19 mm (From eyepiece lens center at -1 m-1) Built-in dioptric adjustment: -3.0 - +1.
Specifications • Shutter Type: Shutter speeds: Electronically-controlled, focal-plane shutter 1/4000 sec. to 1/60 sec. (Full Auto mode), X-sync at 1/200 sec. 1/4000 sec. to 30 sec., bulb (Total shutter speed range. Available range varies by shooting mode.) • Flash Built-in flash: Retractable, auto pop-up flash Guide No.: 13/43 (ISO 100, in meters/feet) Flash coverage: 17mm lens angle of view Recycling time approx. 3 sec.
Specifications • Movie Shooting Movie compression: MPEG-4 AVC/H.264 Variable (average) bit rate Audio recording format: Linear PCM Recording format: MOV Recording size and frame rate: 1920x1080 (Full HD) : 30p/25p/24p 1280x720 (HD) : 60p/50p 640x480 (SD) : 60p/50p Crop 640x480 (SD) : 60p/50p * 30p: 29 97 fps, 25p: 25 00 fps, 24p: 23.976 fps, 60p: 59.94 fps, 50p: 50.00 fps File size: 1920x1080 (30p/25p/24p) : Approx. 330 MB/min. 1280x720 (60p/50p) : Approx. 330 MB/min. 640x480 (60p/50p) : Approx.
Specifications • Image Playback Image display formats: Single image, Single image + Info (Basic info, detailed info, histogram), 4-image index, 9-image index, image rotate possible Zoom magnification: Approx. 1.
Specifications • Dimensions and Weight Dimensions (W x H x D): 128.8 x 97.5 x 75.3 mm / 5.1 x 3.8 x 3.0 in. Weight: Approx. 530 g / 18.7 oz. (CIPA testing standards) Approx. 475 g / 16.8 oz. (body only) • Operation Environment Working temperature range: 0°C - 40°C / 32°F - 104°F Working humidity: 85% or less • Battery Pack LP-E8 Type: Rated voltage: Battery capacity: Working temperature range: Rechargeable lithium-ion battery 7.
Specifications • EF-S18-55mm f/3.5-5.6 IS Angle of view: Diagonal extent: 74°20’ - 27°50’ Horizontal extent: 64°30’ - 23°20’ Vertical extent: 45°30’ - 15°40’ Lens construction: 11 elements in 9 groups Minimum aperture: f/22 - 36 Closest focusing distance: 0.25 m / 0.82 ft. (From image sensor plane) Max. magnification: 0.34x (at 55 mm) 207 x 134 - 67 x 45 mm / 8.1 x 5.3 - 2 6 x 1 8 in. (at 0 25 m / 0.82 ft.) Field of view: Image Stabilizer: Lens shift type Filter size: 58 mm Lens cap: E-58 Max.
Trademarks Adobe is a trademark of Adobe Systems Incorporated. Windows is a trademark or registered trademark of Microsoft Corporation in the United States and other countries. Macintosh and Mac OS are trademarks or registered trademarks of Apple Inc. in the United States and o her countries. SDXC logo is a trademark of SD-3C, LLC. HDMI, HDMI logo, and High-Definition Mul imedia Interface are a trademark or registered trademark of HDMI Licensing LLC.
Safety Warnings Follow these safeguards and use the equipment properly to prevent injury, death, and material damage. Preventing Serious Injury or Death • To prevent fire, excessive heat, chemical leakage, and explosions, follow the safeguards below: - Do not use any batteries, power sources, and accessories not specified in this booklet. Do not use any home-made or modified batteries. - Do not short-circuit, disassemble, or modify the battery pack or back-up battery.
• If you drop the equipment and the casing breaks open to expose the internal parts, do not touch the internal parts due to the possibility of electrical shock. • Do not disassemble or modify the equipment. High-voltage internal parts can cause electrical shock. • Do not look at the sun or an extremely bright light source through the camera or lens. Doing so may damage your vision. • Keep the camera from the reach of small children. The neck strap can accidentally choke the child.
Digital Camera Model DS126271 Systems This device complies with Part 15 of the FCC Rules. Operation is subject to he following two conditions: (1) This device may not cause harmful interference, and (2) this device must accept any interference received, including interference that may cause undesired operation. Note: This equipment has been tested and found to comply with the limits for class B digital devices, pursuant to Part 15 of the FCC Rules.
IMPORTANT SAFETY INSTRUCTIONS 1. SAVE THESE INSTRUCTIONS — This manual contains important safety and operating instructions for Battery Charger LC-E8 & LC-E8E. 2. Before using the charger, read all instructions and cautionary remarks on (1) the charger, (2) the battery pack, and (3) the product using the battery pack. 3. CAUTION — To reduce risk of injury, charge only the Battery Pack LP-E8. Other types of batteries may burst, causing personal injury and other damage. 4.
Index 1280x720 ......................................131 Battery Grip .................................. 216 1920x1080 ....................................131 Beeper.......................................... 138 1st-curtain sync.............................148 Black-and-white image ............. 76, 93 2nd-curtain sync............................148 Built-in flash........................ 64, 79, 82 2-sec. self- imer ..............................71 Bulb .............................................
Index Copyright information....................199 File number .................................. 140 Creative Auto ..................................55 File size .......................... 72, 132, 173 Creative Zone modes .....................20 Filter effect (Monochrome) ............. 93 Custom Functions.........................190 Clear all ....................................190 List............................................191 Firmware Ver. ...............................
Index Function availability table..............210 Image dust prevention.................. 151 Image review time ........................ 138 G Grid display ...........................112, 134 H Image verification data ................. 197 Image Zone .................................... 20 Image-recording quality.................. 72 HDMI.....................................160, 167 Index display ................................
Index Live View shooting........................107 Focusing...................................113 Grid display ..............................112 Possible shots ..........................109 Long exposures o Bulb Low level format........................42, 43 M M (Manual exposure)......................83 Magnified view ......................120, 158 Malfunction ...................................218 Manual exposure ....................83, 127 Manual focusing......................69, 120 Maximum burst ....
Index Paper settings (printing)................178 R Partial metering...............................86 RAW ........................................ 72 - 74 Peripheral illumina ion correction ...104 RAW+JPEG............................. 72 - 74 PictBridge......................................175 Recharge........................................ 24 Picture Style Adjustment..................................91 Selection.....................................75 User defined ...............................
Index Shooting mode................................20 A-DEP (Automatic dep h-of-field AE) .....85 M (Manual exposure) .................83 Av (Aperture-priority AE) ............80 Tv (Shutter-priority AE)...............78 P (Program AE) ..........................60 C (Creative Auto) .....................55 1 (Full Auto).............................46 7 (Flash Off) ............................49 2 (Portrait) ................................50 3 (Landscape) .........................51 4 (Close-up) ...........
Quick Reference Guide Menu Operations - - - - - - - - - - - - - - - - - - - - Q Quick Control Screen - - - - - - - - - - - - - - Image-recording Quality - - - - - - - - - - - - - - - Picture Style - - - - - - - - - - - - - - - - - - - - - - - Nomenclature - - - - - - - - - - - - - - - - - - - - - - Basic Zone Modes - - - - - - - - - - - - - - - - - - - Using the Built-in Flash- - - - - - - - - - - - - - - - Creative Zone Modes - - - - - - - - - - - - - - - - - d: Program AE - - - - - - - - - - - - - - - - -
Quick Reference Guide Menu Operations button <0> button LCD monitor Cross keys 1. Press the button to display the menu. 2. Press the key to select the tab, then press the key to select the desired item. 3. Press <0> to display the setting. 4. After setting the item, press <0>.
Quick Reference Guide Q Quick Control Screen With the shooting settings displayed, press the button. The Quick Control screen will appear. Shutter speed Exposure compensation/ AEB setting Aperture ISO speed Highlight tone priority Flash exposure compensation Shooting mode Auto Lighting Optimizer Image recording quality Drive mode Picture Style White balance Metering mode AF mode Press the key to select the function, then turn the <6> dial to set it.
Quick Reference Guide Image-recording Quality Select [1 Quality], then press <0>. Press the key to select the quality, then press <0>. Image-recording quality Pixels Possible shots A Picture StyleN Press the button. Press the key to select the Picture Style, then press <0>. Style Description P Standard Q Portrait R Landscape V Monochrome Vivid colors and sharp images. Nice skin tones and slightly sharp images. Vivid blue skies and greenery and very sharp images.
Quick Reference Guide Nomenclature Power switch Mode Dial ISO speed setting button <6> Main Dial Flash button Shutter button Focus mode switch Live View shooting/ Movie shooting button AE lock button AF point selection button Display off sensor Cross keys Access lamp Aperture/Exposure compensation button <0> Setting button 247
Quick Reference Guide Shooting Settings Display Aperture Shutter speed Shooting mode Picture Style Image recording quality Quick Control AF mode icon Battery check zxcn OK NG Viewfinder Information ISO speed Exposure level indicator White balance Auto Lighting Optimizer Drive mode Possible shots Metering mode AF point activation indicator <•> Spot metering circle AF points Focus confirmation light AE lock Flash ready Flash exposure compensation Shutter speed Aperture 248 Max.
Quick Reference Guide Basic Zone Modes Ba All the settings necessary for shooting are set automatically. You just press the shutter button, and the camera does the rest. sic Z o n e 1 Full Auto C Creative Auto 7 Flash Off 2 Portrait 3 Landscape 4 Close-up 5 Sports 6 Night Portrait (Displayed only when is set.) Press the button, then press the key to select the function. Turn the <6> dial to set the function.
Quick Reference Guide Cre ati v Creative Zone Modes e ne Zo You can change the camera settings as desired to shoot in various ways. d: Program AE The camera automatically sets the shutter speed and aperture in the same way as the <1> mode. Set the Mode Dial to . s: Shutter-priority AE Set the Mode Dial to . Turn the <6> dial to set the desired shutter speed, then focus the subject. The aperture will be set automatically.
Quick Reference Guide E: AF ModeN Set the lens focus mode switch to . Press the button. Press the key to select the AF mode, then press <0>. X(One-Shot AF): For still subjects 9(AI Focus AF): Switches the AF mode automatically Z(AI Servo AF): For moving subjects S AF PointN Press the button. Press the key to select the AF point. While looking at the viewfinder, you can select the AF point by turning the <6> dial until the desired AF point flashes in red.
Quick Reference Guide Z: ISO SpeedN Press the button. Turn the <6> dial or press the key to select the ISO speed. When “AUTO” is selected, the ISO speed is set automatically. When you press the shutter button halfway, the ISO speed setting will be displayed. i Drive ModeN Press the button. Press the key to select the drive mode, then press <0>.
Quick Reference Guide A Live View Shooting Press the button to display the Live View image. Press the shutter button halfway to focus. Press the shutter button completely to take the picture. To change the Live View settings, use the [6 Live View function settings] menu. Battery Life with Live View Shooting Temperature No Flash At 23°C / 73°F Approx. 200 shots 50% Flash Use Approx.
Quick Reference Guide k Shooting Movies Set the Mode Dial to . Press the shutter button halfway to focus. Press the button to start shooting a movie. To stop movie shooting, press again. To shoot still photos, press the shutter button. Custom FunctionsN 1 Exposure level increments 2 ISO expansion 3 Flash sync.
Quick Reference Guide Image Playback y u Index y u Magnify S Select image L Erase x Playback B Shooting information 255
Software Start Guide EOS DIGITAL Solution Disk This disk contains various software for EOS DIGITAL. EOS Utility Software that lets you connect your computer and camera in order to download images (still images/movies) shot with the camera to the computer, set various settings of the camera, and remotely shoot photos by operating the computer. Digital Photo Professional This software is recommended for users who mainly shoot RAW images. You can view/edit/process/print RAW images at high speed.
Software Start Guide Installing the Software Never connect the camera to your computer before you install the software. The software will not be installed correctly. Even if the previous version of the software is installed, install the software by following the steps below (the current software will overwrite the previous version). 1 Insert EOS DIGITAL Solution Disk (CD). For Macintosh, double-click to open the CD-ROM icon displayed on the desktop, and double-click on [Canon EOS Digital Installer].
Software Start Guide Software Instruction Manual Contains the Instruction Manual files for the software provided. Copying and Viewing the Instruction Manual PDFs 1 Insert the [Software INSTRUCTION MANUAL] CD into your computer. 2 Double-click the CD-ROM icon. For Windows, it is the icon displayed in [My Computer]. For Macintosh, it is the icon displayed on the desktop. 3 Copy the [English] folder to your computer. Instruction Manual PDFs with the following names are copied.
CANON INC. 30-2, Shimomaruko 3-chome, Ohta-ku, Tokyo 146-8501, Japan U.S.A. CANON U.S.A. INC. One Canon Plaza, Lake Success, NY 11042-1198, U.S.A. For all inquires concerning this product, call toll free in the U.S. 1-800-OK-CANON CANADA CANON CANADA INC. HEADQUARTERS 6390 Dixie Road, Mississauga, Ontario L5T 1P7, Canada CANON CANADA INC. MONTREAL BRANCH 5990, Côte-de-Liesse, Montréal Québec H4T 1V7, Canada CANON CANADA INC. CALGARY OFFICE 2828, 16th Street, N.E.
Quick Start Guide 1 2 Quick Reference Guide This quick reference guide explains the basic function settings and how to shoot and playback images. You can take this guide with you when shooting. For detailed instructions, refer to the EOS REBEL T2i/EOS 550D Instruction Manual. E English CT1-1037-000 Insert the battery. White index Red index 3 Attach the lens. Align the lens’ white or red index with the camera’s index in the matching color. Set the lens focus mode switch to .
Shooting Operation Power switch Shutter speed ISO speed setting button <6> Main Dial Basic Zone Modes Aperture Mode Dial Flash button ISO speed Exposure level indicator White balance Auto Lighting Optimizer Drive mode Shooting mode Picture Style Image-recording quality Shutter button Quick Control AF mode icon Battery check Possible shots Metering mode zxcn OK NG Focus mode switch Viewfinder Information Live View shooting/ Movie shooting button Display-off sensor Access lamp <0>
Canon •••
Just a snapshot? o it's a chance to take state-of-the-art pictures.
acro lenses let you approach small subjects and capture But that's not the only reason to use them. By making the most of Canon Macro Lenses, you can turn everyday scenes into dramatic photographs.
c • 03 03 I Contents 04 Start enjoying your macro lens 20 Original ways to enjoy your photos 25 Learn more about macro lenses 31 Canon's Macro Lens lineup 33 Terms
•
y Ho~e~de ter o (ftf(ef w'th. teft? How ftPO'it ft jft~II'1 jftvorlte jn{(t tftrtf torre(( w'th. l'ifc1o'if "(W(f, p\'ieperr(e(, ftHtt rftfrperr,e(? Wow, t\irl1 ft tftft\j treftt (Hto 4'l fh.
Start enjoying your macro lens. Mo.,day I Afternoon teatime" Draw fresh attention to everyday thing rith a Canon Macro Len. If you think that macro lenses are just for enlarging images of small subjects or taking extreme close-ups, think again. A macro lens shows close-up pictures of ordinary subjects - revealing an unknown world! For example, you can take pictures of a colorful subject like a cake, using a blurred background for effect, and get striking professional-looking results.
u era Tktn Rn ~RI1"1 i~tRI f~j,jtctf for .,nRt c1tRr I~R.,t fkotof - R cklllt, for tJC.A~flt. Ufll1., R (R11011 MACro LU1L Itlf fortrRlt lool::f R lIttlE Itlfjtm,t fro~ orlti.,Rr"j fl1RffltotL wltk R., RttrRctlvt j,l~rn_ j,Acl::.,rO~.,_. Ht lool::f Hlet A .,nAt IIttlt ftllow 110W, totf.,'t Itt? WOl1't j,t It .,nRt .,~"1 witt., Itt .
Start enloying your macro lens. Tuesday Our hero Let the ubjecl tand out clearly again t a blurred background. Macro lenses are ideal for taking portrait photos. Since the subject stands out crisply against a hazy background, you can capture the whole scene in an attractive image. To create a beautifully blurred background, 1 just choose the Av mode setting while keeping the aperture fully open (for example, f/2.8 or an even lower f/number, depending on your lens).
Wedne day: "Home garden' A rrttt1j :fIo~nr rtt~I wltk ttH\j r~tH ttrorltt{ .,H!ttH! ~fhr ~ ",kt ~OrHtH" $koWtr. If \jO'i'rt u1Ck~Htttt ,,~ tktf f~~11 r~rdt!t, t~ rkoto.,r~rkIH" tt tott~~ ~H~ rt(Or~IH., tkt (k~H'IH" "'oo~.
Start enjoYing your macro lens Wednesday. Home garden atural subjects for macro shooting, flo ers reveal beautifu surpri e . Rich color variations. Amazing natural patterns. Flowers are the supreme subject of macro shooting, and the ideal way to learn the basics of macro techniques. Only the close-up power of micro photography is really capable of revealing the tiniest details of petals, pistil, and stamens.
Thu ay: "Dad' Ovtr tkt '1tltr{J tudy" jlt~(\'1 ketr{ltke{ ItH~ 10H,-trell{~ret ktlrloo~{ {et~ to .,row 111 wortk J rejltctll1' ~etr t~OtIOHIt' ItttltCk~tl1t It{ well It{ tlt.,ltl1ct. o~ CItH ~ft tkt 1t~1t1.o1"" cltrlt\llHtltf oj cloft-~r ~Ilcro fkoot'.,., to cltrUire tkt {~\ltlt vlll~t oj f~(k clltHIC o\ljutf - tkdr It~m, oj kltrr'1 ~t~orlt{.
Start enjoying your macro lens Thursday 'Dad's study Antiques are fa cinating tnacro subject , revealing c aft nlan hip and co or to a "allOt Macro Len. Why not take pictures of family antiques, such as Dad's old watch or camera? You can make full advantage of macro capabilities for clear detail and soh blurring of unfocused fields, and also emphasize aged texture and quality feeling in your images.
Fr"day "Ou tc o Woof! He ~l\r!cf j~ft o.,(e l\t ftrl\H'}erL tkeH '...... ett'l\tel~ ftl\rtf WI\'}.,'"'' k" tl\l\. It' f kl\T"t to (O~Ht OM kl'" for rrotutloH fro ... ~~r"ll\n, LJ~t ke fioef "nl\!c tke I(e'" wltk VIfltorf. Tkl\t'f o~r frleHfil~ "Wl\t(kfio.,.
Start enjoying your macro lens. for day. 'Our watchdog" Macro lense take detailed portraits of pets frol 1 h ad to ai. When you spend a lot of time with pets, you'll notice a surprising range of facial expressions. Macro lens close-ups can capture these changing looks at just the right moments, for memorable images to save and treasure. Try taking detailed pet pictures of fur or different parts of the body, using focus settings different from ordinary snapshots.
ur ay tt r I"fectf cl"'fter(.,~ "ro",.,c( " 1I100MllI.,., flowerllut - I"c(\jll"'~f ~ lI"'tterfHeL ~rA."o"fHe( - MIlA."\j llvef (., A. t("\j Ore., fr"ce. Yo", CA.., MIl(H A.1I tke A.ct(v(t\j (., tk(f {MIlA.II wort~ w(tko"'t " MIlllCro le.,{.
Start enloying your macro lens So urdoy U e high magnifica ion 1 to At th po plore the hidden beauty and detail of in ec . Use the zoom-in feature of Canon Macro Lenses to photograph insects. You'll be amazed and captivated by the intricate structures and delicate textures against a beautiful natural background. Make full use of macro artistry to take shots of this micro world! Insects are sensitive to sound and motion. Be careful not to scare them away! Be very quiet as you get close to insects.
un Toi-Ill\j Wlllf He ~ro\1.,kt - III ay III J mall world, 19 IloHttlll\j~ Ill~tt III (o\1fl~ (Ill...e over to vlf(t. Illf flllvorlte to\j c1IllHIC "'1~llllt\1n (lllr ...otttl tlllllt Ile tlllf(er wkenver ke .,oef. Hlf ttnlll... If to \l\1\j tile nllli clllr fo...ettlll\j lll~tt trlllvel lllll over tke worli- (~ It. WO\1Ii-H ~t \jO\1 llf(e to i-rlvIH., wltk kl... ro...ettlll\j? "0 I 17 I re m II
rl . I tl Diorama shots usually require a large-scale photo setup, but it's easy with a macro lens. For instance, just put a beautiful scenic photo in the background, and photograph a model against it. The photo looks like you're really there! ( amera tting plays an inlportant part in dioraJna photography. Select II Av Mode" for a camera exposure mode. Try shooting from one angle while changing the aperture of the lens, and choose your favorite combination of background and model.
Change Picture Style to try monochrome pictures - a littl different from color hotos Canon digital SLR cameras make it possible to take pictures in black and white or sepia tones. Monochrome (B/Wl photography extends your shooting capabilities while preserving original detail. Just choose these options from the menu for easy set-up. Setting methods (EGS REBEL T l i / 5 0 0 D ) - - - - - - - - - - - - - - Plcl\ll'1!5!J2 A~a~S(~;)t On tre sooting r.-:enJ select Picture StIle ,t'I" .:.
Photo lampshade Enjoy favorite pictures, illuminated by the flickering light of a candle flame. And you can also enjoy the fragrance of a scented candle. Needed: Print out a favorite photo and trim it to the same size as the outer circumference of a candleholder. Then roll the trimmed photo around the holder. You can choose any kind of favorite shot - flowers, landscapes, your child, or even your pet. Then enjoy different moods by changing photo subjects.
'pe 00 'l" .. . _ ~l J:li. . ~ s..:~ ~~ "". ...... • •I t t ....~,,,"' _~ : n ...., .... • .. t .... d and dd a littl d cor ti n t ou lou ori inal r tp cookbook our fri nd ! ee de d: Alp'1lM or flMA.t1 ~ntWIH" poo~ ls You 've put all you r cul ina ry skil din ner , into a del icio us ma in course for ted cak e and served a bea utif ully dec ora for dessert.
Photo stand , ,-' ~... ,,~ - :. j I-'i ii::ir J ' - .. II~ ~~ ~[ :.:~ ~nfJ] It: !'""c t.l UJI: ~f~ Mount photographs on cardboard folded in an accordion hape. Just tie with a string and you have a portable photo stand! ( It's a unique present that friends will love. Needed: DO This stylish photo stand doubles as an album. You can mount many photos and put them on display, or carry the album around to show friends.
Desktop calendar 1 '2. 3 5" 6 7 a ~ 10 1?- B 1'1- I' I~ 17 l? ?o :ll 2.'1. 23 !l~ ?1 29 2.' 1+ 30 ft r you collect a ack of fa oritc photo ju t mount them on d ted card 0 create an original cal ndar. fhat ay ou can enjoy f: orite pho 0 t roughout the pa in year. '(" " '. Needed: , ...... ,. ar I n K An attractive calendar is a useful item that's also important in your daily life. To make one, just write dates and weeks of the year on drawing paper.
Benefits of USM + inner focus QUiet, fa t autofocus act on. With no expansion or contraction of he lens. ve lent or ose up Ituot 0 s When you want to photograph a small animal or an insect, it's important to get close quietly without scaring the subject. Canon Macro Lenses with USM and inner focus let you photograph subjects with quiet, rapid autofocus. You'll feel confident to approach many subjects that are sensitive to sound and motion in the big world around them.
[ Full-time manual focus Fine-tune the focus while in AF mode. Useful at times like these! Macro photography can only focus on a small area. The impression of a phobJraph changes dramatical~ by making a small shift in the focusing point. Use autofocus for quick focus, and then turn the focus ring. When you keep your attention on the viewfinder and fine-tune the focus, the difference in the finished photo will be immediately apparent.
Tripod mount r 9 Perhaps you shoot a horizontal composition, then feel like taking a similar photo in a vertical framing. With a regular tripod, the subject position through the viewfinder inevitably shihs and the photographer has to refocus from the start. With a tripod mount ring, however, you can maintain the position of the subject in the viewfinder - for an easy, instant frame change to a vertical, horizontal, or even an angled composition e W rrlS 11 Ir od OL.
l Hybrid IS advantag~s Hybrid image stabilizing technology is effective in both macro and standard shooting .' H, ... . .. .' ' ' ,;, "') If l!'::>. ,,! f • ~ t I' VTP' I 01' ',on Hybrid IS perfect in various situations. In macro shooting, the closer you get to your subject, the more likely you'll experience camera shake. Canon's new Hybrid IS changes all that.
TerlT'S What IS IS? IS is on optical Image stabilizing technology developed by Canon A sensor In the lens detects camero shake and compensates by moving the 1$ 1,,1it a floating elerrent n he lens Ben light reachng the lers s corrected there and delivered to tre Imag ng plane recording a shorp Image wi h ittle shake effect.
Canon's Macro Lens lineup Enjoy macro shooting anytime with excellent quality reproduction and a lightweight compact design. Thanks to an easy-to-use viewing angle of 96mm (35mm film equivalent). you can use this versatile macro lens for a wide range of shooting purposes including small flowers and objects, portraits with blurred backgrounds, and landscapes.
EF 1OOmm f/2.8 Macro USM ::: ~atl~ e w Ihe ent e [C S er e 'r- mocr s s ;ava lIe 10 15 exc( ent ep'I"lduc' on qua tv and ease ~se re lens has ':J v ew 19 argle f" 160fllm 135""~ 1 'm equ volenl on EOS REBEl TI, 5000 and 1m 0 model ser on opture rT'ore Jeto Is 'T I Jr, <> away ~on .vI h on E" T S60rrm ~. For s~oollng pee SIO 28 Mac a JSM sepo'o'elYI helps sers sw"ch as Iy between O'lQscope protos 01 01 opllonol 'r ad mo~nt r g so d d pOI ro I Ira "1wg • F ... Vox '1' I EF 180mm f/3 .
Useful info: Basics of macro photography This ratio expresses the relative size of the image, compared to the subject. The larger the magnification ratio, the larger the subiect appears. The magnification ratio indicates the ratio of image size captured on sensor or film to the actual size of the subject. When using a magnification ratio of 1x, for example, the image captured on the sensor or film is the same size as the subject.
Control depth of field, depending on how wide the aperture diaphragm is opened An aperture diaphragm is a mechanism that cortro s the amount of light entering a camera through the lens. By adjusting the opening of the aperture, one can vary the depth of the zone of in-focus elements. If the aperture IS wide open (f/2 8, for example), the focused area becomes shallow, result ng In greater blurring of images n front of and beh nd the subject in focus.
Canon E-6 Printed In Japan 0055W101 011 ONi40.
Canon
Taking too many fuzzy pictures? Canon IS * Lenses are the solution! I 01 I
Nice shot! Or is it? When you enlarge your image, the print looks fuzzy. Frustrating! But a common experience. In most cases, this accidental blurring is caused by camera shake - especially when shooting with a telephoto lens or at slow shutter speeds in dark places. Even if you try to stay still, the camera isn't perfectly steady in your hands when the shutter button is pressed. But now there's a great solution: Canon 15* Lenses. For beautifully clear, blur-free photos. With ease.
Day or night, indoors or outdoors.
Contents • • • • • • • • Page 5 11 :OOAM / Zoo pictures Page 7 12:00PM / Kids in motion Page 9 2:00PM / Animal snapshots Page 11 7:00PM / Night shots Page 13 8:00PM / Indoor shots Page 15 9:00PM / Sleeping faces Page 17 Camera shake Page 25 IS Lens lineup I 04 I
1 1:OOAM / Zoo pictures Ef I mrn I <1 ') I lv' I Most children love going to the zoo. Here's how to shoot "wild" picturesl Great shot! Can you get it? Photographing animals from afar takes good timing and usually, super-telephoto lens. But don't worry! With a steady-shooting Canon IS Lens, there's no fear of blurry results. Even if you're not using a tripod. Picture problems Blurring is virtually unavoidable when shooting distant subjects with a telephoto lens (unlike a wide-angle lens).
• 11 :OOAM / Zoo pictures • .. Trying to take snapshots of the animals, but bars get in the way? What to do? lullerp"only AE f!50 It's easy to get rid of distracting elements like cage bars - with a little know-how! 1. Simply set your lens to telephoto. 2. Choose the Av mode and hold the aperture as wide open as possible. 3. Approach the cage as close as safely possible and shoot. Now, see how well the shot turns out. The cage bars are gone, and the animals look like they're in the wild.
12:00PM / Kids in motion EF7( 11, '4 61 M Your child is swinging, running, playing actively. Now you can capture pure energy in pictures! Kid won't slow down? Panning* technique is tricky, but worth trying. Just set a Canon IS Lens to Mode 2 to correct vertical camera shake while taking pictures.
• 12:00PM / Kids in motion _ Fast moving subject, slow background. How can you get good panning shots? If you know the optimal setting, panning techniques can get better results. Here's one example (with EF70-300mm f/ 4-5.6 IS USM): 1. Turn the IS function on and select IS Mode 2. 2. To improve your success, shoot at around 100-200mm (rather than an extreme 300mm telephoto setting). 3. Select the camera Tv exposure mode and 1/60 sec. shutter speed. Select AI Servo AF as the autofocus mode. 4.
2:00PM / Animal snapshots Turn a tiny creature into a great picture. Canon IS telephoto zoom makes it easyl You're in the park and a cute chipmunk is posing within range! You lower your camera and focus on its eyes. All set? No, you're not steady enough. You need a Canon IS Lens to stop camera shake - and even create a sohly hazy background. Picture problems Before you blame your camera for poor results, take a good look at your picture-taking posture.
• 2:00PM I Animal snapshots. Catch that little chipmunk with telephoto in a beautifully blurred natural setting. Here's how to take a charming picture and get an intentionally blurred background (using EF70-300mm f/ 4-5.6 IS USM): 1. Set the lens as far as possible to the telephoto side (200-300mm), for the longest focusing distance. 2. Select the Av exposure mode and keep the aperture open. 3. Choose natural elements as a background - flowers, gleams of sunlight on leaves, etc. 4.
7:00PM / Night shots EF I 5 8 'jmm' 3 'i 'i 6 IS L.>!V Evening enchantment. Canon's standard IS Zoom Lens is ready for brilliant shots! As the sun sets and the dusk grows darker with every passing second, the city lights up with exciting possibilities for glamorous night shots. And you're ready to take dazzling handheld pictures with Canon's standard IS Zoom Lens. Perfect! Picture problems What's the difference between these two night shots? Same low light conditions, same low shutter speed.
• 7:00PM I Night shots _ How can you capture twilight scenes when the light changes each second? Simple! Just use the convenient AEB (Auto Exposure Bracketing) function in conjunction with an IS lens such as the EF-S 15-85mm f/3.5-5.6 IS USM to generate three different brightness variations for a single shot. 1. Set the camera's drive mode to continuous shooting mode. 2. Set the camera's AEB adjustment to 2/3 in 1-step increments. 3. Turn the IS function of the lens "on." 4.
8:00PM / Indoor shots It's happy birthday time! Take pictures in low light without spoiling the mood. Low light? No flash? Don't be concerned - be inspired! Canon IS Lenses let you take full advantage of candlelight and other low light conditions to create breathtakingly beautiful indoor pictures in available illumination. On any occasion.
• 8 OOPM I Indoor shots. Picture problems Dim light, didn't use flash, camera shake, fuzzy photos . there are so many excuses for lost photo opportunities! But now, you don't have to apologize any more because Canon IS Lenses show outstanding performance in many different kinds of indoor shooting situations. Without a flash! a e a die a d hdd s face. How an y u apture it all beautifully without a flo h2 • 1 Flash sometimes destroys the mood of a room.
9:00PM / Sleeping faces EF-S 15-85mm f!3 5-5 6 IS USM, A child falls asleep. Now, take pictures quietly without waking the sleeper! A child's expression when asleep is especially endearing. Canon IS Lenses are the ideal choice to quietly capture these precious moments. Without distracting flash or blurred images. Without waking a child up and missing that sleeping face! Picture problems -------- Well, you didn't wake the child up by using a flash, but you didn't get the picture either.
• 9:00PM / Sleeping faces _ Shooting angles really matter in photo composition, changing the whole nuance of expression. For example, here's how to use the EF-S 15-85mm f/3.5-5.6 IS USM: 1 Choose the Av mode for exposure a'ld keep the aperture fully open 2 Turn the IS funclior of the lens 'on." 3. Lower your camera to your child1s eye level 4. When aiming at the subject, put your elbow(s) on the table (or somewhere else) to hold the camera steady. 5.
\ IS benefits \ \ \ When does camera shake tend to happen, and what causes it to occur? Perhaps you've encountered blurred images when enlarging pictures: photos that look fine in smaller postcard sizes appear quite fuzzy at greater size. In fact, camera shake happens more frequently than you'd think. There are several reasons for accidental blurring.
• Carrera shake. How do Canon IS Lenses repress blurring caused by camera shake? Canon IS Lenses detect camera shake with a pair Image Stabilizer Parallel Movement Principle of built-in gyro sensors, shifting lens components in 1. Lens When still the direction of the vibration to counteract it and Capturing element prevent blurring. When the shutter button is pressed I~ T"'b,,,, ( halfway while the IS function is on, compensation for camera shake is activated in just 0.5 seconds.
--------------------------------------------------- \ \ In-lens image stabilizer design benefits \ \ \_-------- Why is each individual lens optimized for shake correction? Each Canon IS Lens has a unique optical design for specialized performance. So, Canon's optical correction systems and control mechanisms are customized for effective positioning in each lens model. Canon builds these mechanisms into the lenses to ensure that the optical correction system is optimized for each individual lens.
• a rak • How does a stable viewfinder image help you take better picture? Looking into the viewfinder while focusing and framing is essential to SLR shooting, so a stable viewfinder image is crucial. Canon IS Lenses correct for camera shake by shifting certain optical components in inverse relation to the lens movement, maintaining the position of incoming light rays on the film or capturing elements.
\ In-lens image stabilizer design benefits \ Improve your framing accuracy! Blurry viewfinder images lead to framing errors, so you can inadvertently cut off important details, especially when using a telephoto zoom lens. With Canon IS Lenses such framing errors are a thing of the past. Canon's in-lens image stabilizers enable accurate framing when you fill the frame with part of your subject. Since the viewfinder image is blur-free, you can check every detail and make subtle framing adjustments.
• COrlero ~hOkE' _ rapture fleeting photo opportunities l Concentrating on your subject is difficult if the viewfinder image is blurred. 'vv'hen you lose concentration, you tend to miss small gestures and other momentary photo occasions. Canon's inlens image stabilizer gives you a clear viewfinder image, so itls easier to notice and capture such photo opportunities. o D 0 Canon S Lenses help here Decisive moments with moving subjects.
Background information: A new IS lens for macro What is Hybrid IS? Macro photography involves shooting close-ups of subjects, including flowers, insects, and jewelry. Until recently, however, there was no technology that could compensate for the type of camera shake common to macro photograpy.
• Come a rake_ photography f-< y ' I I There are two types of camera shake that can negatively affect image quality: angle camera shake and shift camera shake. Conventional Canon IS technology incorporates a vibration gyro (angular speed sensor) to compensate for angle camera shake. This is an excellent solution for most types of photography, but provides insufficient image stabilization for macro photography, which is highly susceptible to shift camera shake.
\ Product overview \ Beautifully designed standard zoom lens realizes high image quality and easy operability. EF-S 15-85mm f/3.5-5.6 IS USM • Lens construction 17 elements In 12 groups • FOCUSing d slonce a.35m/l 15 N.. 00 • MaXimum magnification rate: 0 21 x • Filler size 72mm This standard zoom lens, specially designed for EOS 7D and EOS REBEL Tl i/500D* but also compatible with all cameras designed to take EF-S lenses, covers focal lengths ranging from 24mm through 136mm in the 35mm format.
• I en I r p Single focal ength lenses J 1OOrl f 2 8l Mon IS USM E.f200rmf 2 ISUSM E.F3001T,,-n f/? Bl S LSM EF300m'T f/4L IS JSM U400MrT' f/2 8llS USM E 400m rn rJ 4 f)O IS USM ., . EF500rT'm f!4l1S USM EF600mm rJ 4L IS USM - E.F800mm f/5 6L IS USM Zoom lenses EFS 17 55mm f/2 8 15 USM • EF-S 17-85mr'1 f4-5 6 IS USM J EF S18-55mm f/3 5-5 6 IS EF·S18-135mm f/3 55615 . l~ I JI • , J • I L EF24 105mfTl '/4L IS U5M EI23 135'111'1 '/355 61S EF28 300rT'm f!3 55 6L 5 l)SM EF .
Canon E-8 Printed in Japan 0055W102 011 ONi40.
uoder ne ~nb!Jqe~ / ued er ul apely Canon EOS DIGITAL ............•......•.•.......•..•.•••.•...... Solution Disk ver.22.0 For Macintosh Canon Utilities: Digital Photo Professional 3.8 ImageBrowser 6.5 EOS Utility 2.8 PhotoStitch 3.2 Picture Style Editor 1.7 WFT Utility 3.5 For Windows Canon Utilities: Digital Photo Professional 3.8 ZoomBrowserEX 6.5 EOS Utility 2.8 PhotoStitch 3.1 Original Data Security Tools 1.8 Picture Style Editor 1.7 WFT Utility 3.
O O ST~PP! Installieren Sie die Treiber-Software von der belgepacken CD-ROM bevor Sie die Kamera mit dem Kabel an den Computer anschliBen. ATTENZIONE! Assicurate Vi di aver installato il driver dal CD-ROM incluso nella confezione prima di connettere la fotocamera al Vostro computer con questa cavo. STOP! Be sure to install the driver software from the _ _ enclosed CD-ROM before connecting the camera to your computer with this cable.
TFyMy Plio1: Your Images Printed Free From concept to print, the professional's choice is Canon. Have your images printed on a professional model for free.* * Please refer to the Try My Photo website Terms & Conditions.
Visit www.registercanon.com to register your new EOS camera today and receive the following*: • Automatic notification of firmware and software updates • Priority telephone support • Exclusive priority e-mail support address • Exclusive savings on select products, classes and workshops There is no charge to register or for the benefits offered. * These benefits valid in the u.s. only. Please read the Terms and Conditions at www.registercanon.com for complete details.
Ca-non ., Dealer Record of Canon Purchase Fiche d'Achat our Concessionnaire Canon II I Complete this card at time of sale. A remplir au moment de I'achat PRESENT OWNERSHIP AND PRODUCTS INTERESTED IN Articles deja en possession ou juges dignes d'interet CAMERAS APPAREILS -PHOTO (Camera) (Appareil) (Camera) (Appareil) INTERCHANGEABLE LENS Objectif interchangeable MODEL Modele CANON U.S.A., INC.
Canon LIMITED WARRANTY The Limited Warranty set forth below is given by Canon U.S.A., Inc. in the United Slales and Canon Canada, Inc.
Cauou GARANTIE RESTREINTE La presente garantie restreinte est lournie par Canon U.S.A., Inc. aux Elats-Unis et Canon Canada Inc. au Canada (collectivement «Canon ») it I'egard des jumelles et des produ~s doles d'objecti!s photographiques de marque Canon livres avec celte garantie restreinte et identifies par Ie numero de modele inscril sur ce«e carte de garantie restreinte (chacun elanlle« prOOuit ») lorsqu'ils sonl achelesetulilisesaux Elals-Unisou au Canada.
REMARKS Canon USA One Canon Plaza. Lake Success. N.Y. 11042-1198 Tel: (1)-800-828-4040 Canon Canada 6390 Dixie Road. Mississauga.
Ca...n.n CANON' EOS Digital Camera™ and Accessories Limited WarrantyFor U,S.A. & Canada Only ,IIV The limited warranty set forth belOw is given by Canon U.S.A.. Inc, (Canon U.S.A) in the United States 0' Canon Carlada tnc (Canon Canada) in Canada with respect to tile Canon brand EOS D,grtal Camera, as well as with respect to the accessories packaged with this limited warranty and described on the registration card accompanying this limited warranty (collectively the ·ProdlJClsT.
Ca....n.n II IV Garant" IImltee des apparells photo numenques EOS Digital Camera" et des accessOires de CANON Pour les Etats·Ums et Ie Canada seulement La trisen1_ ga.anlte Imtee ut to\.llTlle Pi" Canon U.S A.. Inc. (Canon U.S.A.) lI\.lX £lals·UrlIS ou CtlflOn Canada Inc. (Canon Canada) au Canada a regard de rappareol photo ..........rique EOS cle marque Canon. <1M 8Q;fiSOifes Iiv'&$ av«celle ga,ant;" Imee III OOcrits sur Ia carle d'emeglslremenl a~\IfIlInt III llI''''enttlll'',ant...