
Owner's Manual


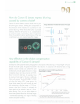
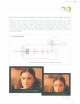
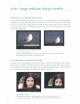
Table Of Contents
- Quick Start Guide
- Instruction Manual
- Conventions Used in This Manual
- Table of Contents
- Quick Start Guide
- Supplied Accessories
- Parts & Controls
- Getting Started
- Attaching the Strap
- Charging the Battery
- Installing / Removing the Battery
- Power On
- Date & Time Set
- Setting the Language
- Installing & Removing Memory Card
- Attaching & Detaching a Lens
- Lens Image Stabilizer
- Basic Operation
- Using the Quick Control Screen
- Menu Operations
- Formatting a Memory Card
- Switching the LCD Monitor Display
- Basic Shooting & Image Playback
- Advanced Shooting Operations
- Program AE
- Changing the ISO Speed
- Using the Flash
- Changing the AF Mode
- Selecting the AF Point
- Continuous Shooting
- Self-Timer
- Setting Image Quality
- Selecting a Picture Style
- Action Shots
- Changing Depth of Field
- Manual Exposure
- Automatic Depth of Field
- Changing the Metering Mode
- Setting Exposure Compensation
- Auto Exposure Bracketing
- Customizing a Picture Style
- Registering a Picture Style
- Setting the Color Space
- AE Lock
- FE Lock
- Setting the White Balance
- White Balance Correction
- Auto Lighting Optimizer
- Lens Peripheral Illumination Correction
- Preventing Camera Shake
- Live View Shooting
- Shooting Movies
- Handy Features
- Silencing the Beeper
- Card Reminder
- Setting Image Preview Time
- Setting Auto Power-Off Time
- Adjusting LCD Monitor Brightness
- File Numbering Methods
- Auto Rotate of Vertical Images
- Checking Camera Settings
- Restore Default Settings
- Preventing the LCD Monitor from Turning Off Automatically
- Changing the Shooting Settings Screen Color
- Setting the Flash
- Automatic Sensor Cleaning
- Appending Dust Delete Data
- Manual Sensor Cleaning
- Image Playback
- Printing Images
- Customizing the Camera
- Reference
- Troubleshooting
- Error Codes
- System Accessory Map
- Specs
- Index
- Quick Reference Guide
- Macro Photography Made Easy
- Using Image Stabilizer Lenses for Better Results
- Scan of Supplied CD-ROMs
- Software Installation Warning
- Warranty

In-lens
image stabilizer
design
benefits
---------------------------------------------------
\
\
\
\
\_--------
Why
is
each individual
lens
optimized
for
shake
correction?
Each
Canon
IS
Lens
has a unique optical design for specialized performance. So, Canon's optical
correction
systems
and control mechanisms are customized for effective positioning
in
each
lens
model. Canon builds these mechanisms into the
lenses
to
ensure that the optical correction
system
is
optimized for each individual lens.
No
matter which Canon
lens
you
use
-
wide
- angle zoom,
telephoto zoom, fixed focal length telephoto, or standard zoom - you can count on high-precision
camera shake correction at all focal lengths.
EF·S
15·85mm
f/3
5-5.6
IS
USM
_Optical
correction
systems
EF70-300mm
1/4-56
IS
USM
_Opticol
correction
systems
How
do
large
prints
show
outstanding
correction
performance?
Nowadays,
more and more people are enjoying easy
printing
of
large-sized photos using digital
SLR
cameras
and home printers.
While
camera shake blur may not
be apparent
in
postcard-sized prints, it becomes clearly
visible
as
print size increases. Canon's in-lens image
stabilizer accurately compensates for even the slightest
camera shake. That's
why
Canon
IS
Lenses
are the
perfect choice for the
growing
number
of
users
who
enjoy printing - and displaying - their
own
beautiful
large-Sized
digital photos.
I
19
I