
Specifications
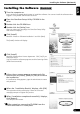

Installing the Software (Windows)
4
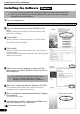
Installing the Software (Windows)
1 Turn the computer on.
2 Place the CanoScan Setup Utility CD-ROM in the
drive.
After you select your language, the CanoScan Setup Utility
main menu will display.
3 Click [Install].
Read the "Notes on Software Installation" and click [Next].
The [Install] window will display.
4 Click [Install].
Read the Software User License Agreement. Click [Yes] if you
accept the terms.
You will install five software programs and the Scanning Guide
(HTML format manual).
5 Follow the on-screen message prompts and click
buttons such as [Install], [Next] or [Yes] to continue
the installation.
6 When the "Installation Results" displays, click [OK].
The registration dialog will display. Follow the on-screen
message prompts to register this product.
7 When "Installation completed successfully" displays,
click [Restart].
The computer will restart.
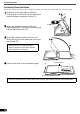
8 After Windows restarts, remove the CD-ROM from
the drive and store it in a safe place.
Continue to page 6.
• If you are running Windows XP or Windows 2000 Professional with multiple user
accounts, you should log on with an administrator user name when installing or
uninstalling software programs.
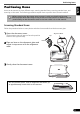
If the "Found New Hardware Wizard" or "Add New Hardware Wizard" appears, click [Cancel].
• In a few cases, your operating system may
require a restart. Follow the on-screen
messages to restart and resume installation.
Windows