
Owner's Manual


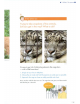

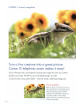
Table Of Contents
- Quick Reference Guide
- Instruction Manual
- Conventions Used in This Manual
- Table of Contents
- Quick Start Guide
- Supplied Accessories
- Parts & Controls
- Getting Started
- Attaching the Strap
- Charging the Battery
- Installing / Removing the Battery
- Installing / Removing a Memory Card
- Using the LCD Monitor
- Power On
- Date & Time Set
- Setting the Language
- Attaching & Detaching a Lens
- Lens Image Stabilizer
- Basic Operation
- Using the Quick Control Shooting Functions
- Menu Operations
- Formatting a Memory Card
- Switching the LCD Monitor Display
- Feature Guide
- Touch Screen Operations
- Basic Shooting & Image Playback
- Fully Automatic Shooting
- Full Auto Techniques
- Disabling Flash
- Creative Auto Shooting
- Shooting Portraits
- Shooting Landscapes
- Shooting Close-Ups
- Shooting Moving Subjects
- Shooting Night Portraits (with a Tripod)
- Shooting Night Scenes (Handheld)
- Shooting Backlit Scenes
- Quick Control
- Shoot by Ambience Selection
- Shoot by Lighting or Scene Type
- Image Playback
- Advanced Shooting Operations
- Program AE
- Setting the Image-Recording Quality
- Changing the ISO Speed
- Optimal Image Characteristics for the Subject
- Changing the AF Operation
- Selecting the AF Point
- Subjects Difficult to Focus
- Continuous Shooting
- Self-Timer
- Using the Built-in Flash
- Convey the Subject’s Movement
- Changing Depth of Field
- Manual Exposure
- Changing the Metering Mode
- Setting Exposure Compensation
- Auto Exposure Bracketing
- Locking the Exposure
- Locking the Flash Exposure
- Auto Correction of Brightness and Contrast
- Noise Reduction Settings
- Lens Peripheral Illumination / Chromatic Aberration Correction
- Customizing Image Characteristics
- Registering Preferred Image Characteristics
- Matching the Light Source
- Adjusting the Color Tone for the Light Source
- Setting the Color Reproduction Range
- Mirror Lockup to Reduce Camera Shake
- Live View Shooting
- Shooting Movies
- Handy Features
- Silencing the Beeper
- Card Reminder
- Setting Image Review Time
- Setting Auto Power-Off Time
- Adjusting LCD Monitor Brightness
- Creating and Selecting a Folder
- File Numbering Methods
- Setting Copyright Information
- Auto Rotate of Vertical Images
- Checking Camera Settings
- Restore Default Settings
- Preventing the LCD Monitor from Turning Off Automatically
- Changing the Shooting Settings Screen Color
- Setting the Flash
- Automatic Sensor Cleaning
- Appending Dust Delete Data
- Manual Sensor Cleaning
- Wireless Flash Photography
- Image Playback
- Searching for Images Quickly
- Magnified View
- Playing Back with the Touch Screen
- Rotating the Image
- Setting Ratings
- Quick Control During Playback
- Playing Movies
- Editing the Movie’s First and Last Scenes
- Slide Show (Auto Playback)
- Viewing the Images on a TV
- Protecting Images
- Erasing Images
- Shooting Information Display
- Post-Processing Images
- Printing Images
- Customizing the Camera
- Reference
- Troubleshooting
- Error Codes
- Specs
- Downloading Images to a Personal Computer
- Quick Reference Guide
- Index
- Do More with Macro
- Great Photography IS Easy
- Flash Classroom
- Scans of CD-ROMs
- Lens Warranty
- Camera Warranty

09
I
2:00PM / Animal snapshots
Turn
a tiny creature into a
great
picture.
Canon
IS
telephoto
zoom
makes
it
easy!
You
'
re
in
the
park
and
a
cute
chipmunk
is
posing
with
in
range!
You
l
ower
yo
ur
camera
and
focus
on
i
ts
eyes.
All
se
t? No,
you
'
re
not
steady
enough.
You
need
a
Canon
IS
Lens
to
stop
camera
shake-
and
even
create
a
soft
ly
hazy
background
.
Picture problems
B
efore
you
blame
your
camera
for
poo
r r
esu
lt
s,
to
ke
a
good
l
oo
k at
your
picture-
t
akin
g
posture
.
Are
you
t
rying
to
shoot
at
low
le
vel
whil
e
squatting
on
your
heels?
Well
,
sometimes
you
can
't
brace
yourself
or
choose
a
steady
platform
Tha
t's
why
you
need
Canon
IS
lenses
to
bani
sh
camera
shake