
User Manual


Recording Audio
82
POINTS TO CHECK
•Set [— Audio Scene] to [„ Custom Setting] (A 79).
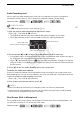
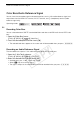
1 Open the [Built-in Mic Wind Screen] screen.
[FUNC.] > [MENU] > p > [Built-in Mic Wind Screen]
2 Touch the desired option and then touch [X].
Options
(
Default value)
NOTES
• Some low-frequency sounds will be suppressed along with the sound of wind. When recording in
surroundings unaffected by wind or if you want to record low-frequency sounds, we recommend
setting [Built-in Mic Wind Screen] to [j Off à].
Microphone Attenuator
If the audio level is too high and the audio sounds distorted while recording , activate the microphone
attenuator (12 dB).
POINTS TO CHECK
•Set [— Audio Scene] to [„ Custom Setting] (A 79).
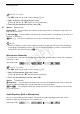
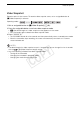
1 Open the [Microphone Attenuator] screen.
[FUNC.] > [MENU] > p > [Microphone Attenuator]
2 Touch the desired option and then touch [X].
Options
(
Default value)
Audio Equalizer (Built-in Microphone)
You can use the audio equalizer to adjust sound levels by specifically targeting the high- or low-
frequency range and selecting one of 3 available levels.
[H Auto (High)]
The camcorder will automatically activate the built-in microphone wind screen at a
high level, as necessary.
[L Auto (Low) ] The camcorder will automatically activate the built-in microphone wind screen at a
low level, as necessary.
[j Off à] The built-in microphone wind screen will be deactivated at all times.
Operating modes:
[2 Automatic]
The camcorder will automatically activate the microphone attenuator as necessary
for optimal audio recording levels so high audio levels will not be distorted.
[i On å] The microphone attenuator will be activated at all times to reproduce more faithfully
the sound dynamics.
Operating modes:
COPY