
Owner's Manual


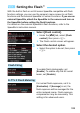
Table Of Contents
- Quick Reference Guide
- Basic Instruction Manual
- Introduction
- Compatible Memory Cards
- About Supplied Instruction Manuals
- Table of Contents
- Supplied Accessories
- Using This Manual
- Quick Start Guide
- Parts & Controls
- Getting Started
- Attaching the Strap
- Charging the Battery
- Installing and Removing the Battery
- Installing and Removing the Memory Card
- Using the LCD Monitor
- Turning On the Power
- Setting the Date and Time
- Selecting the Interface Language
- Attaching and Detaching a Lens
- About the Lens Image Stabilizer
- Basic Operation
- Quick Control
- Menu Operations
- Using the Touch Screen
- Formatting the Card
- Disabling the Beeper
- Setting the Power-off Time / Auto Power Off
- Setting the Image Review Time
- Turning the LCD Monitor Off / On
- Reverting the Camera to the Default Settings
- Displaying the Grid
- Displaying the Electronic Level
- Feature Guide and Help
- Basic Shooting
- Setting the AF and Drive Modes
- Image Settings
- Advanced Operations
- Shooting with the LCD Monitor (Live View Shooting)
- Shooting Movies
- Image Playback
- Viewing the CD-ROM Instruction Manuals / Downloading Images to Your Computer
- Instruction Manual (Supplied on CD-ROM)
- Table of Contents
- Introduction
- Getting Started
- Charging the Battery
- Installing and Removing the Battery
- Installing and Removing the Card
- Using the LCD Monitor
- Turning on the Power
- Setting the Date, Time, and Zone
- Selecting the Interface Language
- Attaching and Detaching a Lens
- Lens Image Stabilizer
- Basic Operation
- Quick Control for Shooting Functions
- Menu Operations
- Using the Touch Screen
- Before You Start
- Displaying the Grid
- Displaying the Electronic Level
- Feature Guide and Help
- Basic Shooting
- Fully Automatic Shooting (Scene Intelligent Auto)
- Full Auto Techniques (Scene Intelligent Auto)
- Disabling Flash
- Creative Auto Shooting
- Special Scene Mode
- Shooting Portraits
- Shooting Landscapes
- Shooting Close-ups
- Shooting Moving Subjects
- Shooting Night Portraits (With a Tripod)
- Shooting Night Scenes (Handheld)
- Shooting Backlit Scenes
- Quick Control
- Shoot by Ambience Selection
- Shoot by Lighting or Scene Type
- Setting the AF and Drive Modes
- Image Settings
- Setting the Image-Recording Quality
- Setting the ISO Speed
- Selecting a Picture Style
- Customizing a Picture Style
- Registering a Picture Style
- Setting the White Balance
- White Balance Correction
- Auto Correction of Brightness and Contrast
- Setting Noise Reduction
- Highlight Tone Priority
- Lens Peripheral Illumination / Chromatic Aberration Correction
- Creating and Selecting a Folder
- File Numbering Methods
- Setting Copyright Information
- Setting the Color Space
- Advanced Operations
- Program AE
- Shutter-Priority AE
- Aperture-Priority AE
- Manual Exposure
- Selecting the Metering Mode
- Setting Exposure Compensation
- Auto Exposure Bracketing (AEB)
- AE Lock
- Bulb Exposures
- HDR (High Dynamic Range) Shooting
- Multiple Exposures
- Mirror Lockup
- Using the Eyepiece Cover
- Using a Remote Switch
- Remote Control Shooting
- Flash Photography
- Shooting with the LCD Monitor (Live View Shooting)
- Shooting Movies
- Image Playback
- Image Playback
- Shooting Information Display
- Searching for Images Quickly
- Magnified View
- Playing Back with the Touch Screen
- Rotating the Image
- Setting Ratings
- Quick Control for Playback
- Enjoying Movies
- Playing Movies
- Editing a Movie’s First and Last Scenes
- Slide Show (Auto Playback)
- Viewing Images on a TV Set
- Protecting Images
- Erasing Images
- Changing Image Playback Settings
- Post-Processing Images
- Sensor Cleaning
- Printing Images
- Customizing the Camera
- Reference
- INFO. Button Functions
- Checking the Battery Information
- Using a Household Power Outlet
- Using Eye-Fi Cards
- Function Availability Table According to Shooting Mode
- Menu Settings
- System Map
- Troubleshooting Guide
- Error Codes
- Specifications
- Handling Precautions: EF-S18-55mm f/3.5-5.6 IS STM, EF-S18-135mm f/3.5-5.6 IS STM
- Viewing the CD-ROM Instruction Manuals / Downloading Images to Your Computer
- Troubleshooting
- Error Codes
- Specs
- Index
- Wi-Fi Function Basic Instruction Manual
- Scans of Supplied CD-ROMs
- 18-55mm f/3.5-5.6 IS Lens (Supplied with 28070D55)
- Warranty

D Using an External Speedlite
194
With an EZ/E/EG/ML/TL-series Speedlite set to A-TTL or TTL
autoflash mode, the flash can be fired at full output only.
Set the camera’s shooting mode to <a> (manual exposure) or
<f> (aperture-priority AE) and adjust the aperture setting before
shooting.
When using a Speedlite that has manual flash mode, shoot in the
manual flash mode.
Sync Speed
The camera can synchronize with non-Canon compact flash units at
1/250 sec. and slower speeds. With large studio flash units, be sure to
test the flash synchronization before shooting with the sync speed set
within approx. 1/60 sec. to 1/30 sec., since the flash duration of such
units is longer than that of compact flash units and vary depending on
the models.
Cautions for Live View Shooting
If you use a non-Canon flash unit with Live View shooting, set [A2:
Silent LV shoot.] to [Disable] (p.231). The flash will not fire if it is set to
[Mode 1] or [Mode 2].
Canon Speedlites Other Than the EX-series
Using Non-Canon Flash Units
If he camera is used with a flash unit or flash accessory dedicated to
another camera brand, the camera may not operate properly and
malfunction may result.
Do not attach a high-voltage flash unit on the camera’s hot shoe. It may
not fire.