
User manual


40
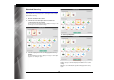
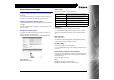
Select document settings
By default, CaptureOnTouch enables the [Full auto] scan setting, so
scanning is implemented using the scan conditions that match the
document.
To specify the document size, color mode, and other settings, set
the desired scan condition by editing the scan mode panel.
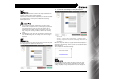
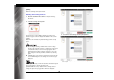
Creating new [Select document] panels
Click the [New document] button, and a [New document] panel will
be added.
Click to display the list of panel types. The selected type of the
panel is created.
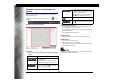
Edit [Select document] panel
The [Select document edit screen] opens when you click the [ ]
button in the [Select document] panel.
Click the [Select document] tab in the shortcuts editing window.
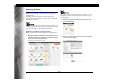
Scan settings
Makes the scan settings.
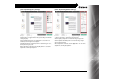
[Color mode]
Select the color mode for scanning from below.
[Page Size]
Select the paper size of the document to be scanned.
If you specify [Match original size], the page size of the scanned
document is detected and the images are saved at the detected
size.
[Dots per inch]
Select the resolution.
Select [Detect automatically] and the software will automatically
scan the document at the optimum resolution.
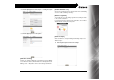
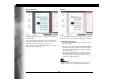
[Scanning Side]
Select the scanning side of the document.
If you select [Skip blank page], scanned images of blank pages are
not saved.
[Automatically straightens skewed images]
If a document is not straight when fed, the scanner detects that the
document is not straight from the scanned image and straightens
the skewed image.
Select the setting from below.
[OFF]
[Straightens with angle of fed documents]
[Straightens with angle contents of fed documents]
Detect automatically Automatically determines the color mode based
on the document content and scans accordingly.
24-bit Color Scans the document in color.
24-bit color
(photograph)
Scans the document in color using photo-
compatible tones.
Grayscale Scans the document in Grayscale.
Grayscale (photograph) Scans the document in color using photo-
compatible tones.
Black and White Scans the document in black and white (binary).