
User Manual


Table Of Contents
- Before Use
- Basic Guide
- Advanced Guide
- 1 Camera Basics
- 2 Auto Mode / Hybrid Auto Mode
- 3 Other Shooting Modes
- Shooting with Your Favorite Settings (Creative Assist)
- Specific Scenes
- Image Effects (Creative Filters)
- Shooting High-Contrast Scenes (High Dynamic Range)
- Adding Artistic Effects
- Shooting with a Fish-Eye Lens Effect (Fish-Eye Effect)
- Shooting Oil Painting-like Photos (Art bold Effect)
- Shooting Watercolor-like Photos (Water Painting Effect)
- Shots Resembling Miniature Models (Miniature Effect)
- Playback Speed and Estimated Playback Time (for One-Minute Clips)
- Shooting with a Toy Camera Effect (Toy Camera Effect)
- Shooting with a Soft Focus Effect
- Shooting in Monochrome (Grainy B/W)
- Shooting High-Contrast Scenes (High Dynamic Range)
- Shooting Movies in Movie Mode
- 4 P Mode
- Shooting in Program AE ([P] Mode)
- Adjusting Shooting Functions from a Single Screen
- Image Brightness (Exposure)
- Image Colors
- Shooting Range and Focusing
- Flash
- Other Settings
- 5 Tv, Av, M, and C Mode
- 6 Playback Mode
- 7 Wi-Fi Functions
- Available Wi-Fi Features
- Importing Images into a Smartphone
- Sending Images to a Registered Web Service
- Viewing Images Using a Media Player
- Printing Images Wirelessly from a Connected Printer
- Sending Images to Another Camera
- Image Sending Options
- Sending Images Automatically (Image Sync)
- Shooting Remotely
- Editing or Erasing Wi-Fi Settings
- 8 Setting Menu
- Adjusting Basic Camera Functions
- Date-Based Image Storage
- File Numbering
- Formatting Memory Cards
- Changing Video Formats
- Electronic Level Calibration
- Using Eco Mode
- Power-Saving Adjustment
- Screen Brightness
- World Clock
- Date and Time
- Display Language
- Silencing Camera Operations
- Hiding Hints and Tips
- Changing Touch Screen Settings
- Cleaning the Image Sensor
- Checking Certification Logos
- Adjusting Other Settings
- Restoring Defaults
- Adjusting Basic Camera Functions
- 9 Accessories
- System Map
- Optional Accessories
- Using Optional Accessories
- Using the Software
- Printing Images
- 10 Appendix
- Troubleshooting
- On-screen Messages
- On-screen Information
- Functions and Menu Tables
- Handling Precautions
- Specifications
- Type
- Image Sensor
- Recording System
- Image Processing during Shooting
- Autofocus
- Exposure Control
- Shutter
- Flash
- Drive, Self-timer System
- Still Photo Shooting
- Movie Shooting Settings
- LCD Monitor
- Playback
- Post-processing of Images
- Direct Printing
- Custom Functions
- Interface
- Wi-Fi
- Network Functions
- Power Supplies
- Dimensions and Weight
- Operation Environment
- Number of Shots per Memory Card
- Recording Time per Memory Card
- Internal Flash Range Guide
- Battery Pack LP-E17
- Battery Charger LC-E17/LC-E17E
- Type
- Index
- Wi-Fi (Wireless LAN) Precautions
87
Advanced Guide
Basic Guide
1
Camera Basics
2
Auto Mode /
Hybrid Auto Mode
3
Other Shooting Modes
Tv, Av, and M Mode
6
Playback Mode
7
Wi-Fi Functions
8
Set-Up Menu
9
Accessories
10
Appendix
Index
4
P Mode
5
Tv, Av, M, and C Modes
Before Use
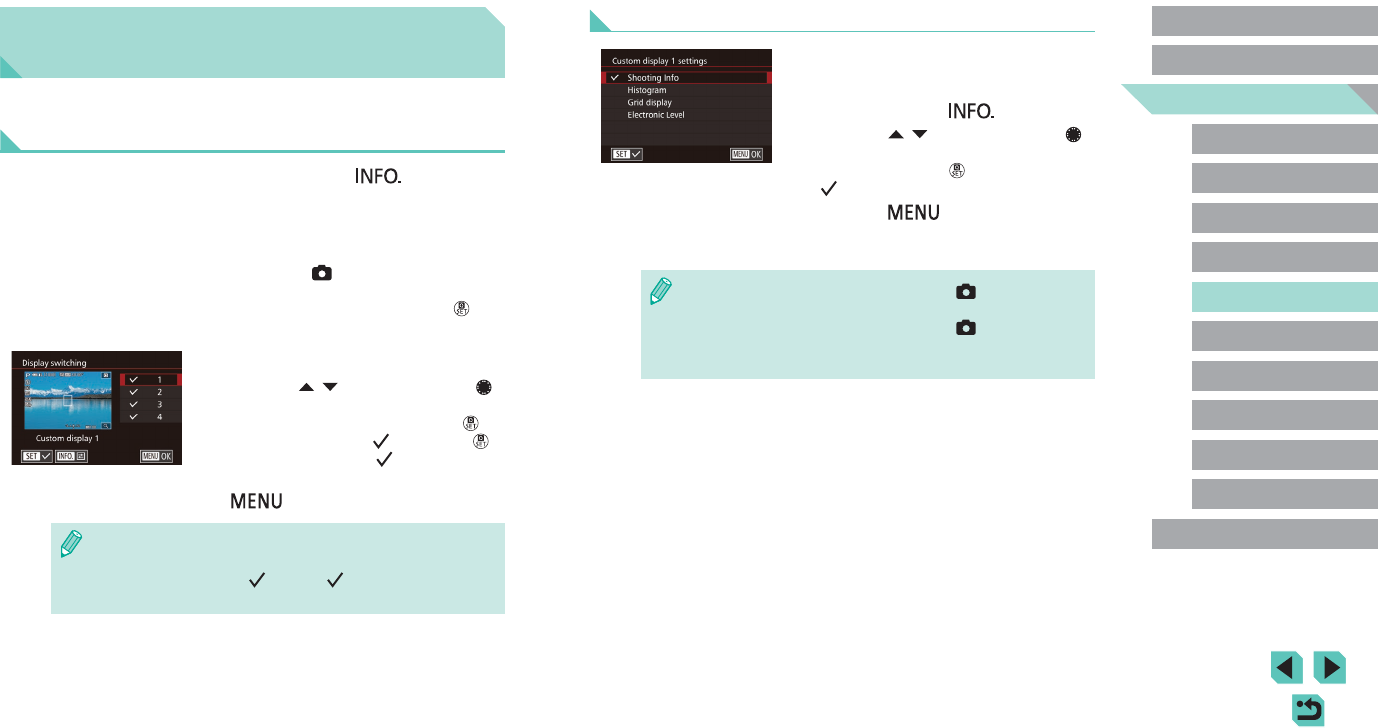
Customizing Displayed Data
● Follow steps 1 – 2 in “Customizing
Display Information” (
=
87) to select
[Custom display 1] or [Custom display 2]
and then press the [ ] button.
● Press the [
][ ] buttons or turn the [ ]
dial to choose the information to display
and then press the [ ] button to add a
[ ].
● Press the [
] button to return to the
[Display switching] screen and check the
resulting display.
● Go to [Shooting information display] on the [ 1] tab and choose
[Grid display] to change to a ner grid.
● Go to [Shooting information display] on the [
1] tab and choose
[Histogram] to change the displayed histogram from a brightness
histogram to an RGB histogram.
Customizing Controls and
Display
Customizing Display Information
You can dene which screens are shown when the [ ] button
is pressed in the shooting screen. You can also customize the data
displayed by the screens.
1
Access the setting screen.
● Choose the [ 1] tab, select [Shooting
information display], and then choose
[Display switching] and press the [ ]
button (
=
31).
2
Congure the settings.
● Press the [ ][ ] buttons or turn the [ ]
dial to choose the screens you do not
want displayed and then press the [ ]
button to remove the [ ]. Press the [ ]
button again to add a [ ].
● To return to the menu screen, press the
[
] button.
● Use the display sample on the left side of the screen to see what
your selected effect in step 2 will look like.
● You cannot remove all [
] or add a [ ] only to [INFO. Quick
Control].