DIGITAL DOCUMENT CAMERA DZ-3600U ▼ ▼ ▼ ▼ ▼ Setup for Operation with a Computer ▼ ▼ ▼ ▼ ▼ An introduction to the Features ▼ ▼ ▼ ▼ ▼ DZ-3600U User’s Manual Mastering the Basics Operating without a Computer ▼ ▼ ▼ ▼ ▼ DIGITAL DOCUMENT CAMERA User’s Manual ▼ ▼ ▼ ▼ ▼ Troubleshooting CANON INC. 30-2, Shimomaruko 3-chome, Ohta-ku, Tokyo 146-8501, Japan Appendix ▼ ▼ ▼ ▼ ▼ U.S.A. —— CANON U.S.A., INC. NEW YORK OFFICE One Canon Plaza, Lake Success, NY 11042, U.S.A. Phone: 516-328-5960 CANON U.S.A., INC.
Introduction Thank you for purchasing a Canon DZ-3600U Digital Document Camera. Please read this Users Guide thoroughly to use this product safely and extend its life. In particular, please read and observe the safety precautions. Features of the DZ-3600U Digital Document Camera • High-Resolution This device employs the Variable Refraction Optical System (VAROS) and a built-in 12 power zoom lens to achieve high-resolution image capturing.
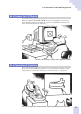
Introduction How to Use the Guides The following guides are supplied with the DZ-3600U Digital Document Camera. Read the descriptions below to make the most efficient use of them to suit your own purposes.
Safe Use of the Equipment An exclamation point within a triangle is intended to alert the user to the presence of important operating and maintenance (servicing) instructions in the literature accompanying the equipment. 1. Important Warnings TO REDUCE THE RISK OF ELECTRIC SHOCK, DO NOT REMOVE THE COVER (OR BACK) OF THE EQUIPMENT. THERE ARE NO USER-SERVICEABLE PARTS INSIDE. REFER SERVICING TO QUALIFIED SERVICE PERSONNEL. The serial number of this equipment may be found on the rear of the equipment.
Safe Use of the Equipment FCC Notice DZ-3600U Digital Document Camera This device complies with Part 15 of the FCC Rules. Operation is subject to the following two conditions: (1) this device may not cause harmful interference, and (2) this device must accept any interference received, including interference that may cause undesired operation. Note: This device has been tested and found to comply with the limits for a Class B digital device, pursuant to Part 15 of the FCC Rules.
Safe Use of the Equipment Important Safety Instructions In these safety instructions, the word ‘equipment’ refers to the Canon DZ-3600U Digital Document Camera and all its accessories. 1. Read Instructions - All the safety and operating instructions should be read before the equipment is operated. 2. Retain Instructions - The safety and operating instructions should be retained for future reference. 3. Heed Warnings - Pay attention to all warnings on the equipment and in the operating instructions. 4.
Safe Use of the Equipment 11. Power Cord Protection - Power cords should be routed so that they are not likely to be walked on or pinched by items placed upon or against them. Pay particular attention to plugs and the point from which the cords exit the equipment. 12. Lightning - For added protection of this equipment during a lightning storm, or when it is left unattended and unused for long periods of time, disconnect it from the electrical outlet.
Safe Use of the Equipment 19. Do not install the equipment in the following locations as this can cause fire or electric shock. - Hot locations. - Locations close to open flame or fire. - Very humid or dusty locations. - Locations exposed to direct sunlight. - Locations exposed to salt spray. - Locations close to flammable solvents (alcohol, thinners, etc.). 20.
A La Carte Menu of DZ-3600U Applications The DZ-3600U can be used in an amazing variety of applications, such as those introduced below. As a Presentation Tool Used with the accompanying DZ-3600U Presentation Software, the equipment becomes a highly effective presentation tool that works in conjunction with a computer and projector. Its single remote control places the powerful features of the DZ-3600U, its software and other programs, such as PowerPoint, at your fingertips.
A La Carte Menu of DZ-3600U Applications As a Scanner for 3-D Objects With the supplied DZ-3600U TWAIN Driver, the equipment can be used with standard graphics programs to capture a remarkable assortment of three-dimensional objects and films. Instant 3-D scanning to capture those difficult contours. As a Conventional Visualizer Of course the DZ-3600U fits the bill as a conventional visualizer (video output device) connected directly to a video monitor or a projector.
Table of Contents Safe Use of the Equipment ................................................. 5 Chapter 1 Setup for Operation with a Computer Connecting to a Power Source ................................................ 16 Connecting to a Computer ..................................................... 17 Computer System Requirements ................................................ 18 Installing the Software .........................................................
Table of Contents Opening Saved Images ................................................. 58 .... 59 Forwarding/Reversing the Display to the Next Image ..................................... 61 Selecting Images from the List ................... 62 Adjusting the Display Size of Preview Images .................. 63 Changing the Display Size of Captured Images ..................... 65 Adjusting the Brightness of Preview Images .............................
Table of Contents Chapter 5 Troubleshooting Troubleshooting tips ........................................................... 100 Error Messages .................................................................... 103 Appendix Removing the Equipment from the Box ............................... 106 Packing List ........................................................................ 108 Changing the Remote Control Batteries ............................... 109 Components Guide ..............................
Setup for Operation with a Computer ▼ ▼ ▼ ▼ ▼ Chapter 1 1
Connecting to a Power Source Connect the DZ-3600U to a power source with the supplied power cord. This explanation assumes that you have already removed the main unit and accessories from the box and placed them on a stable surface. If you have not yet unpacked them, read and follow the steps described in Removing the Equipment from the Box (P.106), then find a suitable location. !!! Important !!! • Do not use a power cord other than the one supplied. Plug it into a 120volt electrical outlet only.
Connecting to a Computer When connected to a computer, the main unit can load captured images onto the computer or be controlled from the computer. For instructions on how to operate the equipment without a computer, see Chapter 4, Operating without a Computer. 1. Confirm that the power is off on the main unit and all other devices. 2.
Connecting to a Computer Computer System Requirements The following minimum requirements must be met by your computer for it to successfully run the software for the DZ-3600U.
Installing the Software The bundled software must be installed onto the hard drive of your computer for it to work with the DZ-3600U. The instructions below will show you how to install two programs: DZ3600U Presentation Software (hereafter referred to as Presentation Software) and DZ-3600U TWAIN Driver (hereafter referred to as TWAIN Driver). As its name suggests, Presentation Software works with your computer to deliver presentations, serving as the key interface between the two.
Installing the Software 3. Place the software CD-ROM into the computer’s drive. • The setup utility will automatically start after a few moments. • If the setup utility does not automatically start up after a long interval, double-click the [My Computer] icon on the Windows desktop and double-click the CD-ROM icon in the My Computer window. Double-click the [SETUP] icon which appears in the next window. The setup utility will start. 4. Click the [Next] button. 5. Click the [Next] button.
Installing the Software 6. Click the [Next] button. Click the [Next] button. Setup for Operation with a Computer 7. 1 8. If you wish the software to start automatically, click this check box to place a check mark in it. By placing a check mark in this box you are setting it so that Presentation Software will automatically start when you turn on the computer and run Windows (a shortcut will be placed in Window’s Startup folder). (p.
Installing the Software 9. Click the [Next] button. • The software installation will start. The window below will display when the installation is finished. 10. Click the [Finish] button. • The software installation is complete. This concludes the software installation process. 11. Click the Windows [Start] button on the taskbar, select [Shut Down] from the menu and follow the correct procedures to shut down Windows. 12. Turn off the computer, its monitor and any other peripherals.
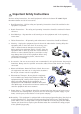
Important Instructions for the Remote Control A remote control is supplied with the DZ-3600U. It can be used to control various functions while you are standing at a podium or among the audience. CAPTURE W RESOLUTION ZOOM T PREVIEW LIGHTS + COLOR AUTO NEAR FAR APP REV FWD FOCUS ROTATE Setup for Operation with a Computer BRIGHTNESS – 1 We will have you try various operations using this remote control in the next chapter.
Important Instructions for the Remote Control Aim the Remote Control at the Camera Head The remote control sensor (the component that receives the infrared signals from the remote control) is located on the camera head. You must aim the remote control at the camera head for it to be effective. Pointing it at the monitor or screen on which images are being displayed will not work.
Chapter 2 ▼ ▼ ▼ ▼ ▼ Mastering Basic Operations 2
Assembly This chapter explains the most fundamental and important operating procedures step by step. We encourage you to try each step as you read about it. !!! Important !!! • This chapter assumes that you have correctly set up the DZ-3600U for use with a computer and installed Presentation Software. If you have not yet done this, follow the instructions in Chapter 1, Setup for Operation with a Computer, before resuming the steps below.
Assembly 4. Push the arm lock release lever, which can be found on the main unit’s left side at the back. • The camera arm will now float freely. Arm Lock Release Lever 5. Grasp the camera arm and lift it up until it locks into place with a click. Swivel the camera head horizontally until it clicks into place. Mastering Basic Operations 6. 2 7. Orient the camera head so that the lens points directly onto the object stage.
Turning On the Power Turn on the power of each device in the correct sequence. 1. Press the power switch on the main unit to set it to the ( | ) position. • All the indicators on the control panel will light for about 20 seconds after the power is turned on while the main unit initializes itself. It will indicate the ready state when only the power indicator and a few other indicators remain lit. POWER 2. Turn on the other devices that you’ll be using (computer monitor, computer CPU, projector, etc.).
Starting the Software If you have set Presentation Software to start automatically (see step 8 at page 21) after Windows has initialized as described in Chapter 1, the following window will display. If this is the case, proceed directly to the next page. The toolbar will vanish from the display after a few moments. There is no need for concern. This is discussed in Chapter 3.
Placing Objects Find a document or other object and place it at the center of the object stage, the white translucent portion. 1. Place the document or object in the center of the object stage, orienting it as shown in the illustration. Is the document or object displayed correctly in the large screen monitor, projector screen or your computer monitor? If it does not display, see Chapter 5, Troubleshooting. Now try putting your hand on the document or object. Notice how the display changes in real time.
A Few of the Basics We will now introduce you to a few procedures involving the remote control. !!! Important !!! • Aim the remote control at the sensor on the camera head to execute commands. For details, see the section entitled Important Instructions for the Remote Control (P.23). 2 ••• Note ••• Mastering Basic Operations • Each of the functions introduced in this section, such as zooming, can also be controlled from the main unit’s control panel or your computer.
A Few of the Basics Zooming This topic will explain how to change the size at which an object appears in the display. The size is changed with the zoom function. 1. Press the [T] button on the remote control for two or three seconds. CAPTURE W RESOLUTION ZOOM T PREVIEW • The display will show a close-up of the document or object. LIGHTS BRIGHTNESS – + COLOR AUTO NEAR FAR APP REV FWD FOCUS 2. Press the [W] button in the same manner.
A Few of the Basics Capturing Images This topic will show you how to capture the display contents as a still image. The capture function is used to scan and load the document or object. 1. Press the [Capture] button on the remote control. • The capture will start once you press the capture button, and the captured image will appear in the computer’s display after a few moments.
A Few of the Basics Rotating Captured Images Next, try your hand at changing the orientation of the displayed image with the rotate function. CAPTURE W RESOLUTION ZOOM T 1. PREVIEW Press the [Rotate] button on the remote control. LIGHTS BRIGHTNESS – + COLOR AUTO NEAR FAR APP REV FWD • The image will rotate 90 degrees counterclockwise each time the button is clicked.
Closing Software Programs The following procedures are for closing the Presentation Software program. 1. Move the mouse cursor close to the top of the window. • The toolbar will reappear. 2. • A message will appear asking if you wish to close the program without saving the captured image. 3. Mastering Basic Operations Click the ( ) closebox at the extreme right of the toolbar. 2 Click the [No] button.
Turning Off the Power Turn off the power on the devices in the correct sequence. !!! Important !!! • Wait at least five seconds before turning the power switch back on after shutting it off. Turning it on too quickly may result in a malfunction. 1. Click the Windows [Start] button on the taskbar and select [Shut Down], following the correct procedures to close Windows. 2. Press the power switch on the DZ-3600U main unit to set it to the ( ) position. • The main unit will power down. 3.
Knock-Down This topic explains how to fold the arms and prepare the equipment for storage or transport. You may skip this topic if you will not be storing the equipment. 1. Swivel the camera head until it locks into place with the lens pointing up. 2. 3. Support the arm with your right hand while you push the arm lock release lever with your left. 2 Mastering Basic Operations Turn the camera head in a horizontal plane to align the grooves. • The arm will now move freely.
Knock-Down 4. Fold the arm down gently until it clicks into place on the object stage. 5. Fold down the left front light first. 6. Fold down the right front light last. • Face the lights toward each other. 7. If required, place the cover carefully over the unit when the lamps have cooled sufficiently. !!! Important !!! • The fluorescent tubes in the arm lights may become extremely hot after use.
Chapter 3 An Introduction to the Features 3
About the Bundled Software This topic features the two programs bundled with the DZ-3600U. The Two Programs to Install The software installed onto your computer with the setup utility includes DZ-3600U Presentation Software, an application program, and DZ-3600U TWAIN Driver, a driver for capturing images. DZ-3600U Presentation Software This application program assists in creating effective full-featured presentations with the DZ-3600U Digital Document Camera.
About the Bundled Software DZ-3600U TWAIN Driver This driver software is for use within standard image processing (graphics) application programs to capture still images from the DZ3600U. This driver allows you to use the graphics programs with which you are the most familiar to operate the DZ-3600U as a three-dimensional scanner. 3 !!! Important !!! • Application programs must be TWAIN-compliant (TWAIN_32) to be used with the DZ-3600U TWAIN Driver.
Preview Mode and Still Mode The first priority in using the Presentation Software program is to learn the distinction between the preview mode and the still mode. Presentation Software features two modes, the preview and still modes, and is always in one mode or the other. The following topic addresses the significance and role of the respective modes. •••␣ Note␣ ••• • Present ation So ftw ar e starts up in the pr eview mode .
Preview Mode and Still Mode Still Mode The still mode is for viewing images on a computer display (or other device connected to the computer, such as a projector or large screen monitor) that have been loaded from the DZ-3600U into the computer. Off-Line Display of Images Loaded onto a Computer In still mode, you can switch between or change the display size of numerous previously loaded images.
Toolbar and Status Bar This topic briefly explains the buttons and message area that appear at the top of the Presentation Software window. Toolbar The toolbar is the area at the top of the window that contains the buttons for controlling various Presentation Software functions. The buttons on the toolbar change according to the mode. Toolbar in Preview Mode Toolbar in Still Mode !!! Important !!! • Some buttons, such as the ( ) button, are split into two sections with a left and right portion.
Toolbar and Status Bar Display/Hide the Toolbar and Status Bar The toolbar and status bar are intended as tools for the presenters and their helpers, and are not meant to be seen by the audience. Presentation Software, therefore, provides the means to easily hide and display them. Display the Toolbar and Status Bar ▼ Move the mouse cursor to the top of the window • The toolbar and status bar will display.
Capturing Images Preview Mode Still Mode The images captured by the DZ-3600U’s camera can be loaded onto a computer as still images. This guide describes individual functions and commands from this point onward. The preview mode and still mode notations in the boxes at the top right of the title page for each topic indicate the mode(s) to which the topic applies. When this command is executed in preview mode, Presentation Software automatically switches to still mode to display the captured image.
Capturing Images Procedure with the Control Panel POWER CAPTURE RESOLUTION PREVIEW WHITE BALANCE AUTO NEGA DETAIL MANUAL RED BLUE SOFT HAR Capturing Images Press the [Capture] button. • You will capture the subject appearing in the camera lens when the button is pushed. 3 Procedure with the Computer Click the ( ) button. • You will capture the subject appearing in the camera lens when the button is clicked.
Selecting the Capture Resolution Preview Mode Still Mode This topic explains how you can set the resolution at which an image is captured. At the High Resolution setting, images are 1,900 pixels wide by 1,424 pixels high. At the Low Resolution setting, images are 640 pixels wide by 480 pixels high. •••␣ Note ••• • The resolution is set to High Resolution at startup.
Selecting the Capture Resolution Procedure with the Control Panel POWER CAPTURE RESOLUTION PREVIEW WHITE BALANCE AUTO NEGA DETAIL MANUAL RED BLUE SOFT HAR Selecting the Capture Resolution Press the [Resolution] button. • Each press of the button will switch between the two resolution settings. • The resolution setting will display on the Presentation Software status bar.
Switching to Preview Mode Still Mode This topic addresses how you can switch from still mode to the preview mode. Procedure with the Remote Control Switching to Preview Mode CAPTURE W RESOLUTION ZOOM In still mode, press the [Preview] button. PREVIEW T • The DZ-3600U will switch from the still mode to the preview mode and begin to display images in real time.
Selecting the Display Resolution Preview Mode In preview mode, you can select between display settings that either feature higher resolution or faster display speed for real-time images. If [High Clarity] is selected, priority is placed on displaying images at the highest resolution setting, but the speed at which images appear and refresh (the speed at which each frame appears) will be slower.
Selecting the Display Resolution Procedure with a Computer Selecting the Display Resolution Click the ( ) button to the right of the ( ) button and select either [High Clarity] or [High Speed] from the menu. • The display resolution and display rate will change. • In still mode, click this button to switch into preview mode and select a display resolution.
Saving Images Preview Mode Still Mode Captured images can be saved as a file to a computer disk. Images can be saved to disk in any of the following three ways. Please note that files can only be saved and opened with the computer and not with the remote control or DZ-3600U control panel. Saving Images as Presentation Software Files This method allows you to save all of the currently captured images to disk at once. Files saved with this method can be opened again by the Presentation Software program.
Saving Images Saving Images As Presentation Software Files 1. Click the ( ) button. • A menu will display. Preview Mode Still Mode 2. Click [Save History]. • The Save As dialog will display. 3. Specify a folder and file name, then click the [Save] button. • All of the files that have been captured up to this point will saved as Presentation Software files.
Saving Images Saving Just the Displayed Image 1. Ensure Presentation Software is in still mode and display the image you wish to save. 2. Click the ( ) button. • A menu will display. 3 3. • The Save As dialog will display. An Introduction to the Features Click [Export Current Image]. 4. Specify a folder, file name and file format, then click the [Save] button. • This will save the image as an image file.
Saving Images Saving All Images and the HTML Index 1. Click the ( ) button. • A menu will display. Preview Mode Still Mode 2. Click [Export All Images]. • The Export Still Images dialog will display. 3. Specify the folder location and folder name, then click the [OK] button. • To change the suggested folder location, click the [Browse] button to the right.
Saving Images ••• Note ••• • The following window will display if the HTML index file created by the Saving All Images and the HTML Index method is opened with a browser program for viewing Internet web sites. Click the [Image1], [Image2], etc., icons to open and display each respective image file.
Opening Saved Images Preview Mode Still Mode Presentation Software files saved to disk can be opened and displayed. !!! Important !!! • Only files saved in the Presentation Software file format with a “.PIH” file extension can be opened. Image files in standard file formats, such as JPEG or bitmap images, cannot be opened. • Opening a file causes the unsaved images that have been captured up to that point to be lost.
Forwarding/Reversing the Display to the Next Image Preview Mode Still Mode When you are displaying an image in still mode, you can forward or reverse the display to the next image. In preview mode, Presentation Software automatically switches into still mode to perform this procedure. In preview mode, only the [REV] button on the remote control and ( button on the toolbar are enabled for this command.
Forwarding/Reversing the Display to the Next Image Procedure with a Computer To Reverse the Display to the Previous Image Click the ( ) button. • The image immediately prior to the currently displayed image will display. • In preview mode, Presentation Software will switch into still mode and display the last captured image. Preview Mode Still Mode 60 To Forward the Display to the Next Image Click the ( ) button. • The image immediately after the currently displayed image will display.
Selecting Images from the List Preview Mode Still Mode A particular image can be selected from a list of previously captured images and displayed. If this command is initiated in preview mode, Presentation Software automatically switches to still mode and displays the selected image. •••␣ Note ••• • A scroll bar may appear on the right side of the image list depending upon the number of previously captured images. Use the scroll bar to find the file you wish to select.
Adjusting the Display Size of Preview Images Preview Mode The zoom command can be used to change the image display size. To make zooming easier, set the display resolution to [High Speed]. !!! Important !!! • Over-zooming the image of a three-dimensional object may exceed the focal adjustment capabilities, resulting in a blurred image. • The image may be out of focus if it is over-zoomed and the switch for the closeup lens is set to Off.
Changing the Display Size of Captured Images Still Mode The display size of captured images can be changed in still mode. !!! Important !!! • The zoom buttons will be shown gray when the maximum level of magnification is about to be exceeded and the command will not execute. ••• Note ••• • When the image is zoomed larger than the window, scroll bars appear on the right and bottom of the window. It is also easy to shift the image in the ) cursor buttons on the remote control.
Changing the Display Size of Captured Images Procedure with a Computer There are two ways to change the zoom setting with the computer. Method 1 This method uses the Zoom Out/Zoom In buttons. Zoom Out Zoom In Click the ( Click the ( ) button. ) button. Method 2 This method uses the pull-down menu on the status bar to select a zoom setting. Select a Display Size Click the arrow here and select a size from the list.
Adjusting the Brightness of Preview Images Preview Mode The brightness of images in preview mode can be adjusted. ••• Note ••• • This function can be used to adjust the image brightness when an extremely dark or bright document or object is displayed, or when the document is relatively small and greater contrast is required to distinguish it from the white of the object stage. • When the document is extremely dark, the image quality can be improved by placing a piece of black paper behind it.
Adjusting the Brightness of Preview Images Procedure with the Control Panel AUTO -- + EXT IN ZOOM FOCUS BRIGHTNESS MANUAL NEAR WIDE TELE W T LIGHTS IN1:Green IN2:Orange FAR Adjusting the Brightness Turn the [Brightness] dial. • Twisting the dial clockwise brightens the image. Twisting it counterclockwise darkens the image. Procedure with a Computer Brighter Darker Click the ( 66 ) button. Press the ( ) button.
Adjusting the Focus of Preview Images Preview Mode The focus is normally adjusted with the autofocus function, but it can be adjusted manually with the procedures below. !!! Important !!! • Do not forget to reset the DZ-3600U to autofocus (auto indicator on) after you have manually adjusted an image and are displaying the next. • Pressing the [Auto] button in autofocus mode will turn off the autofocus.
Adjusting the Focus of Preview Images Procedure with the Control Panel AUTO -- + To Turn Autofocus On/ Off Press the [Auto] button. • Autofocus is turned on or off each time the button is pressed. • The auto indicator lights when autofocus is on. EXT IN ZOOM FOCUS BRIGHTNESS MANUAL NEAR WIDE TELE W T LIGHTS IN1:Green IN2:Orange FAR To Adjust the Focus to a Closer Setting Press the [Near] button. • Autofocus will shut off when the button is pressed.
Adjusting the Detail of Preview Images Preview Mode Use the detail function to adjust the sharpness of contour detail in the image. !!! Important !!! • Over- emphasizing the image contours may cause it to flicker. •••␣ Note ••• • The image detail can also be adjusted in still mode. However, the change in detail cannot be verified unless a video monitor is directly connected to the DZ-3600U. Procedure with the Remote Control This function cannot be controlled with the remote control.
Adjusting the Color Balance of Preview Images Preview Mode The color balance is normally adjusted automatically to the document or object with the auto white balance function. The following procedures may be used to adjust the color balance manually if the color equilibrium is disturbed by a marked change in the ambient lighting. A large change in the ambient lighting around the DZ-3600U may throw off the color balance and produce a red or blue bias.
Adjusting the Color Balance of Preview Images Procedure with the Remote Control This function cannot be controlled with the remote control. Procedure with the Control Panel POWER CAPTURE RESOLUTION PREVIEW WHITE BALANCE AUTO RED Resetting the White Balance/ Restoring Auto White Balance Press the [Auto] button. DETAIL BLUE SOFT HARD Adjusting the Color Balance Adjust the color balance by twisting the [Manual] dial while the auto indicator is off.
Adjusting the Orientation of Preview Images Preview Mode The image in the display can be rotated 90 degrees without physically shifting the object on the object stage. !!! Important !!! • The purpose of this command is to change the orientation of the image on a computer display. This function has no direct effect upon the image signal from the DZ-3600U. • To place a document that will be reoriented with this function, place the top edge on the right of the object stage.
Adjusting the Orientation of Preview Images Control Panel This command cannot be executed from the control panel. Procedure with a Computer To Restore the Original Orientation Click the ( ) button. To Rotate 90 Degrees Click the ( 3 ) button. An Introduction to the Features • The image will rotate 90 degrees counterclockwise, causing a document that was placed sideways on the object state to appear vertical.
Rotating Captured Images Still Still Mode Mode This command rotates captured images in 90-degree increments in the display. Procedure with the Remote Control To Rotate an Image FOCUS AUTO NEAR FAR APP REV FWD Press the [Rotate] button. • The image will rotate 90 degrees counterclockwise each time the button is pressed. ROTATE Procedure with the Control Panel This command cannot be executed with the control panel.
Rotating Captured Images Method 2 This method allows you to select from the [Rotate Left 90], [Rotate Right 90] and [Rotate 180] options. To Select an Angle and Rotate the Image Click the arrow ( ) button to the right of the ( ) button and select an option from the menu. • The image will rotate through the specified arc.
Capturing an Object in Monochrome Mode Preview Mode Objects can be recorded as grayscale (black, shades of gray, and white) or monochrome images with the DZ-3600U. !!! Important !!! • If an image is captured after the DZ-3600U has been switched to grayscale or monochrome mode, it will be loaded onto the computer as a monochrome. ••• Note ••• • The source object does not have to be monochrome to use this function to good effect.
Using the Front Lights and Backlight Preview Mode This command turns the front lights and backlight on and off. Turn the front lights on when using the DZ-3600U in dark settings. Use the backlight to illuminate films and transparencies, such as OHP transparencies. !!! Important !!! • The fluorescent tubes in the front lights become very hot when operated. To avoid burns, please be extremely careful not to touch the tubes directly with your fingers or other body parts.
Using the Front Lights and Backlight Procedure with the Control Panel AUTO -- + EXT IN ZOOM FOCUS BRIGHTNESS MANUAL NEAR WIDE TELE W T LIGHTS IN1:Green IN2:Orange FAR To Turn the Front Lights and Backlight On/Off Press the [Lights] button. • The sequence progresses from lights off, to front lights on, and backlight on with each press of the button.
Shooting Negatives Preview Mode To view negative films, turn on the backlight and switch to negative mode. Ensure that the backlight is lit (P.77). Procedure with the Remote Control This function cannot be controlled with the remote control. Procedure with the Control Panel POWER CAPTURE RESOLUTION PREVIEW WHITE BALANCE AUTO NEGA DETAIL MANUAL RED BLUE SOFT HARD To Switch to Negative Mode Press the [NEGA] button. Procedures Required for showing Negative Films 1.
Reversing or Inverting Images Preview Mode The mirror and flip buttons on the camera head can be used to reverse or invert an image. •••␣ Note ••• • This function is useful for correcting the display of reversed films or upended documents. • This function can also be used to deliberately reverse or invert the image to change the perspective. To Restore the Original Orientation Press the [Reset] button.
Shooting the Surroundings Preview Mode The camera head can be aimed forward within an arc of 162 degrees and moved freely to shoot an audience, conference participants or the surroundings. !!! Important !!! • Do not apply excessive force on the camera or its arm, or rush to move the camera head to hurriedly focus on a subject.
Using the Finger Pointer Still Mode You can display and move a finger pointer within the window to draw attention to specific elements of an image during a presentation. Displaying the Finger Pointer The following procedures are used to show and hide the finger pointer. Procedure with the Remote Control BRIGHTNESS – + COLOR AUTO NEAR FAR APP REV FWD FOCUS To Show/Hide the Finger Pointer Press the button labeled with the pointing hand.
Using the Finger Pointer Moving the Finger Pointer The finger pointer can be moved in all four directions within the display. Procedure with the Remote Control BRIGHTNESS – + COLOR AUTO NEAR FAR APP REV FWD FOCUS ROTATE To Move the Finger Pointer Press the appropriate cursor button ( ) ( )( )( ). • The finger pointer will move in the direction indicated by the cursor button. • Press continuously on any cursor button to keep moving the finger pointer in that direction.
Interfacing with PowerPoint Preview Mode Still Mode Microsoft PowerPoint slide shows can also be controlled with the remote control. Switching between Application Programs When Presentation Software is running, the remote control can be used to switch between it and the PowerPoint window if that window was the active window immediately prior to Presentation Software. To Switch between Programs BRIGHTNESS – + COLOR AUTO NEAR FAR APP REV FWD FOCUS Press the [APP] button on the remote control.
Interfacing with PowerPoint Controlling Slides You can use the remote control to control the display of slides (pages) in PPA-compliant application programs, such as Microsoft PowerPoint. Make sure that the desired slide show (in PowerPoint) or file has been selected in the PPA-compliant application. BRIGHTNESS – + COLOR AUTO NEAR FAR APP REV FWD FOCUS ROTATE To Advance/ Reverse a Slide Press the [FWD] or [REV] button on the remote control when the desired program is active.
Scanning Images with TWAIN Driver This topic explains how TWAIN Driver can be used to scan and load images from the DZ-3600U into TWAIN-compliant application programs, such as the major graphics programs available on the market. !!! Important !!! • The application must be a TWAIN_32 TWAIN-compliant program to operate with TWAIN Driver. • Presentation Software and TWAIN Driver cannot be run simultaneously on a computer.
Scanning Images with TWAIN Driver Using TWAIN Driver The next step is to start up TWAIN Driver. An item such as [TWAIN_32], [Acquire], [Import] or [TWAIN Input] should appear in the application’s [File] menu or one of its submenus. Click on this item to display a window like the one below. In this window, the following buttons can be used to adjust the settings. Moreover, as with Presentation Software, the remote control and control panel can be used to control the TWAIN Driver.
Scanning Images with TWAIN Driver Click the ▼ beside the [Captured Image Size] item in the window to display the menu below. This setting allows you to select the size (dimensions expressed in pixels) at which images are captured. After you have adjusted the settings to your satisfaction, click the [Capture] button. This will cause TWAIN Driver to capture the image and display it in the application’s window. When you have finished the capture, click the [Close] button.
Chapter 4 ▼ ▼ ▼ ▼ ▼ Operating without a Computer 4
Connecting to a Video Monitor or Projector Use an S video cable or BNC video cable to connect the DZ-3600U to a video monitor or projector. •••␣ Note ••• • The S video and BNC video cables mentioned here are sold separately. Obtain a cable long enough to reach between the devices at the site in which they will be used. • Standard television sets may be used as video monitors if they are equipped with a video in jack. S Video Cable 1. Ensure that the main unit and other devices are turned off. 2.
Connecting to a Video Monitor or Projector BNC Video Cable 1. Ensure that the main unit and other devices are turned off. 2. Insert the plug on one end of the BNC video cable into the video output port on the main unit. • Turn the plug in the port to secure it. VIDEO OUTPUT S VIDEO VIDEO S VIDEO Rear Panel of the Main Unit RS-232C AC INLET EXT IN 1 USB EXT IN 2 60/100 HandShake Reserved Service Mode OFF ON Video Monitor or Projector BNC Video Cable 3.
Connecting to Other Image Input Devices The DZ-3600U has the ability to connect to other image input devices and throughput the data to a video monitor or projector. Among its other uses, this function allows you to show the contents of a video tape or the video feed from another camera during a presentation without having to change equipment. !!! Important !!! • The video feed from an external input device cannot be output to a computer.
Connecting to Other Image Input Devices Connecting to an External Input Device 1. 2. Ensure that the main unit and other devices are turned off. Insert the plug at one end of the S video or BNC video cable to the respective EXT In 1 or EXT In 2 port. Rear Panel of the Main Unit VIDEO S VIDEO OUTPUT VIDEO S VIDEO RS-232C AC INLET EXT IN 1 USB 60/100 HandShake Reserved Service Mode EXT IN 2 OFF ON S Video Cable or BNC Video Cable 3.
Assembly, Knock-Down and Power On/Off Use the following procedures to assemble, knock-down and turn the power on and off the DZ-3600U. Assembly and Knock-Down For assembly instructions, see page 26. For knock-down instructions, see page 37. Turning On the Power POWER 1. Press the ( | ) side of the power switch, which is located on the left side of the main unit. 2. Turn on the power of the other connected devices (video monitor, etc.).
Button Functions This topic explains the functions of each button when the DZ-3600U is used as a stand-alone device (no computer). Control Panel Power Indicator Brightness Dial Lights when the power is on (p. 94) Adjusts the image brightness (p. 66) Capture Button/Indicator (Used only when a computer is connected) Resolution Button/ Indicator Focus Button/ Indicator (Used only when a computer is connected) Adjusts the focus (p.
Button Functions Remote Control Resolution Button Capture Button (Used only when a computer is connected) (Used only when a computer is connected) Preview Button Zoom Button (Used only when a computer is connected) Adjusts the image display size (pp. 62, 63) Lights Button Brightness Button Adjusts the image brightness (p. 65) Turns on the front lights and backlight (p.
Button Functions Camera Head Reset Button Resets the flip and mirror settings to the starting point (p. 80) RESET Flip Button Inverts images from top to bottom (p. 80) FLIP ON CLOSEUP LENS Mirror Button MIRROR Reverses images from left to right (p. 80) OFF Closeup Lens Switch Operationg without a Computer Switches the closeup lens on and off to change from shooting objects on the object stage to shooting the surroundings (p.
Displaying Images from External Input Devices The DZ-3600U is equipped with a throughput function to display image data from external input devices, such as VCRs and video cameras. !!! Important !!! • The negative, monochrome, flip and mirror functions have no effect on images from external input devices. The image data from these devices is simply passed through the DZ-3600U to the output device. • Image data from external input devices cannot be throughput to a computer.
Chapter 5 ▼ ▼ ▼ ▼ ▼ Troubleshooting 5
Troubleshooting Tips Please confirm the following points before contacting the dealer if you encounter any difficulties operating the equipment or software programs. Presentation Software Will Not Start • Is the DZ-3600U’s power turned on? (P.28) • Is the USB cable connected correctly? (P.17) • Is the software correctly installed? (P.19) The Computer Monitor Is Blank • Is the computer connected correctly to its monitor and the projector? (P.
Troubleshooting Tips The Processing Speed of Other Application Programs Has Slowed • You have temporarily minimized Presentation Software in preview mode and attempted to use another application program, which has been slowed down. This is due to the fact that Presentation Software is still using memory resources to run its internal programming. To free up memory resources, switch Presentation Software into still mode before using the other application.
Troubleshooting Tips Lines Are Appearing in Captured Images •Has the camera head or object been moved or has the ambient lighting changed while the image is being captured? • Lines may appear in images captured at the High Resolution setting. If this occurs, switch the electronic shutter DIP switch on the rear panel to the following setting (P.111): For regions with electricity supplied at 60 Hertz: Set the DIP switch to 60 • The lines may also disappear if the brightness is adjusted. (P.
Error Messages The following messages may appear on the computer display if an error occurs when the DZ-3600U is connected to the computer. A brief explanation and remedies are provided in the column on the right. Error Message A device attached to the system is not functioning. Can’t Open Device. Exiting Canon DZ3600U Presentation. Connection to the DZ-3600U has been lost. DZ-3600U Presentation attempted to locate a nonexistent image. DZ-3600U Presentation could not allocate needed memory.
Error Messages Error Message The network resource type is not correct. The operation could not be completed because access was denied. The operation could not be completed because the disk is full. The operation could not be completed because the system is already using all resources. The specified path could not be created. The specified path is invalid. The system cannot find the device specified. The system cannot find the file specified. The system cannot find the path specified.
▼ ▼ ▼ ▼ ▼ Appendix 105
Removing the Equipment from the Box This topic explains how to remove the DZ-3600U Digital Document Camera from the packaging in which it is shipped. !!! Important !!! • Always use two adults to remove or replace the unit in the packaging. • Always securely fasten the camera head with tape when transporting the equipment. • Save the packaging to transport the equipment in the future.
Removing the Equipment from the Box 6. Unfold first the left, then the right front light. 7. Remove the plastic bags from around the front lights. 8. Push the lever (arm lock release lever) at the base of the camera arm and unfold the arm. 9. Remove the packing materials securing the camera arm. 10. Remove the packing materials taped to the object stage. 11. Remove all other tape strips from the equipment.
Packing List The following items should be included in the box.
Changing the Remote Control Batteries Follow the procedures below to install or replace the batteries in the remote control. 1. Open the battery cover by pressing down and sliding the back panel of the remote control that is marked [Open]. 2. If there are spent batteries inside the battery chamber, remove them. 3. Insert two AA batteries, orienting the battery terminals (“+” and “-” end) in the direction shown on the diagram in the battery chamber. Do not insert the batteries incorrectly.
Components Guide The names and functions of the various components are listed below. Main Unit Camera Head The recording camera Camera Arm Support arm for the camera head Front Light Adjustable light source for illuminating objects on the object stage (p. 77) Object Stage, Backlight Stage for resting objects, featuring an integral backlight for illuminating films and transparencies (p. 77) Arm Lock Release Lever Release for moving the camera arm (p.
Components Guide Back Panel of the Main Unit Output Video Port S Video Port EXT IN 1 (External Input 1) Video Port S Video Port Output ports for connecting a video monitor (p. 90) RS-232C Port Port used to control the main unit from an external device (Consult your dealer about equipment for this port) Input ports for receiving images from external devices (p.
Components Guide Control Panel Power Indicator Brightness Dial Lights when the power is on (p. 28) Adjusts the image brightness (p. 66) Capture Button/Indicator Used when images are captured by Presentation Software (p. 47) Focus Button/ Indicator Adjusts the focus (p. 68) Resolution Button/Indicator Selects the resolution of images captured by Presentation Software (p. 49) Preview Button/Indicator Switches Presentation Software in and out of preview mode (p.
Components Guide Remote Control Resolution Button Capture Button Selects the capture resolution(p. 48) Used when images are captured by Presentation Software (p. 46) Preview Button Switches Presentation Software in and out of preview mode (p. 50) and switches between display resolutions in preview mode (p. 51) Zoom Button Adjusts the image display size (pp. 62, 63) Brightness Button Adjusts image brightness (p. 65) Adjusts the image display size (p.
Components Guide Camera Head Reset Button Resets the flip and mirror settings to the starting point (p. 80 RESET Flip Button Inverts images from top to bottom (p. 80) Mirror Button FLIP ON CLOSEUP LENS MIRROR Reverses images from left to right (p. 80) OFF Closeup Lens Switch Switches the closeup lens on and off to change from shooting objects on the object stage to shooting the surroundings (p.
Components Guide Toolbar (Preview Mode) Adjusts the brightness of the preview image (p. 66) Captures and loads still images onto a computer (p. 47) Switches brtween resolution (fineness) settings for the capture images (p. 49) Minimizes the window (p. 40) Adjusts the size of the preview image (p. 62) In preview mode, pressing this button does not change the mode Switches between color/ grayscale/monochrome settings (p. 76) Switches between quality settings for images shown in preview mode (p.
Components Guide Toolbar (Still Mode) Captures and loads still images onto a computer (p. 47) Rotates images 90 degrees counterclockwise with each click (p. 74) Switches between resolution (fineness) settings for the captured images (p. 49) Switches to preview mode (p. 50) Minimizes the window (p. 40) Selects an image rotation angle from the menu (p. 75) Switches to preview mode and selects the display resolution (p. 52) Displays Help topics Selects images for display from the list (p.
Specifications Video Signal Pickup Element Total Number of Pixels Still Images Size Synchronization Resolution Signal to Noise Ratio Camera Head Rotation Angles White Balance Shooting Lens Electronic Shutter Image Size Range Data Transfer Input Illumination Other Functions Input/Output Ports Power Supply Requirements Power Consumption Remote Control Exterior Dimensions(w x d x h) Weight Operating Range Conforms to the NTSC color format 1/3-inch charge-coupled device (CCD) Approximately 410,000 pixels (ef
Glossary Color On a computer, color information is expressed by combining various ratios of the three primary colors: red, green and blue (RGB). The DZ3600U is capable of expressing each of the primary colors in 256 hues (8 bits), which together create a total of approximately 16.7 million colors (256 x 256 x 256) (24 bits) in which images can be expressed. Grayscale A grayscale image is one that is expressed in black, white and 254 shades of gray (a total of 256 tones).
Glossary TWAIN An application programming interface (API) standard for image input devices, such as the DZ-3600U, image scanners and digital cameras. Any device will work with any application program, regardless of the manufacturer or model, as long as both comply with the standard. USB Universal serial bus: a new interface standard that supports up to 127 peripheral devices, such as keyboards, displays, mice and modems in a daisy chain connection.
Index Symbols [+] Button 65 [-] Button 65 .PIH Format 53 A Accessories 108 AC Inlet 16, 111 Aiming the Remote Control 24 APP Button 84 Applications 10 Arm Lock Release Lever 26, 37, 110 Assembly 26 Auto Button 67, 71 Autofocus 67 Automatic Startup 21, 29 Auto White Balance 70 B Batteries 109 Backlight 77, 110 Bitmap (.
Index M Maintenance 6 Main Unit 110 Manual Dial 71 Memory Requirements 18 Microsoft PowerPoint 84 Mirror Button 80 Monochrome 76 N Near Button 67 NEGA Button 79, 119 Negative Film 79 Negative Mode 79, 119 NTS 118 O Object Stage 110 Open 58 Opening Saved Files 58 Orientation 72 OS 18 Output 90, 111 P Packing List 108 Presentation Software 40 Presentation Software File Format (.
Art Direction: Design: Writing: English Writing: Cartoons: Illustration: Cover Photo: 122 Yoshisuke Kuramoto, CDS Inc., Tokyo, Japan Sumio Koike, J-Cat Communications, Vancouver, Canada Yoshihito Isogawa, Isogawa Studio, Tokyo, Japan Christian R.P. Cowley, Concise Communications Corp., Vancouver, Canada Adrian Raeside, Koko Press Inc.
DIGITAL DOCUMENT CAMERA DZ-3600U ▼ ▼ ▼ ▼ ▼ Setup for Operation with a Computer ▼ ▼ ▼ ▼ ▼ An introduction to the Features ▼ ▼ ▼ ▼ ▼ DZ-3600U User’s Manual Mastering the Basics Operating without a Computer ▼ ▼ ▼ ▼ ▼ DIGITAL DOCUMENT CAMERA User’s Manual ▼ ▼ ▼ ▼ ▼ Troubleshooting CANON INC. 30-2, Shimomaruko 3-chome, Ohta-ku, Tokyo 146-8501, Japan Appendix ▼ ▼ ▼ ▼ ▼ U.S.A. —— CANON U.S.A., INC. NEW YORK OFFICE One Canon Plaza, Lake Success, NY 11042, U.S.A. Phone: 516-328-5960 CANON U.S.A., INC.