
EOS MOVIE Utility Ver.1.5 for Windows Instruction Manual

18
Introduction
Playing Back
Confirming File
Information
Saving
Exiting EMU
Reference
Contents
Preparation
Basic
Screen
1
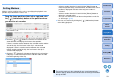
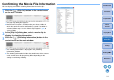
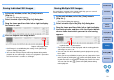
In the main window, select the [View] menu X
[Clip list...].
➜ The [Clip list] dialog box appears.
2
Select a movie clip in the [Clip list] dialog box.
3
Drag the frame position slider left or right to display
the frame to save.
4
Click the Capture still image button.
➜ A still image is saved following the settings in the [Still Image
Capture Settings] dialog box.
● You can also click the Capture still image button during movie
playback to save still images. In this case, playback is paused as
the current frame is saved as a still image.
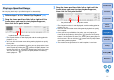
Saving Individual Still Images
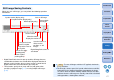
Capture still image button
By specifying a segment in the current movie clip, you can save all
frames within the segment as still images.
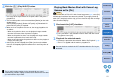
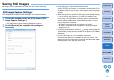
1
In the main window, select the [View] menu X
[Clip list...].
➜ The [Clip list] dialog box appears.
2
Select a movie clip in the [Clip list] dialog box.
3
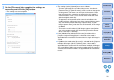
Drag the frame position slider left or right to display
the starting frame, and then click the In point button
when a frame from which you want to start saving
appears.
➜ The In point marker is now displayed, and the starting point for
still images to save is set.
● You can also click this button during movie playback to specify
the In point.
● Once you have specified the In point, you can jump to the frame
at the In point by clicking the [ ] (move to IN point) button. If no
In point has been set, clicking this button jumps to the first frame.
You can also click the [ ] (move to IN point) button during
movie playback.
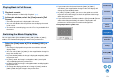
Saving Multiple Still Images
In point button In point marker