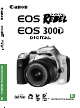
INSTRUCTION MANUAL E E INSTRUCTION MANUAL
Thank you for purchasing a Canon product. The EOS DIGITAL REBEL/EOS 300D DIGITAL is a high-performance, digital AF SLR camera with an ultra-fine CMOS sensor with 6.30 million effective pixels. It is full-featured for all types of shooting, from fully automatic snapshooting to highly creative work. You can use all Canon EF and EF-S lenses and start shooting quickly at any time in any mode. Images can also be printed directly from the camera. CompactFlash cards serve as the camera’s recording medium.
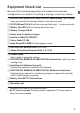
Equipment Check List Be sure all the following equipment and accessories have been included with your camera. If anything is missing, contact your dealer. ¢ EOS DIGITAL REBEL/EOS 300D DIGITAL camera body (with Eyecup, body cap and lithium backup battery for the date and time) ¢ EF-S18-55mm f/3.5-5.6 (with lens cap and dust cap) * In optional lens kit.
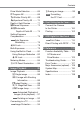
Contents Introduction Equipment Check List .............. 3 Handling Precautions .............. 8 Nomenclature ........................ 10 Conventions Used in this Manual ......................... 16 1 Before You Start ............... 17 Recharging the Battery .......... 18 Installing and Removing the Battery ............................. 20 Using a Household Power Supply ......................... 22 Mounting and Detaching a Lens .................................... 23 Installing and Removing the CF Card .
Contents Drive Mode Selection ............ 65 TProgram AE ....................... 66 RShutter-Priority AE ........... 68 EAperture-Priority AE ........ 70 Depth-of-field Preview ........... 71 WManual Exposure .............. 72 QAutomatic Depth-of-Field AE ........ 74 Setting Exposure Compensation ....................... 75 Auto Exposure Bracketing ..................... 76 jAE Lock ............................. 78 Bulb Exposures ..................... 79 Using the Built-in Flash ..........
Safety Warnings Follow these safeguards and use the equipment properly to prevent injury, death, and material damage. Preventing Serious Injury or Death • To prevent fire, excessive heat, chemical leakage, and explosions, follow the safeguards below: - Do not use any batteries, power sources, and accessories not specified in this booklet. Do not use any home-made or modified batteries. - Do not short-circuit, disassemble, or modify the battery pack or back-up battery.
• If you drop the equipment and the casing breaks open to expose the internal parts, do not touch the internal parts due to the possibility of electrical shock. • Do not disassemble or modify the equipment. High-voltage internal parts can cause electrical shock. • Do not look at the sun or an extremely bright light source through the camera or lens. Doing so may damage your vision. • Keep the camera from the reach of small children. The neck strap can accidentally choke the child.
Handling Precautions The Camera camera is a precision instrument. Do not drop it or expose it to physical shock. • This camera is not waterproof and should not be used in wet conditions or underwater. • The If the camera gets wet, take it to your nearest Canon dealer as soon as possible. If • • • • • • • • • • small amounts of water splash onto the camera, wipe it with a clean dry cloth. If the camera is exposed to salty air, wipe it thoroughly with a slightly damp cloth.
Handling Precautions not press hard on an LCD display or subject it to impacts, as this can cause • Do display flaws and damage. an LCD display becomes soiled, clean it with a commercially available blower • Ifbrush, or wipe it with a soft cloth, taking care not to scratch the screen. If an LCD display becomes extremely soiled, consult your nearest Canon dealer. their nature, LCD displays react more slowly at low temperatures, and may • By appear dark at high temperatures.
Nomenclature Reference page numbers are indicated by (p.∗∗). Mode dial (p.14) EF lens mount index (p.23) Power switch (p.26) Built-in flash (p.80) Drive mode selection button (p.65) Flash-sync contacts 〈l〉 Main dial (p.27) Hot shoe EF-S lens mount index (p.23) Shutter button (p.26) Strap mount (p.17) Red-eye reduction /Self-timer lamp (p.82/44) 〈M〉 Flash button (p.83) Remote control sensor Grip (Battery compartment) Lens release button (p.23) DC coupler cord hole (p.
Nomenclature Dioptric adjustment knob (p.36) 〈0〉 LCD panel illumination button (p.84) 〈∑〉 Aperture value/Exposure compensation button (p.72) Eyecup (p.46) Viewfinder eyepiece 〈j/8〉 AE lock / FE lock button / Index / Reduce button (p.78/83/88/89,106) LCD panel (p.12) 〈m〉 Menu button (p.28) 〈3/7〉 AF point selector / Enlarge button (p.62/89,106) 〈4〉 Info button (p.60, 86) Strap mount (p.17) 〈5〉 Jump button (p.90) ISO speed set button (p.50) 〈]〉 Playback button (p.86) CF card slot cover (p.
Nomenclature LCD Panel Shutter speed AF point selection ( Busy ( CF card full warning ( ) CF card error warning ( ) ) Date/time battery level warning ( ) Error code ISO Speed Camera starting ( ) ) Cleaning image sensor ( ) Aperture value Shots remaining D ISO speed White balance Z Auto C Daylight X Shade L AEB V Cloudy B Tungsten bulb N White fluorescent light M Flash , Custom Battery level wer Exposure level indicator Exposure compensation amount AEB level CF card writing status The actu
Nomenclature Viewfinder Information Focusing screen AF point display indicator 〈.
Nomenclature C Mode Dial The Mode Dial is divided into two functional zones. ve ati re Zone Full Auto Ba Im sic 1 Basic Zone • All you do is press the shutter button. Y: Full Auto (p.38) Allows you fully automatic shooting—the camera makes all the settings. Image Zone Allows you fully automatic shooting in specific situations. U : Portrait (p.40) I : Landscape (p.40) O : Close-up (p.40) P : Sports (p.41) A : Night Portrait (p.41) S : Flash off (p.
Nomenclature Battery Charger CB-5L This is a battery pack charger. (p.18) Battery pack slot Power cord Red lamp Power cord socket AC Adaptor Kit ACK-E2 (optional) Supplies power to the camera from a household power outlet. (p.
Conventions Used in this Manual • This icon indicates the main dial. <å> and <µ> icons indicate the cross • The keys. The <ß>, <∂>, <ƒ>, and <©> icons indicate the respective cross key (up, down, left, and right). icon indicates the SET button, used for • The setting menu options. camera control icons and markings in this booklet correspond to • The the icons and markings on the camera. more information, reference page numbers are provided in • For parentheses (p.00).
1 Before You Start This chapter explains a few preliminary steps and basic camera operations. Attaching the Strap Pass the end of the strap through the camera’s strap mount from the bottom. Then pass it through the strap’s buckle as shown in the illustration. Pull the strap to make sure it does not slip out of the buckle. The eyepiece cover is also attached to the strap. (p.
Recharging the Battery the power cord. 1 Connect Connect the power cord to the charger. • the power plug to an AC • Connect outlet. the cover. 2 Remove If you remove the battery from the • camera, be sure to reattach the cover to protect against short circuit. < – > mark the battery. 3 Attach Align the battery’s top edge with the • • < – > mark on the charger. While pressing down the battery, slide it in the direction of the arrow. To detach the battery, follow the above procedure in reverse.
Recharging the Battery not recharge any battery pack other than Battery Pack BP-511 or • Do BP-512. If the battery is left in the camera for a prolonged period without the • camera being used, a low electrical current may be discharged excessively and the battery’s service life may be affected. When not using the camera, remove the battery and attach the protective cover to prevent shorting. Before using the camera again, be sure to recharge the battery.
Installing and Removing the Battery Installing the Battery Load a fully charged BP-511 battery pack into the camera. the battery compartment 1 Open cover. the lever in the direction shown • Slide by the arrow in the diagram, and open the cover. the battery into the camera. 2 Insert Point • the battery contacts downward. the battery pack until it locks into • Insert place. the cover. 3 Close Press the cover closed until it clicks • shut. Battery Pack BP-512 can also be used.
Installing and Removing the Battery Battery Life (shots) Shooting conditions No flash use 50% flash use Approx. 600 Approx. 400 Approx. 450 Approx. 350 Temperature Normal (20°C/68°F) Low (0°C/32°F) figures above are based on Canon’s standard testing conditions • The (w/fully charged battery, EF-S18-55mm f/3.5-5.6 lens, image review [ON], review time of [2 sec.], and image quality at [Large a]). number of shots may be less than indicated in some cases, due to • The differences in shooting conditions.
Using a Household Power Supply With AC Adapter Kit ACK-E2 (optional), you can connect the camera to a household power outlet and not worry about the battery becoming exhausted. the DC Coupler. 1 Connect Connect the DC Coupler’s plug to the • AC adapter’s socket. the power cord. 2 Connect • Connect the power cord to the AC adapter. the cord into a power outlet. • Plug When you are finished, remove the • plug from the power outlet. the cord in the groove.
Mounting and Detaching a Lens Mounting a Lens the caps. 1 Remove • Remove the rear lens cap and the body cap by turning them as shown by the arrow. EF-S Lens mount index the lens. 2 Attach Align the EF-S lens with the camera’s • • EF Lens mount index white EF-S lens mount index and turn the lens as shown by the arrow until it clicks in place. When attaching a lens other than an EF-S lens, align the lens with the red EF lens index mark. the lens, set the focus mode 3 On switch to .
Installing and Removing the CF Card The captured image will be recorded onto the CF card (optional). Either a Type I or Type II CF card can be inserted into the camera. Installing a CF Card the cover. 1 Open Slide • the cover in the direction shown by the arrow, and open it. mark Label side the CF card. 2 Insert Using CF cards made by Canon is • recommended.
Installing and Removing the CF Card Removing the CF Card the cover. 1 Open • Set the Power switch to <2>. Check that the “ ” message is not • shown on the LCD panel. sure the access lamp is off, and • Make open the cover. Access lamp the CF card. 2 Remove Press the Eject button. • s The CF card is ejected. • Close the cover. blinking access lamp indicates that data is being read, written, or • Aerased on the CF card or that data is being transferred.
Basic Operation Power Switch The camera operates only after the Power switch is set to <1>. <1> : Set to this position when the camera is in use. <2> : The camera does not operate. Set to this position when not using the camera. save battery power, the camera turns off automatically after 1 minute • Toof non-operation. To turn on the camera again, just press the shutter • button. You can change the auto power-off time with the menu’s [Auto power off] setting (∆).
Basic Operation movement during the moment of exposure is called camera • Camera shake. Camera shake can cause blurred pictures. To prevent blurred • pictures due to camera shake: · Hold the camera steady. · Use your finger tip to touch the shutter button, grasp the camera with your entire right hand, then press the shutter button gently. No matter what state the camera is in (image playback, menu operation, image recording, etc.
Menu Operations The on-screen menus enable you to set various settings such as the image-recording quality, date and time, etc. Basically, you look at the LCD monitor and use the button, <5> button, Cross keys <å> <µ>, and button to proceed to the next step.
Menu Operations Setting Procedure the menu. 1 Display • Press the < m> button to display the menu. To turn off the menu, press the button again. a tab. 2 Select Press the <5> button to select a • tab. a tab is highlighted, you can • When also use the <µ> keys to select another tab. a menu item. 3 Select Press the <å> keys to select a menu • item, then press
. can also turn the dial to • You select a menu item. you press the <5> button now, • Ifanother tab will be selected. the menu setting.
Menu Operations Menu Settings <˙> (Shooting) Quality Red-eye on/off AEB WB-BKT Beep Custom WB Parameters Large a Large s Medium a Medium s Small a Small s RAW Off On 1/3-stop increments, ±2 stops whole-stop increments, ±3 stops On Off Manual setting of white balance Parameter 1 Parameter 2 Adobe RGB Set 1 Set 2 Set 3 Set up <]> (Playback) Protect Rotate Print Order Auto Play Review Review time 30 Erase protection Image rotation Specifies images to be printed Auto playback of imagees Off On On (Info)
Menu Operations LCD Monitor The color LCD monitor on the back of the camera enables you to review and select recorded images and set various menu settings. The LCD monitor cannot be used as a viewfinder to shoot. The LCD monitor’s brightness can be adjusted with the menu’s [LCD Brightness] setting (∆). • • Reverting to the Default Settings [Clear all camera settings]. 1 Select Select the [˚] tab. • the <å> keys to select [Clear • Press all camera settings], then press
. the settings.
Setting the Date and Time Set the date and time as shown below. [Date/Time]. 1 Select • Select the [∆] tab. the <å> keys to select [Date/ • Press Time], then press
. s The Date/Time setting screen will appear. the date and time. 2 Set Press the <å> keys to set the digits, • then press
. selection will then shift to the next • The item. the date display format. 3 Set Press the <å> keys to set the • desired date format to [mm/dd/yy], [dd/mm/yy], or [yy/mm/dd]. the
button.
Replacing the Date/Time Battery The date/time battery maintains the camera’s date and time. The battery’s service life is about 5 years. When the date/time battery’s power is low, “ ” will appear on the LCD panel. Replace the battery with a new CR2016 lithium battery as described below. The date/time setting will also be reset, so you must set the correct date/time. 1 Set the Power switch to <2>. the cover and remove the 2 Open battery. 3 Take out the battery holder.
Cleaning the Image Sensor (CMOS) The image sensor is like the film in a film-based camera. If any dust or other foreign matter adheres to the image sensor, it may show up as a dark speck in the images. To avoid this, follow the procedure below to clean the image sensor. Note that the image sensor is a very delicate component. If possible, you should have it cleaned by a Canon Service Center. While you clean the image sensor, the camera must be turned on.
Cleaning the Image sensor (CMOS) the image sensor. 4 Clean Use a rubber blower to carefully blow • away any dust, etc., on the surface of the image sensor. the cleaning. 5 Terminate Set the Power switch to < 2>. • s • The camera will turn off and the shutter will close. The mirror will also go down. Set the Power switch to <1>. You can start shooting again. the sensor cleaning, never do any of the following that • During would turn off the power.
Dioptric Adjustment By adjusting the diopter to suit your eyesight (with or without eyeglasses), the viewfinder image will look clearer. The camera’s adjustable dioptric range is –3 to +1 dpt. Turn the dioptric adjustment knob. the knob left or right so that the • Turn AF points in the viewfinder look sharp. illustration shows the knob at the • The standard setting (–1 dpt).
2 Fully Automatic Shooting This chapter describes how to use the camera’s Basic Zone modes < U> for quick and easy shooting. In these modes, all you do is point and shoot. In addition, to help prevent mistakes caused by operating the camera improperly, the <6> <3> buttons do not operate so there is no need to worry about accidental errors. Set the Mode Dial to < Y> or .
Y Fully Automatic Shooting All you do is point the camera and press the shutter button. Everything is automatic so it is easy to photograph any subject. With seven AF points to focus the subject, anyone can just point and shoot. 1 Turn the Mode dial to . any of the AF points on the 2 Aim subject. main subject, as determined by • The the camera, will be focused by one of the AF points. AF point the subject. 3 Focus • Press the shutter button halfway to s Shutter speed Aperture value focus.
Y Fully Automatic Shooting 5 Shoot. • Compose the shot and press the s shutter button fully. The captured image will be displayed for about 2 sec. on the LCD monitor ( MENU ). focusing with , do not touch the focusing ring at the front of • While the lens. you want to zoom, do it before focusing. Turning the zoom ring after • Ifachieving focus may throw off the focus. When the CF card becomes full, the CF Full warning “ ” will • appear on the LCD panel and shooting will be disabled.
Programmed Image Control Modes Select a shooting mode to suit the target subject, and the camera will be set to obtain the best results. For the functions available in the Basic Zone modes, see the “Function Availability Table” (p.122). U Portrait This mode blurs the background to make the human subject stand out. down the shutter button executes • Holding continuous shooting.
Programmed Image Control Modes P Sports This is for fast-moving subjects when you want to freeze the action. camera will first track the subject with the • The center AF point. Focus tracking will then • A continue with any of the seven AF points covering the subject. When focus is achieved, the beeper will sound softly. While you hold down the shutter button, focusing will continue for continuous shooting. Night Portrait This mode is for images of people at twilight or at night.
Reviewing Images Image Review The image can be displayed on the LCD monitor immediately after you shoot. You can set one of three image review options: [On] to display the image, [On (Info)] to display both the image and shooting information, and [Off] to not display the image. [Review]. 1 Select Select the <]> tab. • Press the <å> keys to select • [Review], then press
. the Review setting. 2 Set • Press the <å> keys to select the desired setting, then press
. 3 Shoot.
Reviewing Images Changing the Review Time You can set the image review time to [2 sec.], [4 sec.], [8 sec.], or [Hold] which keeps the image displayed on the LCD monitor. [Review time]. 1 Select Select the <]> tab. • Press the <å> keys to select • [Review time], then press
. the Review time setting. 2 •SetPress the <å> keys to select the desired setting, then press
. [Hold] setting keeps displaying the image until you press the • The shutter button halfway.
q Self-timer Operation You can use self-timer in any Basic mode or Creative mode. We recommend using a tripod when you use the self-timer. the button (∫). 1 Press • Press the button so that • • <´ > appears on the LCD panel. the subject. 2 Focus The shooting procedure is the same as • for “Fully Automatic Shooting” (p.38). through the viewfinder and press • Look the shutter button completely. s s The beeper will sound and the shot will be taken 10 sec. later. During the first 8 sec.
K Wireless Remote Control With the optional Remote Controller RC-5 (optional), you can shoot remotely from up to about 5 meters/16.4 ft. in front of the camera. Battery holder Transmit button Transmitter Battery holder lug the button (∫). 1 Press Press the button so that • • • <´> appears on the LCD panel. 2 Shoot. • Point the signal transmitter toward the s • Remote control sensor camera’s remote control sensor and press the signal button.
Using the Eyepiece Cover During self-timer or remote control operation when your eye does not cover the viewfinder eyepiece, stray light may enter the eyepiece and affect the exposure when the image is captured. To prevent this, use the eyepiece cover (attached to the neck strap) to cover the eyepiece. the eyecup. 1 Remove From the bottom of the eyecup, push it • upward. the eyepiece cover. 2 Attach Slide the eyepiece cover down into the • eyepiece groove to attach it.
3 Settings for Shooting This chapter explains the settings for shooting digital images: Image-recording quality, ISO speed, white balance, processing parameters, file numbering, and auto rotation. For Basic Zone modes, only the image-recording quality (except ), file numbering, auto rotation, and camera setting checking will apply in this chapter.
Image-Recording Quality The widely-used JPEG format is used for image-recording quality settings other than . Images captured in the format must later be processed by a personal computer. For example, when [Large a] is selected, the LCD panel will display . [Quality]. 1 Select Select the <˙> tab. • the <å> keys to select • Press [Quality], then press . the image-recording 2 Select quality. the <å> keys to select the • Press desired image-recording quality, then press
.
Image-Recording Quality Image File Size and CF Card Capacity According to Image-Recording Quality Image File Size Max. Capacity Image-Recording Image Size (Pixels) Format Quality (Approx.) (Approx.) 3072 x 2048 (Approx. 6.3 million) 2048 x 1360 (Approx. 2.8 million) JPEG 1536 x 1024 (Approx. 1.6 million) + : 3072 x 2048 (Approx. 6.3 million) RAW + JPEG 3.1 MB 38 images 1.8 MB 65 images 1.8 MB 66 images 1.2 MB 101 images 1.4 MB 88 images 0.
D Setting the ISO Speed The ISO speed is a numeric indication of the sensitivity to light. A higher ISO speed number indicates a higher sensitivity to light. Therefore, a high ISO speed is suited for moving subjects or shooting in low-light conditions. However, the image will contain more noise to make it look coarse or grainy. On the other hand, a low ISO speed will make the image look finer, but it is not suited for freezing motion or shooting in low light.
6 Selecting the White Balance Normally, the setting will set the optimum white balance automatically. If natural colors cannot be obtained with , you can set the white balance manually to suit the respective light source. In the Basic Zone modes, will be set automatically. 1 Press the <6> (∂) button. ( ∫ ) the white balance setting. 2 Select While looking at the LCD panel, turn • • the dial to select the desired white balance setting. To return to shooting, press the shutter button halfway.
Custom White Balance With custom white balance, you shoot a white object that will serve as the standard for the white balance. By selecting this image, you import its white balance data for the white balance setting. a white object. 1 Shoot • The plain, white object should fill the viewfinder center. the lens focus mode switch to • Set , then focus manually (p.64). any white balance setting. (p.51) • Set the white object so that a • Shoot standard exposure is obtained.
Custom White Balance / White Balance Auto Bracketing [,]. 4 Select Press the <6> (∂) button. (∫) • the < l> dial to select < ,>. • Turn The custom white balance will be set. s White Balance Auto Bracketing With just one shot, three images having a different color tone can be recorded simultaneously. Based on the current white balance mode’s standard color temperature, the white balance setting can be changed from 0 to +/–3 stops in whole-stop increments. This is called white balance bracketing.
White Balance Auto Bracketing 4 Shoot. The bracketing sequence will start with s the standard color temperature followed by a bluish tone (decreased compensation) and reddish tone (increased compensation). White balance bracketing will not work if the image-recording quality is < h>. continuous shooting, the number of images recorded will be • During three times as many as the number of shots taken. three images are recorded for one shot, the CF card will take • Since longer to record the shot.
Selecting the Processing Parameter The image you capture can be processed to look more vivid or more subdued. The processing parameters can be set according to the preset Parameter 1, Parameter 2, and Adobe RGB. Or they can be set to Set 1, 2, or 3 that you can set yourself. [Parameters]. 1 Select Select the <˙> tab. • the <å> keys to select • Press [Parameters], then press
. the processing parameter. 2 Select Press the <å> keys to select the • desired parameter, then press
.
Setting Processing Parameters The image you capture can be processed automatically by the camera in accordance with the parameter settings you set (five settings each for [Contrast], [Sharpness], [Saturation], and [Color tone]). You can register and save up to three sets of processing parameters.
Setting Processing Parameters the parameter. 4 Select Press the <å> keys to select the • parameter, then press
. the parameter. 5 Set Press the <µ> keys to set the • parameter, then press
. to the [Parameters] menu. 6 Return • Press the < m> button twice to return to step 1. Then press < p>. the desired Set Number. 7 Select Press the <å> keys to select [Set 1], • [Set 2], or [Set 3], then press
. [Parameter 1] sets the contrast, sharpness, and color saturation by +1 stop.
File Numbering The images you take are automatically assigned a file number from 0001 to 9999 and saved in a folder (created automatically) that can hold up to 100 images. The file number is akin to the frame number of film images. The automatic file numbering method can be set to [Continuous] or [Auto reset]. [File numbering]. 1 Select • Select the <∆> tab. the <å> keys to select [File • Press numbering], then press
. the file numbering method.
Setting Auto Rotation Vertical shots can be rotated automatically so that they are displayed upright during playback. Auto rotation will work only with vertical images captured while [Auto rotate] was [On]. It will not work with vertical images captured while [Auto rotate] was [Off]. [Auto rotate]. 1 Select Select the <∆> tab. • the <å> keys to select • Press [Auto rotate], then press
. the Auto rotate setting. 2 Set Press the <å> keys to select [On], • then press
. a vertical shot.
INFO. Checking Camera Settings When the camera is ready to shoot, press the < 4> button to view the current camera settings on the LCD monitor. Display the camera settings. the <4> button. • Press The current camera settings appear on s • the LCD monitor. Press the < 4> button again to clear the LCD monitor. Camera Setting Information Date/time (p.32) AEB amount (p.76) WB-BKT amount (p.53) Processing parameter setting (p.55) Image review (p.42) Image review time (p.43) Auto rotate (p.59) ISO speed (p.
4 Advanced Operations Cre ati v With Creative Zone modes, you can set the desired shutter speed or aperture value to obtain the exposure you want. You take control of the camera. e ne Zo preview, • Depth-of-field exposure compensation, AEB, AE lock, bulb, and white balance bracketing are possible only in Creative Zone modes. Before starting, turn the power switch to .
3Selecting an AF Point The AF point is used for focusing. The AF point can be selected automatically by the camera or manually by you. In the Basic Zone modes and mode, the AF point selection is automatic only. In the , , , and modes, the AF point can be selected either automatically or manually. Automatic AF point Selection The camera selects the AF point automatically according to situation. Manual AF point Selection You can select any of the seven AF points manually.
3Selecting an AF Point Automatic AF point Selection Manual AF point Selection Focus Lock After achieving focus, you can lock the focus on a subject and recompose the shot. This is called “focus lock.” 1 Set the camera to a Creative Zone mode. 2 3 Select the desired AF point. • Set a Creative Zone mode except . Aim the AF point over the subject and press the shutter button halfway to focus. 4 Keep pressing the shutter button halfway and recompose the image as desired. 5 Shoot.
When Autofocus Fails (Manual Focusing) Autofocus can fail to achieve focus (the focus confirmation light blinks) with certain subjects such as the following: (a) Low-contrast subjects (blue sky, solid-color walls, etc.). (b) Subjects in low light. (c) Extremely backlit and reflective subjects (car with a reflective body, etc.). (d) Overlapping near and far objects (animal in a cage, etc.). In such cases, do one of the following: 1.
Drive Mode Selection The drive mode can be set to single or continuous (2.5 frames per sec.). Press the button. ( ∫ ) s • The button toggles between the two drive modes. The continuous drive mode can be selected in the Creative Zone modes. J : Single H: Continuous ´ : Self-timer/ Remote control continuous shooting, the captured images are first stored in the • During camera's internal memory and then successively transferred to the CF • • card.
TProgram AE Like (Full Auto) mode, this is a general-purpose shooting mode. The camera automatically sets the shutter speed and aperture value to suit the scene’s brightness. This is called Program AE. ∗ T stands for Program ∗ AE stands for Auto Exposure 1 Set the Mode Dial to . AF point on the subject. 2 Focus Look through the viewfinder and aim • any AF point over the subject. Then press the shutter button halfway. Shutter speed Aperture value the display.
T Program AE “ ” and the maximum aperture blink, it indicates • Ifunderexposure. Increase the ISO speed or use flash. “ ” and the minimum aperture blink, it indicates • Ifoverexposure. Decrease the ISO speed or use an ND filter to reduce the amount of light entering the lens. the “Function Availability Table” (p.122) for difference between • Refer Creative Zone modes and Basic Zone modes.
RShutter-Priority AE In this mode, you set the shutter speed and the camera automatically sets the aperture value to suit the brightness of the subject. This is called Shutter-Priority AE. A fast shutter speed can freeze the motion of a fast-moving subject and a slow shutter speed can blur the subject to give the impression of motion. ∗R stands for “time value.” Fast shutter speed Slow shutter speed 1 Set the Mode Dial to . the desired shutter speed.
R Shutter-Priority AE If the maximum aperture blinks, it indicates • underexposure. Turn the dial to set a slower shutter speed until the blinking stops. Or increase the ISO speed. the minimum aperture blinks, it indicates • Ifoverexposure. Turn the dial to set a faster shutter speed until the blinking stops. Or decrease the ISO speed. Shutter Speed Display The shutter speeds from “ ” to “ ” indicate the denominator of the ” indicates 1/125 sec. Also, fractional shutter speed.
E Aperture-Priority AE In this mode, you set the desired aperture value and the camera sets the shutter speed automatically to suit the subject brightness. The larger or brighter the aperture value (lower f/number) the more blurred the background will become. This effect is ideal for portraits. The smaller or darker the aperture value (higher f/number), the clearer the focus will be for both near and far objects (wider depth of field). ∗E is an abbreviation for Aperture value.
E Aperture-Priority AE / Depth-of-field Preview the “ ” shutter speed blinks, it indicates • Ifunderexposure. Turn the dial to set a larger aperture value (smaller f/number) until the blinking stops. Or increase the ISO speed. the “ ” shutter speed blinks, it indicates • Ifoverexposure. Turn the dial to set a smaller aperture value (larger f/number) until the blinking stops. Or decrease the ISO speed. Aperture Value Display The larger the f/number, the smaller the diaphragm will be.
f Manual Exposure In this mode, you set both the shutter speed and aperture value as desired. To determine the exposure, refer to the exposure level indicator in the viewfinder or use a handheld exposure meter. This method is called manual exposure. ∗f stands for manual. 1 Set the Mode Dial to . the desired shutter speed. 2 Select • Turn the dial to set the desired shutter speed. the desired aperture value. 3 Select • Hold down the <∑> button and turn the dial to set the desired aperture value.
f Manual Exposure the exposure. 5 Determine Check the exposure level and set the • desired shutter speed and aperture value. 6 Shoot. If the exposure level mark blinks at the or level, it indicates that the difference between the standard exposure exceeds +/–2 stops.
Q Automatic Depth-of-Field AE This mode is for obtaining a wide depth of field automatically between a near subject and far subject. It is effective for group photos and landscapes. The camera uses the seven AF points to detect the nearest and farthest subjects to be in focus. ∗Q stands for Auto-depth of field. 1 Set the Mode Dial to . the subject. 2 Focus Move the AF point over the subject and • press the shutter button halfway.
Setting Exposure Compensation Exposure compensation is used to alter the camera’s standard exposure setting. You can make the image look lighter (increased exposure) or darker (decreased exposure). The exposure compensation amount can be set up to +/–2 stops in 1/3-stop increments. the Mode Dial to any Creative 1 Turn Zone mode except < f>. the exposure setting. 2 Check Press the shutter button halfway and • check the display. 3 Set the exposure compensation amount.
Auto Exposure Bracketing With auto exposure bracketing (AEB), the camera automatically changes the exposure level up to +/–2 stops in 1/3-stop increments for three successive shots. Standard exposure Decreased exposure Increased exposure [AEB]. 1 Select Select the <˙> tab. • the <å> keys to select [AEB], • Press then press
. the AEB amount. 2 Set • Press the <µ> keys to set the s AEB range standard exposure desired AEB amount, then press
. The < L> and AEB level will appear on the LCD panel.
Auto Exposure Bracketing Neither flash nor bulb exposures can be used in AEB mode. the drive mode is set to continuous, the three bracketed shots will be • Iftaken continuously and then the shooting will stop. If the drive mode is set to single image, you must press the shutter button three times. control has been set, the three bracketed shots • Ifwillthebeself-timer/remote taken continuously. • AEB can be combined with exposure compensation.
jAE Lock AE lock enables you to lock the exposure at a different place from the point of focus. After locking the exposure, you can recompose the shot while maintaining the desired exposure level. This feature is useful for backlit and spotlighted subjects. In Creative Zone modes, partial metering will be used automatically for AE lock. the subject. 1 Focus The exposure setting will be displayed s in the viewfinder. the button.
Bulb Exposures When bulb is set, the shutter is open during the time you keep pressing the shutter button fully. Bulb is useful when a long exposure is necessary for capturing night scenes, fireworks, the night sky, etc. 1 Set the Mode Dial to . the shutter speed to “ ”. 2 Set • Look at the LCD panel and turn the dial to select “ • The next setting after “ ”. ” is “ ”. the aperture value. 3 Set Hold • down the <∑> button and turn the dial to set the desired aperture value. 4 Shoot.
Using the Built-in Flash Using the Built-in Flash in the Basic Zone In the Basic Zone modes (except < I> < P> < S>), the built-in flash pops up and fires automatically in low-light and backlit conditions. Using the Built-in Flash in the Creative Zone When using a Creative Zone mode, press the button to pop up the built-in flash. T Select mode for full autoflash. The shutter speed and aperture value are determined automatically, just as in < Y> (Full Auto) mode.
Using the Built-in Flash Built-in Flash Range (using EF-S18-55mm f/3.5-5.6 lens) ISO Speed Wide-angle: 18 mm Telephoto: 55 mm 100 Approx. 0.7-3.7 m (2.3-12.1 ft) Approx. 0.7-2.3 m (2.3-7.5 ft) 200 Approx. 0.7-5.3 m (2.3-17.4 ft) Approx. 0.7-3.3 m (2.3-10.8 ft) 400 Approx. 0.7-7.4 m (2.3-24.3 ft) Approx. 0.7-4.6 m (2.3-15.1 ft) 800 Approx. 0.7-10.5 m (2.3-34.5 ft) Approx. 0.7-6.6 m (2.3-21.6 ft) 1600 Approx. 0.7-14.9 m (2.3-48.9 ft) Approx. 0.7-9.2 m (2.3-30.
Using the Built-in Flash Using Red-eye Reduction When flash is used in a low-light environment, the subject’s eyes may come out red in the image. “Red eye” happens when the light from the flash reflects off the retina of the eyes. The camera’s red-eye reduction feature turns on the red-eye reduction lamp to shine a gentle light into the subject’s eyes to narrow the pupil diameter or iris. A smaller pupil reduces the chances of red eye from occurring.
Using the Built-in Flash j FE Lock FE (flash exposure) lock obtains and locks the correct flash exposure reading for any part of a subject. It works in Creative Zone modes. that the icon is lit. 1 Check • Press the < M> button to pop-up the built-in flash. check that the < M > • Inicontheisviewfinder, lit. on the subject. 2 •Focus Press the shutter button halfway. Keep pressing the shutter button halfway until step 4. the button.
Metering Modes The camera has three metering modes: Evaluative, partial, and centerweighted average metering. Evaluative metering This is the camera’s standard metering mode suited for most subjects even under backlit conditions. After detecting the main subject’s position, brightness, background, front and back lighting conditions, camera orientation (horizontal or vertical), etc., the camera sets the proper exposure. Partial metering This is set automatically during AE lock in the Creative Zone modes.
5 Image Playback This chapter explains how to view and erase images and how to connect the camera to a TV monitor. Images not taken with the camera: The camera might not be able to properly display images captured with a different camera or edited with a personal computer for image processing or changing the file name.
Image Playback You can select any image to view. You can view a single image, the image information, an index display, or a magnified view. ] Single image the image. 1 Playback Press the < ] > button. • s The last captured image will appear on the LCD monitor. another image. 2 View Press the <ƒ> key to view images • • • starting with the newest one. Press the <©> key to view images starting with the oldest one. To quit the playback, press the <] > button. The LCD monitor will turn off.
Image Playback Image Information File No. Image Flash exposure compensation amount Aperture value Shutter speed Images recorded / Total images recorded Image-recording quality Image protect Exposure compensation amount Histogram Metering mode Shooting mode ISO speed WB-BKT Shooting time White balance Audio note (The camera has no sound recording feature.) Shooting date Histogram Sample Histogram A histogram is a graph indicating the image’s brightness.
Image Playback ˆ Index Display Nine thumbnail images are displayed on one screen. the camera to the playback 1 Set mode. the < ] > button. • Press The last captured image will appear on s the LCD monitor. the index. 2 Display Press the < 8 > button. • s The selected thumbnail will be highlighted with a green border. an image. 3 Select Press the cross keys to move the • green frame in the respective direction.
Image Playback 7/ø Magnified View The selected image can be magnified by 1.5x to 10x on the LCD monitor. 1 Display the image to be magnified. the image in the single-image • Display or image information display mode. the image. 2 Magnify Press the < 7 > button. • s Magnified portion • • The center of the image will be magnified. To increase the magnification, hold down the < 7 > button. Press the < 8 > button to reduce the magnification.
Image Playback 5 Image Jump While single image, image with shooting information, index, or magnified image is displayed, you can jump images ahead or back. the camera for playback. 1 Set Display a single image, image with • shooting information, index, or magnified image. jump display. 2 Set Press the < 5> button. • s The jump bar will appear at the bottom of the screen. Jump bar forward or back. 3 Jump Press the <µ> keys. In the • magnified view, turn the dial.
Image Playback Automated Playback of Images (Auto playback) This function automatically and continuously displays all images recorded on the CF card. Each image is displayed for approximately 3 seconds. [Auto Play]. 1 Select Select the <]> tab. • the <å> keys to select [Auto • Press Play]. the auto play. 2 Start • Press
. s • • After [Loading image...] is displayed for a few seconds, auto play will start. To pause the auto play, press < p>.
Image Playback Rotating an Image The Rotate function can rotate an image 90° or 270˚ clockwise. This allows you to display images with the correct orientation. [Rotate]. 1 •Select Select the <]> tab. the <å> keys to select • Press [Rotate], then press
. s The image rotation screen will appear. the image. 2 Rotate Press the <µ> keys to select the • s • • image to be rotated, then press
. Each time you press
, the image will rotate clockwise. To rotate another image, repeat step 2.
Connecting to a TV By connecting the camera to a TV set with the video cable (provided), you can view the recorded images on a TV set. Always turn off the camera and the television before connecting or disconnecting them. Be sure the camera is set to the video system format (NTSC or PAL) compatible with the TV set. If necessary, set the menu’s [Video system] setting to [NTSC] or [PAL]. If the proper video system format is not set, the image will not be displayed properly. the camera to the TV.
Image Protection You can protect images to prevent accidental erasure. [Protect]. 1 Select Select the <]> tab. • the <å> keys to select • Press [Protect], then press
. s The protect setting screen will appear. the image protection. 2 Set Press the <µ> keys to select the • s Image protection icon • • • image to be protected, then press
. When an image is protected, the < ¬> icon will appear below the image. To cancel the image protection, press
again. The <¬ > icon will disappear.
9 Erasing an Image You can erase images individually or erase all the images at one time in the CF card. Only protected images will not be erased. Once an image is erased, it cannot be recovered. So be careful when erasing an image. To prevent important images from being erased accidentally, protect it. Erasing a Single Image the playback mode and select 1 Set the image to be erased. the < ]> button. • Press Press <µ> keys to select the • image the to be erased. the erase menu.
9 Erasing an Image Erasing All Images the camera for playback. 1 •SetPress the < ]> button. the erase menu. 2 Display • Press the <9 > button. s The erase menu will appear at the bottom of the screen. [All...]. 3 Select • Press the <µ> keys to select [All...], s then press
. The confirmation dialog will appear. the images. 4 Erase Press the <µ> keys to select [OK], • s • then press
. All unprotected images will be erased.
Formatting the CF Card Format the CF card before using it in the camera. Formatting a CF card will erase everything in the card including protected images. Before formatting a card, make sure there is nothing you need to retain. If necessary, transfer the images to a personal computer before formatting the card. [Format]. 1 Select Select the <∆> tab. • the <å> keys to select • Press [Format], then press
. s The confirmation dialog will appear. the CF card.
Formatting the CF Card About the “ ” Error Message If “ ” (CF error) is displayed on the LCD panel, it indicates a problem with the CF card that is preventing the image data from being recorded or read. Use another CF card instead. Or, if you have a commercially-available CF card reader that can read the CF card, use it to transfer the images in the card to a personal computer. After transferring and saving all the images to a personal computer, format the card. The card might then work properly.
6 Direct Printing from the Camera By using the dedicated cable to connect the camera to a Canon printer (optional) compatible with direct printing, you can easily print images directly from the camera. The direct printing operation is all done with the camera.
Connect the Camera to the Printer 1 Turn the Power switch to <2>. up the printer. 2 Set For • details, refer to the printer’s manual. the camera to the printer. 3 Connect • For information on which cable to use • and how to connect it to the printer, refer to the printer’s instruction booklet. When connecting the cable plug to the camera’s < œ> terminal, the cable plug’s < ∂ > icon must face the front side of the camera. on the printer.
Direct Printing the camera’s power switch to 5 Turn <1>, then press the <]> button. s The image will be displayed, and the <å> or <ß> icon will appear on the upper left. Indicates that a card photo printer is connected. BJ printer-connected icon direct printing, using AC Adapter Kit ACK-E2 (optional) to power the • For camera is recommended. a battery pack will be used to power the camera, be sure to fully • Ifrecharge it first. While printing, monitor the battery level.
Printing You can specify the printing style (borders on/off, date on/off, etc.), print quantity, and image trimming. You do all the printing operations with the camera. Images in the h format cannot be printed directly from the camera. Connected printer icon the image to be printed. 1 Select Check that the <å > or <ß > icon is • • displayed on the upper left of the LCD monitor. Press the <µ> keys to select the image to be printed.
. 2 Press The print setting screen will appear.
Printing [Style]. 3 Select Set the desired settings for [Borders], • [Date], and the BJ printer’s paper size. the setting procedure, see “Setting • For the Printing Style” on the next page. the image. 4 Print Press the <å> keys to select • s • [PRINT], then press
. Printing will start. When the printing is completed properly, the screen returns to step 1.
Printing Setting the Printing Style [Style]. 1 Select Press the <å> keys to select [Style], • s then press
. The [Style] setting menu will appear. the style option. 2 Select Press the <å> keys to select the • s option, then press
. The available settings will be displayed. Style setting screen BJ printer Card photo printer BJ printers, [Paper] must be set to the paper size used. • With With card photo printers, [Image] will appear instead of [Paper].
Printing [Paper] (BJ printer) [Image] (Card photo printer) [Borders] [Date] the desired setting. 3 Select • Press the <å> keys to select the s • desired setting, then press
. The selected setting will take effect. When you are done, press the to return to the print setting screen. If you set “Bordered,” certain printers may print the date on the border. The date may be hard to see on a light background or on the border. is [On], the date recorded for the image will appear on the print.
Printing Setting the Quantity Set the number of copies. the <å> keys to select • Press [copies]. Press the <µ> keys to set the • number of copies. • Set a number from 1 to 99. Setting the Trimming You can trim the image and print only the trimmed portion. Before starting, you must first set the [Style] settings. If you change the [Style]/[Borders] after setting the trimming, the trimming setting will be lost. [Trimming]. 1 Select Press the <å> keys to select • s [Trimming], then press
.
Printing Rotating the trimming frame Press the <4> button to rotate the trimming frame. The button toggles between the vertical and horizontal image orientation. For example, a horizontal shot can be printed as a vertical shot. The operation guide disappears while you trim the image. It will reappear after 5 sec. of idle time. • the trimming. 3 Exit • Press
to return to the print setting screen. [Borderless] is set, certain printers might not print the trimmed image • Ifcorrectly.
Printing Stopping the Printing While [Stop] is displayed on the LCD monitor, press
. s s The printing will stop. If the confirmation dialog appears, press the <µ> keys to [OK], then press
. When Stopping the Printing With a card photo printer: If only one print is being printed, you cannot stop the printing. If multiple prints are being printed, the printing will stop after the current print is finished printing.
7 DPOF: Digital Print Order Format With DPOF (Digital Print Order Format), you can specify which images in the CF card are to be printed and the quantity. This feature is very convenient when you make prints with a DPOF-compatible printer or photo lab. DPOF DPOF (Digital Print Order Format) is a standard for digital cameras to record the image selections, quantity of prints, and other print settings on a CF card or other recording media.
Print Order First you set the printing options and select the images to be printed. The printing options give you a choice of making an index print (multiple, thumbnail images on one print), inserting the date, and inserting the image file No. The printing options will apply to all the images selected for printing. (They cannot be set differently for each image.) For printing, you can either select images individually or select all the images.
Print Order the set up option. 3 Select Press the <å> keys to select the • s [Print Type] option, then press
. The set up screen will appear. [Date] [File No.] the desired setting. 4 Select • Press the <å> keys to select the desired setting, then press
. 5 Exit the set up screen. the < m> button. The print • Press order screen will reappear. select [Order] or [All] to select • Next, the images to be printed (p.113).
Print Order if [Date] and [File No.] are set to [On], the date or file No. might • Even not be imprinted depending on the print type setting and printer type. (See the table below.) Print Type Date File No. Standard Yes No Index* No Yes Both Standard Index* Yes No No Yes * With BJ printers, the date and file No. will not be imprinted. [Index] prints, both the [Date] and [File No.] cannot be set to [On] • With at the same time. Also, the [Date] will not be imprinted even if it is [On].
Print Order Selecting Individual Images When the print type is [Standard] or [Both], you can set the number of copies to be printed for each standard-type print. If [Index] is set, you can either include or not include the image to the index print. [Order]. 1 Select Press the <µ> keys to select • s [Order], then press
. The order screen will appear. the image to be printed. 2 Select Press the <µ> keys to select the • desired image. the <8> button to see a • Press three-image view.
Print Order print settings. 3 •SetThethesettings will be different depending on the [Print Type] explained in “Printing Options” on page 110. Indication when [Standard] and [Both] are set. Press the <å> keys to set the number of copies from 1 to 99. Indication when [Index] is set. If you want to include the image to the index print, press the <å> keys to checkmark the index print checkbox on the upper left. Or leave it unchecked if you do not want to include the image to the index print.
Print Order Selecting All Images You can select all the images in the CF card (except h images) for printing or cancel the [All] selection. For standard-type prints, only a single print will be available for each image. [All]. 1 Select • Press the <µ> keys to select [All], s then press
. The All screen will appear. [Mark all]. 2 Select Press the <å> keys to select [Mark • s • • all], then press
. One print each will be specified for all the images, then the print order screen will reappear.
Direct Printing with DPOF With a printer (Optional) compatible with direct printing, you can print according to the DPOF settings. the camera to the printer. 1 Connect (p.100) [Print Order]. 2 Select • Select the <]> tab. the <å> keys to select [Print • Press Order], then press
. [Print]. 3 Select • Press the <å> keys to select [Print], then press
. will be displayed only if the • [Print] camera is connected to the printer and printing is possible. Printing style settings the printing style.
Direct Printing with DPOF Print Order settings printing. 5 Start Check the printing options displayed • on the upper left. the <å> keys to select [OK], • Press then press
. s The printing will start. the printing ends, the screen will • When return to step 3. If you set “Bordered,” certain printers may print the date on the border. The date may be hard to see on a light background or on the border.
Direct Printing with DPOF Stopping the Printing While [Stop] is displayed on the LCD monitor, press
. s s The printing will stop. When the confirmation dialog appears, press the <µ> keys to select [OK], then press
. Stopping the Printing With a card photo printer: If only one print is being printed, the printing cannot be stopped. If two or more prints are being printed, the printing will stop with the next print.
MEMO 119
MEMO 120
8 Reference This section will help you understand your camera better. It covers basic shooting concepts, camera specifications, system accessories, and other reference information.
Function Availability Table : Automatic Setting Basic Zone Mode Dial ISO Quality speed White balance JPEG RAW Auto Manual Auto WB Preset WB Custom WB WB-BKT Parameters One-Shot AI Servo AF AI Focus AF Auto point selection Manual Program shift Exposure Exposure compensation AEB AE lock Depth-of-field preview Metering mode Evaluative Partial Centerweighted average Drive Single Continuous Auto Built-in flash Manual Flash off Red-eye reduction FE lock Camera setting reset Image sensor cleaning 122
Function Availability Table AF Modes and Drive Modes Drive mode ONE SHOT AF Single An image cannot be taken unless focus is achieved. When focus is achieved, it is locked. With evaluative metering, the exposure setting is also locked. (The exposure setting is stored in memory before the shot is taken.) The above conditions apply during continuous shooting. (approx.2.5 fps Continuous to a max. burst of 4 images.
Troubleshooting Guide If there is a problem, first refer to this Troubleshooting Guide. Power Source “The battery cannot be recharged.” are using the wrong battery. •sYou Use Battery Pack BP-511 or BP-512. battery is not properly attached to the charger. •sThe Attach the battery properly to the charger. (p.18) “The camera does not operate even when the Power switch is set to <1>.” battery is exhausted. •sThe Change the battery pack. (p.18) battery is not installed properly.
Troubleshooting Guide Shooting “No images can be shot or recorded.” CF card is not properly loaded. •sThe Load the CF card properly. (p.24) CF card is full. •sThe Use a new CF card or erase unnecessary images. (p.24, 95) battery is exhausted. •sThe Recharge the battery. (p.18) You did not focus well. (The focus confirmation light in the viewfinder • blinked.) s Press the shutter button halfway and focus the subject. If you still cannot focus properly, focus manually. (p.
Troubleshooting Guide Image Review “The image cannot be erased.” image is protected. •sThe Cancel the protection first. (p.94) “The date and time is wrong.” correct date and time has not been set. •sThe Set the correct date and time. (p.32) “No image appears on the TV screen.” cable plugs are not inserted fully. •sVideo Insert the video cable plugs firmly all the way. (p.93) correct video format (NTSC or PAL) has not been set. •sThe Set the camera to the correct video format to match the TV set. (p.
Error Codes If a camera error occurs, “ xx” will be displayed on the LCD panel. Follow the instruction below according to the error code. If the same error occurs often, something is probably wrong with the camera. Jot down the “xx” error code and take your camera to the nearest Canon Service Center. If an error occurs after you shoot, the camera might have missed the shot. Press the <] > button to see if the image appears on the LCD monitor. Error code Countermeasures Clean the lens contacts. (p.
Major Accessories (optional) Battery Pack BP-511 Powerful, lithium-ion, recharegable power pack. When fully recharged, it enables approx. 500 shots to be taken (at 20˚C/ 68°F with 50% flash use). AC Adapter Kit ACK-E2 Power source kit (AC adapter, DC coupler, power cord) for supplying power to the camera with a household power outlet. Compatible with AC 100 240 V. Compact Power Adapter CA-PS400 Quick charger for Battery Pack BP-511 and BP-512.
Major Accessories (optional) Shoe-mount Speedlites An EX-series Speedlite can be attached to the camera’s hot shoe. It provides high-output flash and features like high-speed sync (FP flash) and FE lock. Flash shooting is as easy as normal AE shooting. Macro Flash The EX-series Macro Lites are ideal for macro flash shooting. You can fire only one flash tube or set a flash ratio to create sophisticated lighting effects.
System Map Eyepiece Extender EP-EX15 Rubber Frame Ef E-series Dioptric Adjustment Lenses ST-E2 220EX 420EX 550EX Macro Ring Lite MR-14EX Macro Twin Lite MT-24EX Bundled Accessories Eyecup Ef Angle Finder C Neck Strap EW-100DBII Semi-hard Case EH-16L Battery Pack BP-511 Battery Grip BG-E1 Battery Charger CB-5L Date / time CR2016 lithium battery EF-S lens Remote Switch RS-60E3 AC Adapter Kit ACK-E2 Battery Pack BP-512 Compact Power Adapter AC Adapter DC Coupler CA-PS400 AC-E2 DR-400 130
System Map CF card Card reader PC card adapter • EOS DIGITAL Solution Disk • Adobe Photoshop Elements Disk PC card slot USB port Interface cable IFC-300PCU Computer Windows XP (Home Edition / Professional) Windows 2000 Professional Windows ME Windows 98 Second Edition Mac OS 9.0-9.
Specifications • Type Type: Recording medium: Image size: Compatible lenses: Lens mount: Digital, single-lens reflex, AF/AE camera with built-in flash Type I and II CF card 22.7 mm x 15.1 mm Canon EF-S and EF lenses (35mm-equivalent focal length is equal to approx.1.6 times the marked focal length.) Canon EF mount • Image Sensor Type: Pixels: Total pixels: Aspect ratio: Color filter system: Low-pass filter: High-sensitivity, high-resolution, large CMOS sensor Effective pixels: Approx. 6.
Specifications • Viewfinder Type: Coverage: Pentamirror, eye-level 95% vertically and horizontally with respect to the effective pixels Magnification: 0.8x (–1 diopter with 50mm lens at infinity) Eye point: 21 mm Dioptric adjustment range: –3.0 - +1.
Specifications ISO speed: Exposure compensation: AE lock: Basic Zone modes: Automatic Creative Zone modes: Equivalent to ISO 100, 200, 400, 800, 1600 AEB: +/–2 stops in 1/3-stop increments Manual: +/–2 stops in 1/3-stop increments (can be combined with AEB) Auto: Applied when focus is achieved in the One Shot AF mode with evaluative metering. Manual: Applied with AE lock button.
Specifications • Playback Image display format: Highlight alert: Single image, single image (Info), magnified view (Approx. 1.5x-10x), 9-image index, zoom in, autoplay, image rotation, and jump In the single image and single image (Info) modes, any overexposed highlight areas with no image infomation will blink. • Image Protection and Erase Protection: Erase: Single images can be protected or cancelled. Single image or all images in the CF card can be erased (except protected images).
Specifications • Dimensions and Weight Dimensions (W x H x D): Weight: 142 x 99 x 72.9 mm / 5.6 x 3.9 x 2.9 in 560 g / 19.7 oz (body only) • Operating Environment Operating temperature range: 0 - 40˚C / 32 - 104°F Operating humidity range: 85% or lower • Battery Charger CB-5L Compatible batteries: Battery mount: Power cord length: Recharging time: Rated input: Rated output: Operating temperature range: Operating humidity range: Dimensions (W x H x D): Weight: Battery Pack BP-511/BP-512 1 Approx. 1.
Digital Camera Model DS6041 Systems This device complies with Part 15 of the FCC Rules. Operation is subject to the following two conditions: (1) This device may not cause harmful interference, and (2) this device must accept any interference received, including interference that may cause undesired operation. Note: This equipment has been tested and found to comply with the limits for class B digital devices, pursuant to Part 15 of the FCC Rules.
Index A AC Adaptor Kit ...................... 15, 22 Accessories ............................... 128 A-DEP ......................................... 74 Adobe RGB ................................. 55 AE Lock ....................................... 78 AEB (Auto Exposure Bracketing) ... 76 AF Mode ................................... 123 AF Point ...................................... 62 AF-Assist Beam .......................... 63 AI Focus AF .............................. 123 AI Servo AF .....................
Index Image-Recording Quality ............ 48 Index Display ............................... 88 ISO Speed .................................. 50 L Landscape .................................. 40 Language .................................... 30 LCD Monitor ............................ 9, 31 LCD Panel ............................... 9, 12 LCD Panel Illumination ................ 84 Lens ............................................ 23 M Magnified View ............................ 89 Main dial .................
CANON INC. 30-2, Shimomaruko 3-chome, Ohta-ku, Tokyo 146-8501, Japan U.S.A. CANON U.S.A. INC. For all inquiries concerning this camera, call toll free in the U.S. 1-800-OK-CANON or write to: Customer Relations, Canon U.S.A., Inc. One Canon Plaza, Lake Success, N.Y. 11042-1198 CANADA CANON CANADA INC. HEADQUARTERS 6390 Dixie Road, Mississauga, Ontario L5T 1P7, Canada CANON CANADA INC. MONTREAL BRANCH 5990, Côte-de-Liesse, Montréal Québec H4T 1V7, Canada CANON CANADA INC.