
Instruction Manual


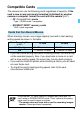


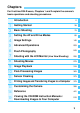
Table Of Contents
- Cover
- Introduction
- Getting Started
- Charging the Battery
- Installing and Removing the Battery
- Installing and Removing the Card
- Turning on the Power
- Setting the Date, Time, and Zone
- Selecting the Interface Language
- Attaching and Detaching a Lens
- Basic Operation
- Quick Control for Shooting Functions
- Menu Operations
- Before You Start
- Displaying the Grid
- Displaying the Electronic Level
- Setting the Viewfinder Information Display
- Help
- Basic Shooting
- Setting the AF and Drive Modes
- Image Settings
- Selecting the Card for Recording and Playback
- Setting the Image-Recording Quality
- Setting Crop/Aspect Ratio
- Setting the ISO Speed
- Selecting a Picture Style
- Customizing a Picture Style
- Registering a Picture Style
- Setting the White Balance
- White Balance Correction
- Auto Correction of Brightness and Contrast
- Setting Noise Reduction
- Highlight Tone Priority
- Correction of Lens Peripheral Illumination and Aberration
- Reducing Flicker
- Setting the Color Space
- Creating and Selecting a Folder
- Changing the File Name
- File Numbering Methods
- Setting Copyright Information
- Advanced Operations
- Program AE
- Shutter-Priority AE
- Aperture-Priority AE
- Manual Exposure
- Selecting the Metering Mode
- Setting Exposure Compensation
- Auto Exposure Bracketing (AEB)
- AE Lock
- Bulb Exposures
- HDR (High Dynamic Range) Shooting
- Multiple Exposures
- Mirror Lockup
- Using the Eyepiece Cover
- Using a Remote Switch
- Remote Control Shooting
- Interval Timer Shooting
- Flash Photography
- Shooting with the LCD Monitor (Live View Shooting)
- Shooting Movies
- Image Playback
- Image Playback
- Shooting Information Display
- Searching for Images Quickly
- Magnifying Images
- Comparing Images (Two-Image Display)
- Rotating the Image
- Protecting Images
- Setting Ratings
- Quick Control for Playback
- Enjoying Movies
- Playing Back Movies
- Editing a Movie’s First and Last Scenes
- Slide Show (Auto Playback)
- Viewing Images on a TV Set
- Copying Images
- Erasing Images
- Changing Image Playback Settings
- Post-Processing Images
- Sensor Cleaning
- Printing Images and Transferring Images to a Computer
- Customizing the Camera
- Reference
- Viewing the CD-ROM Instruction Manuals / Downloading Images to Your Computer

2
The EOS 5DS/EOS 5DS R is a digital single-lens reflex camera
featuring a full-frame CMOS sensor (approx. 36.0 mm x 24.0 mm) with
approx. 50.6 effective megapixels, Dual DIGIC 6, approx. 100%
viewfinder coverage, high-precision and high-speed 61-point AF,
approx. 5.0 fps continuous shooting, 3.2-inch LCD monitor, Live View
shooting, and Full High-Definition (Full HD) movie shooting.
Before Starting to Shoot, Be Sure to Read the Following
To avoid botched pictures and accidents, first read the “Safety
Precautions” (p.20-22) and “Handling Precautions” (p.23-25).
Refer to This Manual While Using the Camera to Further
Familiarize Yourself with the Camera
While reading this manual, take a few test shots and see how they
come out. You can then better understand the camera.
Testing the Camera Before Use and Liability
After shooting, play images back and check whether they have been
properly recorded. If the camera or memory card is faulty and the
images cannot be recorded or downloaded to a computer, Canon
cannot be held liable for any loss or inconvenience caused.
Copyrights
Copyright laws in your country may prohibit the use of your recorded
images of people and certain subjects for anything but private
enjoyment. Also be aware that certain public performances, exhibitions,
etc., may prohibit photography even for private enjoyment.
Introduction
About the EOS 5DS R
The EOS 5DS R’s optical low-pass filter is disabled, and the effect is
eliminated to obtain a higher-looking resolution.
Since the optical low-pass filter is for reducing moire and false colors, images
taken with the EOS 5DS R may show more moire and false colors than with
the EOS 5DS depending on the subject and shooting conditions.