
Instruction Manual

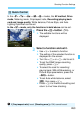

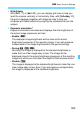
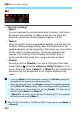
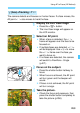
Table Of Contents
- Cover
- Introduction
- Getting Started
- Charging the Battery
- Installing and Removing the Battery
- Installing and Removing the Card
- Turning on the Power
- Setting the Date, Time, and Zone
- Selecting the Interface Language
- Attaching and Detaching a Lens
- Basic Operation
- Quick Control for Shooting Functions
- Menu Operations
- Before You Start
- Displaying the Grid
- Displaying the Electronic Level
- Setting the Viewfinder Information Display
- Help
- Basic Shooting
- Setting the AF and Drive Modes
- Image Settings
- Selecting the Card for Recording and Playback
- Setting the Image-Recording Quality
- Setting Crop/Aspect Ratio
- Setting the ISO Speed
- Selecting a Picture Style
- Customizing a Picture Style
- Registering a Picture Style
- Setting the White Balance
- White Balance Correction
- Auto Correction of Brightness and Contrast
- Setting Noise Reduction
- Highlight Tone Priority
- Correction of Lens Peripheral Illumination and Aberration
- Reducing Flicker
- Setting the Color Space
- Creating and Selecting a Folder
- Changing the File Name
- File Numbering Methods
- Setting Copyright Information
- Advanced Operations
- Program AE
- Shutter-Priority AE
- Aperture-Priority AE
- Manual Exposure
- Selecting the Metering Mode
- Setting Exposure Compensation
- Auto Exposure Bracketing (AEB)
- AE Lock
- Bulb Exposures
- HDR (High Dynamic Range) Shooting
- Multiple Exposures
- Mirror Lockup
- Using the Eyepiece Cover
- Using a Remote Switch
- Remote Control Shooting
- Interval Timer Shooting
- Flash Photography
- Shooting with the LCD Monitor (Live View Shooting)
- Shooting Movies
- Image Playback
- Image Playback
- Shooting Information Display
- Searching for Images Quickly
- Magnifying Images
- Comparing Images (Two-Image Display)
- Rotating the Image
- Protecting Images
- Setting Ratings
- Quick Control for Playback
- Enjoying Movies
- Playing Back Movies
- Editing a Movie’s First and Last Scenes
- Slide Show (Auto Playback)
- Viewing Images on a TV Set
- Copying Images
- Erasing Images
- Changing Image Playback Settings
- Post-Processing Images
- Sensor Cleaning
- Printing Images and Transferring Images to a Computer
- Customizing the Camera
- Reference
- Viewing the CD-ROM Instruction Manuals / Downloading Images to Your Computer

264
z5
When the Live View shooting/Movie
shooting switch is set to <A>, the Live
View shooting menu options will appear
under the [z5] and [z6] tabs (the
[z3] tab in <A>).
The settable functions on this menu screen apply only to Live View
shooting. They do not work with viewfinder shooting (settings
become invalid).
Live View shooting
You can set Live View shooting to [Enable] or [Disable].
AF method
You can select [u+Tracking] or [FlexiZone - Single]. See pages
268-272 for the AF method.
Continuous AF
The default setting is [Disable].
When [Enable] is set, the camera attains rough focus on the subject
continuously. This makes it quicker to achieve focus when you press
the shutter button halfway. If [Enable] is set, the lens will operate
constantly and consume more battery power. This will reduce the
number of possible shots due to shorter battery life.
If you want to set the lens’s focus mode switch to <MF> during
Continuous AF, first stop Live View shooting.
3 Menu Function Settings