
Instruction Manual
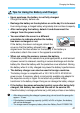
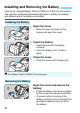

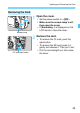


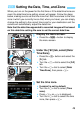
Table Of Contents
- Cover
- Introduction
- Getting Started
- Charging the Battery
- Installing and Removing the Battery
- Installing and Removing the Card
- Turning on the Power
- Setting the Date, Time, and Zone
- Selecting the Interface Language
- Attaching and Detaching a Lens
- Basic Operation
- Quick Control for Shooting Functions
- Menu Operations
- Before You Start
- Displaying the Grid
- Displaying the Electronic Level
- Setting the Viewfinder Information Display
- Help
- Basic Shooting
- Setting the AF and Drive Modes
- Image Settings
- Selecting the Card for Recording and Playback
- Setting the Image-Recording Quality
- Setting Crop/Aspect Ratio
- Setting the ISO Speed
- Selecting a Picture Style
- Customizing a Picture Style
- Registering a Picture Style
- Setting the White Balance
- White Balance Correction
- Auto Correction of Brightness and Contrast
- Setting Noise Reduction
- Highlight Tone Priority
- Correction of Lens Peripheral Illumination and Aberration
- Reducing Flicker
- Setting the Color Space
- Creating and Selecting a Folder
- Changing the File Name
- File Numbering Methods
- Setting Copyright Information
- Advanced Operations
- Program AE
- Shutter-Priority AE
- Aperture-Priority AE
- Manual Exposure
- Selecting the Metering Mode
- Setting Exposure Compensation
- Auto Exposure Bracketing (AEB)
- AE Lock
- Bulb Exposures
- HDR (High Dynamic Range) Shooting
- Multiple Exposures
- Mirror Lockup
- Using the Eyepiece Cover
- Using a Remote Switch
- Remote Control Shooting
- Interval Timer Shooting
- Flash Photography
- Shooting with the LCD Monitor (Live View Shooting)
- Shooting Movies
- Image Playback
- Image Playback
- Shooting Information Display
- Searching for Images Quickly
- Magnifying Images
- Comparing Images (Two-Image Display)
- Rotating the Image
- Protecting Images
- Setting Ratings
- Quick Control for Playback
- Enjoying Movies
- Playing Back Movies
- Editing a Movie’s First and Last Scenes
- Slide Show (Auto Playback)
- Viewing Images on a TV Set
- Copying Images
- Erasing Images
- Changing Image Playback Settings
- Post-Processing Images
- Sensor Cleaning
- Printing Images and Transferring Images to a Computer
- Customizing the Camera
- Reference
- Viewing the CD-ROM Instruction Manuals / Downloading Images to Your Computer
41
Charging the Battery
Upon purchase, the battery is not fully charged.
Charge the battery before use.
Recharge the battery on the day before or on the day it is to be used.
Even during storage, a charged battery will gradually drain and lose its capacity.
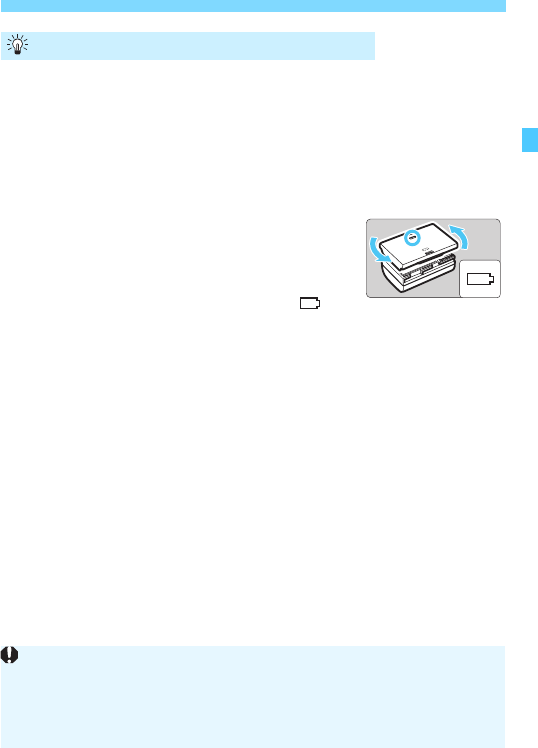
After recharging the battery, detach it and disconnect the
charger from the power outlet.
You can attach the cover in a different
orientation to indicate whether the battery
has been recharged or not.
If the battery has been recharged, attach the
cover so that the battery-shaped hole < > is
aligned over the blue sticker on the battery. If the battery is
exhausted, attach the cover in the opposite orientation.
When not using the camera, remove the battery.
If the battery is left in the camera for a prolonged period, a small amount
of power current is released, resulting in excess discharge and shorter
battery life. Store the battery with the protective cover attached. Storing
the battery when it is fully charged may lower the battery’s performance.
The battery charger can also be used in foreign countries.
The battery charger is compatible with a 100 V AC to 240 V AC 50/60 Hz
power source. If necessary, attach a commercially-available plug adapter for
the respective country or region. Do not attach any portable voltage
transformer to the battery charger. Doing so can damage the battery charger.
If the battery becomes exhausted quickly even after being fully
charged, the battery has reached the end of its service life.
Check the battery’s recharge performance (p.446) and purchase a new battery.
Tips for Using the Battery and Charger
After disconnecting the charger’s power plug, do not touch the prongs for
approx. 10 sec.
If the battery’s remaining capacity (p.446) is 94% or higher, the battery
will not be recharged.
The charger cannot charge any battery other than Battery Pack LP-E6N/LP-E6.