
Digital Photo Professional Ver.4.3 for Macintosh Instruction Manual
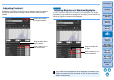


Table Of Contents
- Digital Photo Professional
- Introduction
- Downloading Images
- Viewing Images
- Organizing and Sorting Images
- Editing Images
- RAW Images
- Editing JPEG and TIFF Images
- Tool Palettes
- Editing with the Basic Adjustment Tool Palette
- Editing with the Tone Adjustment Tool Palette
- Editing with the Color Adjustment Tool Palette
- Editing with the Detailed Adjustment Tool Palette
- Editing with the Trimming/Angle Adjustment Tool Palette
- Editing with the Lens Correction Tool Palette
- Editing with the Dust Delete/Copy Stamp Tool Palette
- Setting Work Color Space
- Using the Soft-Proof Colors Function
- Saving Editing Results
- Re-Editing an Image
- Utilizing Adjustment Contents (Recipe)
- Adjusting by Comparing Multiple Images
- Editing Efficiently
- Compositing Images
- Creating HDR (High Dynamic Range) Images
- Transferring a RAW Image to Photoshop
- Customizing the Main Window Toolbar
- Printing Images
- Processing Large Numbers of RAW Images
- Remote Shooting
- Specifying Preferences
- Reference
54
3
Sorting
Images
1
2
4
5
Introduction
Contents
Downloading
Images
Viewing
Images
Printing
Images
Editing
Images
Reference/
Index
6
Processing
Large Numbers
of RAW Images
7
Remote
Shooting
8
Specifying
Preferences
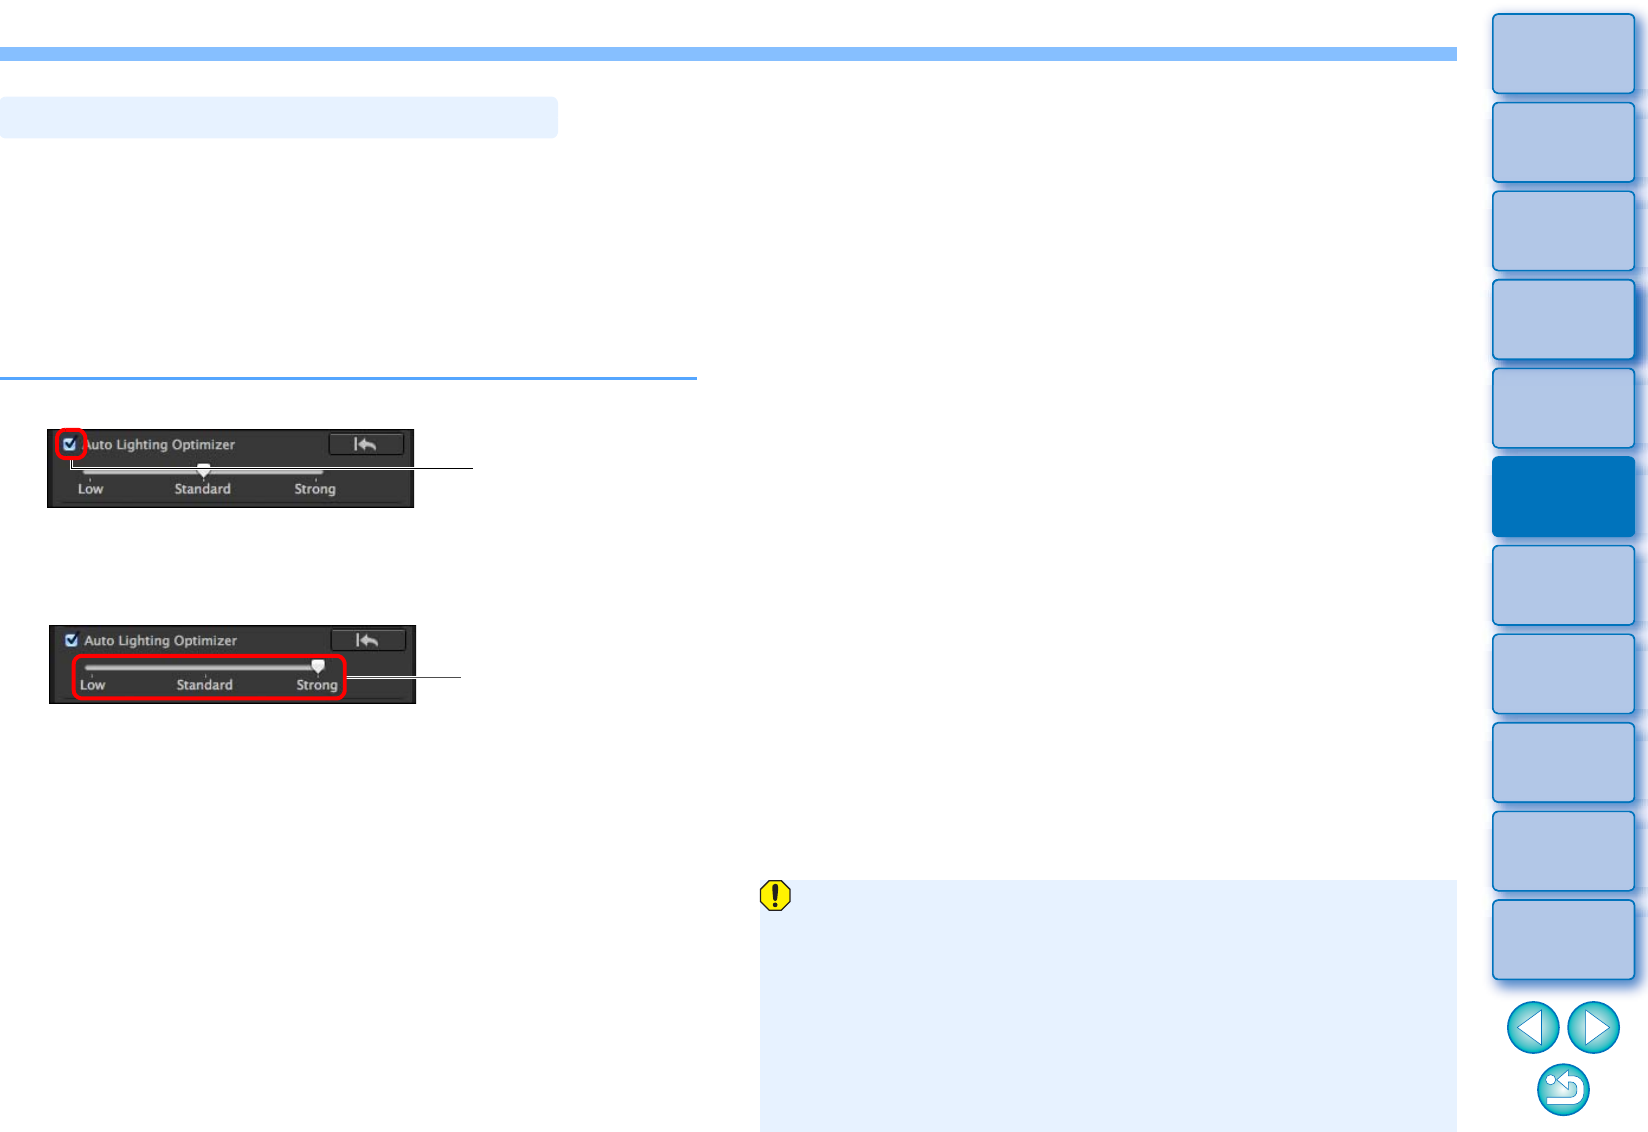
If the shooting result is dark or the contrast is low, you can use the Auto
Lighting Optimizer function to auto-correct the brightness and contrast,
and obtain a more favorable image.
You can also change the setting of the image shot with the camera’s
Auto Lighting Optimizer function.
This function also can be used for JPEG/TIFF images in addition to
RAW images.
* ALO stands for Auto Lighting Optimizer.
1
Checkmark the [Auto Lighting Optimizer] checkbox.
For the image shot with the camera’s Auto Lighting Optimizer
function, the checkbox is already checked.
2
Change the setting according to your preferences.
Auto correction is applied to the image to match the setting.
For the image shot with the camera’s Auto Lighting Optimizer
function, the setting at the time of shooting is applied as the
default value.
To cancel the Auto Lighting Optimizer, remove the check mark
from the checkbox.
Using the Auto Lighting Optimizer
Checkmark
Select from three
levels: Low/Standard/
Strong
When [Highlight tone priority] is set to [Enable] on any supported
EOS DIGITAL camera other than the EOS-1D Mark IV or EOS 5D
Mark II, the Auto Lighting Optimizer cannot be used for RAW
images.
You cannot use the Auto Lighting Optimizer with multiple-
exposure RAW images created with the camera.
When you apply Auto Lighting Optimizer to the RAW and JPEG
images shot simultaneously, the correction results of the two
images may differ.