
User manual


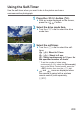
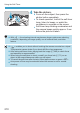
Table Of Contents
- Introduction
- Preparation and Basic Operations
- Basic Shooting
- Fully Automatic Shooting (Scene Intelligent Auto)
- Full Auto Techniques (Scene Intelligent Auto)
- Special Scene Mode
- Shooting Portraits
- Shooting Group Photos
- Shooting Landscapes
- Shooting Moving Subjects
- Photographing Children
- Panning
- Shooting Close-ups
- Shooting Food
- Shooting Night Portraits (With a Tripod)
- Shooting Night Scenes (Handheld)
- Shooting Backlit Scenes
- Shooting Quiet Scenes
- Cautions for the
Modes
- Creative Zone
- Shooting
- Shooting Still Photos
- Tab Menus: Still Photo Shooting
- Setting Image Quality
- Setting Cropping/Aspect Ratio
- Setting the Image Review Time
- Correction of Lens Aberrations due to Optical Characteristics
- Setting the Desired Exposure Compensation
- Auto Exposure Bracketing (AEB)
- Setting the ISO Speed for Still Photos
- Auto Correction of Brightness and Contrast
- Highlight Tone Priority
- Setting the Metering Timer
- Exposure Simulation
- Setting the White Balance
- White Balance Correction
- Setting the Color Space
- Selecting a Picture Style
- Customizing a Picture Style
- Registering a Picture Style
- Setting Noise Reduction
- Appending Dust Delete Data
- Shooting with the Touch Shutter
- Multiple Exposures
- HDR (High Dynamic Range) Shooting
- Interval Timer Shooting
- Reducing Flicker
- Selecting the Display Speed for High-Speed Continuous Shooting
- Card Reminder
- Setting Touch & Drag AF
- Selecting the AF Operation
- Selecting the AF Method
- Focusing on People’s Eyes
- Setting Continuous AF
- Setting Lens Electronic MF
- Setting AF-Assist Beam Firing
- Focus Bracketing
- Selecting the Drive Mode
- Using the Self-Timer
- Selecting the Metering Mode
- Locking the Exposure for Shooting (AE Lock)
- Focusing Manually
- Remote Control Shooting
- Using a Remote Switch
- Flash Photography
- Setting the Flash Function
- General Notes on Still Photo Shooting
- Recording Movies
- Shooting Still Photos
- Playback
- Tab Menus: Playback
- Image Playback
- Magnifying Images
- Index Display (Multiple-Image Display)
- Playing Back Movies
- Editing a Movie’s First and Last Scenes
- Grabbing a Frame from 4K Movies or 4K Time-Lapse Movies
- Playback on a TV
- Protecting Images
- Rotating Images
- Erasing Images
- Digital Print Order Format (DPOF)
- Specifying Images for a Photobook
- Processing RAW Images with the Camera
- Applying Your Favorite Effects (Creative Assist)
- Selecting the Type of RAW Image Processing
- Editing Video Snapshot Albums
- Cropping JPEG Images
- Resizing JPEG Images
- Setting Ratings
- Slide Show (Auto Playback)
- Filtering Images for Playback
- Jump Display (Jumping Through Images)
- Customizing Playback Information Display
- Displaying the Highlight Alert
- Displaying AF Points
- Displaying a Grid
- Specifying Initial Image Display When Playback Begins
- Setting the Initial Magnification Ratio and Position
- Set-up
- Tab Menus: Set-up
- Creating and Selecting a Folder
- File Numbering Methods
- Setting the Auto Rotation of Vertical Images
- Formatting Memory Cards
- Displaying the Shooting Mode Guide
- Displaying the Feature Guide
- Setting Eco Mode
- Setting Power-Saving Features
- Adjusting the Screen Brightness
- Setting the Date, Time, and Time Zone
- Setting the Interface Language
- Setting the Video System
- Setting the Touch Control Response
- Disabling Beeps for Camera Operations
- Checking the Battery Information
- Sensor Cleaning
- Setting the HDMI Output Resolution
- RAW Playback on an HDR TV
- Customizing Information Displayed When Shooting
- Setting a Priority for Shooting Display Performance
- Setting the Viewfinder Display Format
- Setting the Display Mode
- Customizing Shutter Button Functionality for Movie Recording
- Help
- Setting Wireless Features
- Geotagging Images
- Setting the Multi-Function Lock
- Registering Custom Shooting Modes
- Reverting the Camera to the Default Settings
- Setting Copyright Information
- Checking Other Information
- Wi-Fi (Wireless Communication) Functions
- What You Can Do via Wi-Fi (Wireless Communication) Functions
- Connecting to a Smartphone via Wi-Fi
- Connecting to a Computer via Wi-Fi
- Connecting to a Printer via Wi-Fi
- Sending Images to a Web Service
- Wi-Fi Connection via Access Points
- Reconnecting via Wi-Fi
- Changing or Deleting Connection Settings
- Clearing Wireless Communication Settings to Default
- View Info Screen
- Responding to Error Messages
- Wireless Communication Function Notes
- Security
- Checking Network Settings
- [Wireless communication settings] Screen
- [Wi-Fi settings] Screen
- Virtual Keyboard Operation
- Setting the IP Address Manually
- Wi-Fi/Bluetooth Status Display
- Custom Functions / My Menu
- Reference

210
Using the Self-Timer
4
Take the picture.
z
Focus on the subject, then press the
shutter button completely.
g
To check operation, look at the self-timer
lamp, listen for beeps, or watch the
countdown in seconds on the screen.
g
Self-timer lamp blinking accelerates and
the camera beeps quickly approx. 2 sec.
before the picture is taken.
o
With <
q
>, the shooting interval may become longer under some shooting
conditions, depending on image quality, use of external ash, and other
factors.
o
<
l
> enables you to shoot without touching the camera mounted on a tripod.
This prevents camera shake if you shoot still-life or long exposures.
o
After taking self-timer shots, playing back the image (
=
296) to check focus
and exposure is recommended.
o
When using the self-timer to shoot yourself, use focus lock (
=
71) on an
object at the same distance as where you will stand.
o
To cancel the self-timer after it starts, either tap the screen or press <
0
>.
o
Auto power o time may be extended when the camera is set for remote
shooting.