
Service manual


5-1
LASER CLASS 1060P Chapter 5: Appendix
1. INSTALLING THE LASER CLASS 1060P
This machine has been designed for user installation. Therefore, this manual contains only
an outline description of the procedures. For details of the installation, see the
USER’S
GUIDE
.
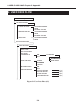
1.1 Setting Up
• Choosing a Location for Your LASER CLASS 1060P
Before you set up Your LASER CLASS 1060P, make sure you have read cautions of setting up LASER
CLASS 1060P.
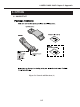
• Unpacking Your LASER CLASS 1060P
Check that nothing is missing when the unit is unpacked.
• Assembling the LASER CLASS 1060P
• Making Connections
Connect the telephone line , the optional handset, a telephone, an answering machine or the power cord.
• The Toner Cartridge
• Loading Recording Paper
Set paper in the auto sheet feeder, in PAPER SIZE under FAX PRINTER, set the size of paper that is to be
used.
• Setting the telephone line type
Select the correct telephone line type in TEL LINE TYPE under USER SETTINGS
• Entering user information
Enter user information, such as DATE & TIME, UNIT TELEPHONE #, UNIT NAME etc.
1.2 Checking Operations
• Copy operation
Make a copy, and check that the operation is normal.
• Communication test
Transmit to, and receive from other facsimiles, and check that images are sent normally when transmitted,
and are printed normally when received.
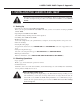
What to do when trouble occurs
Very rarely, during use, the display may go out, all the buttons may stop working, or some
other trouble may occur because of strong electrical noise or a large amount of static. If
such trouble occurs, initialize the RAM. During installation, we recommend that you per-
form the all clear operation after the power on. Refer to
NOTE: “ALL clear” when nothing
works on Page 3-3
.