
imageCLASS MF3200 Series Software Guide


1
2
3
4
5
6
TOP
Back Previous Next
2-2
Table of Contents
Index
Introduction
Printing
Scanning a
Document
PC Faxing
Troubleshooting
Appendix
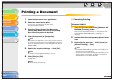
Printing a Document
1. Open the document in an application.
2. Select the command to print.
In most cases, click [Print] from the [File] menu.
The [Print] dialog box appears.
3. From the [Select Printer] list box or the
[Name] drop-down list in the [Print] dialog
box, select the printer to be used.
4. Click [Preferences] or [Properties].
NOTE
Depending on the application you are using, select the printer to
be used in the [General] tab sheet in the [Print] dialog box, then
specify the print settings in the corresponding tab sheet. (Only for
Windows 2000.)
5. Specify the required settings → click [OK].
NOTE
For details, see “Changing Print Settings,” on p. 2-4.
6. Click [Print] or [OK].
Printing starts.
NOTE
To cancel printing, click [Cancel].
■ Canceling Printing
Windows 2000/XP
1. Open the [Printers and Faxes] (Windows 98/
Me/2000: [Printers]) folder.
Click [start] on the Windows task bar → select [Printers and
Faxes] (Windows 98/Me/2000: [Start]
→ [Settings] →
[Printers]).
2. Double-click the corresponding printer driver
icon.
3. Right click the print job → click [Cancel] or
[Cancel Printing] → [Yes].
NOTE
– For Windows 98/Me/2000, the job will be canceled when you
click [Cancel] or [Cancel Printing].
– You can also cancel a print job using [System Monitor] on the
operation panel of the machine. For details, see Chapter 3,
“System Monitor,” in the Advanced Guide.