User’s Guide Please read this guide before operating this equipment. After you finish reading this guide, store it in a safe place for future reference.
Copyright Copyright © 2003 by Canon Inc. All rights reserved. No part of this publication may be reproduced, transmitted, transcribed, stored in a retrieval system, or translated into any language or computer language in any form or by any means, electronic, mechanical, magnetic, optical, chemical, manual, or otherwise, without the prior written permission of Canon Inc. Model Name • H12269 (imageCLASS MP730) • H12270 (imageCLASS MP700) Trademarks Canon and BJ are registered trademarks.
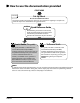
How to use the documentation provided START HERE Set-Up Sheet Printed sheet Be sure to read this sheet first! This sheet includes instructions for setting up your machine and getting it ready for use. Follow all steps in this sheet before using your machine. Printed manual Quick Reference Guide After following instructions in the Set-Up Sheet, we recommend you read this guide to familiarize yourself with the basic operation of all functions of your machine.
Type conventions Please read the list below of symbols, terms, and abbreviations used in this guide. WARNING CAUTION IMPORTANT NOTE Fax Model ( p. n-nn) Set-Up Sheet Quick Reference Guide Software Guide machine default document menu [key name] click, double-click Fax model only: fax or document Indicates a warning concerning operations that may lead to death or injury to persons if not performed correctly. In order to use the machine safely, always pay attention to these warnings.
Contents 1: Introduction Copying an image to fit the page.....................5-3 Advanced copy features ...........................................5-4 Copying two pages on a single page..............5-4 Borderless copying ................................................5-5 Repeating an image on a page .........................5-6 Creating a mirror image.......................................5-8 Shrinking an image to fit the page ..................5-9 What your machine can do............................
Checking a document’s details......................... 8-9 Special dialing............................................................8-10 Dialing through a switchboard.......................8-10 Switching temporarily to tone dialing .........8-10 Restricting use of your machine .........................8-11 Enabling restriction.............................................8-11 Canceling restriction...........................................8-12 9: Fax Model Receiving faxes Setting the receive mode .....
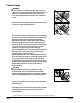
Safety information Read this safety information thoroughly before using your machine, and keep it handy in case you need to refer to it later. WARNING • This product emits low level magnetic flux. If you use a cardiac pacemaker and feel abnormalities, please move away from this product and consult your doctor. CAUTION • Do not disassemble or modify. There are high-temperature and high-voltage components inside the machine which may result in a fire or electrical shock.
Power Supply WARNING • Do not damage or modify the power cord and power plug. Also do not place heavy objects on the power cord, pull on it, or extensively bend it. These actions may cause electrical damage and result in fire or electrical shock. • Do not insert or unplug the power plug with wet hands, as this may result in electrical shock. • Do not overload the wall outlet with too many electrical appliances, as this may result in fire or electrical shock.
IMPORTANT • If dust accumulates around the plug of the power cord when it is connected to a power outlet, unplug the machine and wipe the plug with a clean, dry cloth. • Fax Model Do not plug the machine into the same circuit as appliances such as an air conditioner, television, or copier. These devices generate electrical noise which may interfere with your machine’s operation. • Whenever you turn off the power and unplug the machine, wait at least five seconds before you plug it in again.
CAUTION • Close the document cover and scanning unit gently to avoid catching your hand. Failing to do so may result in personal injury. • Do not press down hard on the document cover or Fax Model ADF when using the platen glass to scan thick books. This may damage the platen glass and/or result in personal injury. • Do not place the following objects on top of the machine.
Legal limitation on usage of your product and the use of images Using your product to scan, print or otherwise reproduce certain documents, and the use of such images as scanned, printed or otherwise reproduced by your product, may be prohibited by law and may result in criminal and/or civil liability. A non-exhaustive list of these documents is set forth below. This list is intended to be a guide only.
4. To relocate this equipment please. 1) Disconnect the equipment from the Telecom connection. 2) Disconnect the equipment from the power source. 3) Reconnect the equipment to the power source. 4) Reconnect the equipment to the Telecom connection. 5. If the supply cord of this equipment is damaged, it must be replaced by an approved Canon part. Please contact your authorized Canon dealer or the Canon help line. 6.
Chapter Introduction 1 What your machine can do Thank you for purchasing the Canon imageCLASS MP730 (indicated by the mark imageCLASS MP700. Your machine incorporates the following functions in one simple-to-operate device: Fax Model ) or the Printer . . . . . . . . . . . . . . . . Print crisp, clear color or black & white documents from your computer. Photo printer . . . . . . . . . . Print photo-quality images from a memory card inserted directly into your machine. Copier . . . . . . . . . . . . .
Unpacking your machine When you unpack your machine, check that you have the following components: ● Fax Model MP730 Machine ● Tray cover ● Ink tanks (Black, cyan, magenta, yellow) ● MP700 ● Multi-purpose tray ● Paper output tray ● Fax Model Document tray ● Printhead ● Power cord ● Documentation (Set-Up Sheet, Quick Reference Guide) ● MP730/700 Setup CD-ROM ● Fax Model Telephone line cord ● Fax Model Destination labels NOTE • A USB cable is not included.
Main components of the machine Fax model shown here.
Operation panel of the machine Fax model shown here. q w r t yu e !2 i o!0 !1 !6 !7 !3 !4 !5 @2 @3 !8 !9 @0 @1 @4 @5 @6 @7 @8 q [Resume] key Resumes an operation after an error is corrected. Fax Model Also ejects a document remaining in the ADF. w Fax Model In Use/Memory light Blinks or lights during operation. Lights also when there are documents in the machine’s memory. e Alarm light Blinks when an error occurs or when the machine needs attention.
IMPORTANT • To prevent the printhead from drying up, the machine automatically caps it when the power is turned off with the [ON/OFF (1 sec.)] key. If you need to disconnect the machine from the main power source (e.g. disconnect the power cord), be sure to turn off the machine first by pressing [ON/OFF (1 sec.)] before disconnecting it.
NOTE • The power cannot be turned off when the machine is operating or when the In Use/Memory light is on or blinking. • Your machine performs printhead cleaning every time you turn on the machine. This ensures optimum print quality, but also consumes a small amount of ink during the cleaning process.
Chapter 2 Document handling Document requirements Fax Model ADF for copying, scanning, or Fax Model Platen glass Fax Model Document type • Special types of paper • Photographs • Book • Fax Model Documents that are not suitable for the ADF. Multipage documents of the same size, thickness, and weight. Size (W × L) Max. 216 × 356 mm (8 !/2 × 14 in.) Fax Model Max. 216 × 297 mm (8 !/2 × 11 #/4 in.) Max. 216 mm × 1 m (8 !/2 × 39 in.) Min. 105 × 148 mm (4 !/8 × 5 &/8 in.
Loading documents You can load your document on the platen glass or Fax Model ADF. Where you load it depends on the type of document and the machine you are using ( p. 2-1). Using the platen glass NOTE • Fax Model Load legal-size documents in the ADF. Follow this procedure to load your document on the platen glass: 1 2 Lift the document cover. 3 Gently lower the document cover. Place your document face down on the platen glass.
Chapter 3 Print media handling Recommended print media and requirements Plain Paper You can use normal photocopy paper, Canon Bubble Jet paper (LC-301), or Canon Super White paper (SW-101). Size: • Standard paper: A5 (148 × 210 mm/5 &/8 × 8 !/4 in.) Letter (215.9 × 279.4 mm/8 !/2 × 11 in.) A4 (210 × 297 mm/8 !/4 × 11 #/4 in.) Legal (215.9 × 355.6 mm/8 !/2 × 14 in.) B5 (182 × 257 mm/7 !/8 × 10 !/8 in.) • Non standard paper: Min: 90 × 120 mm (3 !/2 × 4 #/4 in.) Max: 215.9 × 584.2 mm (8 !/2 × 23 in.
High Resolution Paper HR-101N This type of paper provides better color reproduction than plain paper. It is suitable for printing business documents that feature graphics, and for photographs. Size: A4, Letter, B5 Quantity: Approx. 80 sheets or maximum stack height of 13 mm (!/2 in.) Paper thickness lever position: Left Printer driver setting ([Media Type]): [High Resolution Paper] Use for: Printing from your computer/copying • Load the paper with the whiter side facing up.
Photo Paper Pro PR-101 This is thick paper with a treated surface that enhances gloss and provides superior color reproduction. It is ideal for printing high-quality photographs. Also, by using borderless printing, you can print without any white borders. Size: A4, Letter, 101.6 × 152.4 mm (4 × 6 in.), 127.0 × 177.8 mm (5 × 7 in.) Quantity: 10 sheets, 20 sheets (101.6 × 152.4 mm/4 × 6 in.
T-Shirt Transfers TR-201 This paper is used to produce iron-on transfers. Size: A4, Letter Quantity: 1 sheet Paper thickness lever position: Right Printer driver setting ([Media Type]): [T-Shirt Transfer] Use for: Printing from your computer/copying • Load the paper with the side that does not have green lines facing up. • Use mirror printing to print or copy the image onto the T-shirt transfer. • If the T-shirt transfer is curled, flatten it by curling it in the opposite direction.
–Do not store or display printouts in hot, damp, or humid conditions. Never expose them to heat or direct sunlight. –Store printouts in photo albums, photo frames, or presentation binders to protect them from direct exposure to air or sunlight. –Do not mount printouts in an adhesive-type album as you may not be able to remove them. –Be aware that some types of clear plastic folders and albums may cause the edges of the paper to turn yellow.
Setting the print media size and type For copying and Fax Model receiving faxes, you need to set the size and type of print media loaded in the multi-purpose tray. NOTE • For documents printed from your computer, specify the print media size and type on your computer ( Software Guide). • For photo printing, specify the print media size as described in Chapter 4. Follow this procedure to set the print media size and type: 1 2 Press [Copy] or [Fax]. Press [Paper Select].
Loading print media Loading paper Follow this procedure to load paper in the multi-purpose tray: Remove the tray cover. Place a stack of paper (print side up) in the multi-purpose tray q. Pinch the paper guide A and adjust to the width of the stack w. IMPORTANT • Make sure the stack does not exceed the paper limit mark B or tab C. Otherwise a paper jam may occur. A q w 3 Print media handling 1 2 B C 3 Replace the tray cover over the multi-purpose tray.
If the edges of the envelope are inflated or are curling up, place the envelope on a desk and with a pen press down on it moving from the center toward the edges of the envelope. • Ensure that no curl or puff exceeds 3 mm (! / 8 in.). Cross-sections of the envelope edge Incorrect 4 Place the stack of envelopes (print side up) in the multi-purpose tray q. Pinch the paper guide A and adjust to the width of the stack w.
Loading banner paper NOTE • Always leave an extra sheet at the end of the banner—just in case the type runs over. • Printing on banner paper may require considerable amounts of ink, so use new ink tanks if necessary. • For best print results on banner paper, use light design patterns. Follow this procedure to load banner paper in the multi-purpose tray: 1 Make sure the paper thickness lever is set to the right. • For details, see p. 3-5.
Chapter 4 Photo printing from a memory card This feature allows you to insert a memory card directly into your machine and print photographs from it. You can also read and write to a memory card from your computer. Compatible memory cards The following cards are compatible with the machine: CAUTION • You cannot use Microdrive memory cards. • You cannot use Smart media that has less than 2 MB of memory. NOTE • The above cards are acceptable for this machine.
Inserting/removing a memory card Inserting a memory card Follow this procedure to insert a memory card into the machine: IMPORTANT • The machine only recognizes one memory card at a time. Do not insert memory cards into both slots or the same slot at the same time as the machine will not recognize them. • When switching between memory cards of the same type or inserting a memory card into a different card slot, press [ON/OFF (1 sec.)] to turn off the power before removing the card.
Removing a memory card Follow this procedure to remove a memory card: CAUTION • Do not remove the memory card or turn off the machine when the indicator light is blinking as this may damage the data in the memory card. IMPORTANT • If an error occurs during printing (e.g. paper runs out), do not remove the memory card as this may damage the data in the memory card. 1 Check that the indicator light is not blinking q, then press [ON/OFF (1 sec.)] to turn the machine off w.
Printing methods There are different methods for printing photographs from a memory card. Follow this general procedure to print photographs: Step 1 Print an index ( p. 4-5) to see thumbnails of all the photographs in the memory card. • Note the number below the photograph(s) you want to print. Step 2 Select a printing method. All frames ( p. 4-6) Single frame ( p. 4-8) Frame range ( p. 4-10) DPOF ( p. 4-12) NOTE • You may not be able to print photographs if their file sizes are too large.
Printing an index This printing method prints thumbnails of the photographs in a memory card. An index is useful to see small versions of all photographs in a memory card without having to print each photograph individually. When you print an index, a number A is assigned to each thumbnail. You will need these numbers to select the photographs you want to print in a larger format. A 4 Photo printing from a memory card If “?” appears in the index, see p. 12-13.
10 2] or [3 3] to select the print media type. Use [2 • Select from the following: – – • If you selected <4" × 6"> or <5" × 7"> in step 8, you can only select . 11 Press [OK]. INDEX PHOTO A4 12 Press [Start]. • To cancel printing, press [Stop/Reset]. NOTE • You can only print one index print at a time. • The number assigned to each thumbnail on the index print is different from the ID numbers assigned by the digital camera.
8 9 2] or [3 3] to select the print media size. Use [2 • Select: – for A4-size print media. – for letter-size print media. – <4" × 6"> for card-size print media. – <5" × 7"> for card-size print media. Press [OK]. SELECT PAPER TYPE PHOTO PAPER PRO 10 2] or [3 3] to select the print media type. Use [2 • Select from the following: – – • If you selected <4" × 6"> or <5" × 7"> in step 8, you can only select .
Printing a single frame This printing method prints a specified single photograph from a memory card. In order to select the photograph you want to print, you will need to print the index and note the number assigned to the photograph. To print an index, see p. 4-5. Without a border With a border Follow this procedure to print a single photograph from a memory card: 1 Load the correct print media in the multi-purpose tray. • For details on print media and how to load it, see pp. 3-1, 3-7.
12 2] or [3 3] to select the print media size. Use [2 • Select: – for A4-size print media. – for letter-size print media. – <4" × 6"> for card-size print media. – <5" × 7"> for card-size print media. 13 Press [OK]. SELECT PAPER TYPE PHOTO PAPER PRO 14 2] or [3 3] to select the print media type. Use [2 • Select from the following: – – • If you selected <4" × 6"> or <5" × 7"> in step 12, you can only select .
Printing a range of frames This printing method prints a range of photographs in sequence from a memory card. In order to select the photographs you want to print, you will need to print the index and note the numbers assigned to them. To print an index, see p. 4-5. Without borders With borders Follow this procedure to print selected photographs from a memory card: 1 Load the correct print media in the multi-purpose tray. • For details on print media and how to load it, see pp. 3-1, 3-7.
12 2] or [3 3] to select the print media size. Use [2 • Select: – for A4-size print media. – for letter-size print media. – <4" × 6"> for card-size print media. – <5" × 7"> for card-size print media. 13 Press [OK]. SELECT PAPER TYPE PHOTO PAPER PRO 14 2] or [3 3] to select the print media type. Use [2 • Select from the following: – – • If you selected <4" × 6"> or <5" × 7"> in step 12, you can only select .
DPOF (Digital Print Order Format) printing This printing method prints photographs according to the Digital Print Order Format (DPOF) settings specified on your digital camera. The machine supports the following DPOF functions: • Specified frames printed • Print style (individual photographs, index) • Date printing on individual photographs. Date or frame number printing on index • Number of copies to be printed All other DPOF functions (shooting information, trimming, etc.) are not supported.
7 Press [OK]. SELECT PAPER TYPE PHOTO PAPER PRO 8 2] or [3 3] to select the print media type. Use [2 • Select from the following: – – • If you selected <4" × 6"> or <5" × 7"> in step 6, you can only select . If you selected in step 8: 9 Go to step 11. If you selected in step 8: 9 Press [OK]. BORDERLESS PRINT OFF 2] or [3 3] to select borderless printing. Use [2 • Select: – to print the photographs with borders.
Setting vivid photo printing Enabling this setting will make photographs appear more vibrant, especially blues and greens. It is also effective for photographs that were not taken with the correct exposure. Enable or disable this setting before printing photographs from a memory card. NOTE • Printing will take longer when this setting is enabled. • This setting is only effective when using photo paper pro. It cannot be used with plain paper.
4 Press [OK]. PRINT PHOTO DATE OFF 5 6 2] or [3 3] to select to enable date printing or to disable it. Use [2 Press [OK]. • When date printing is enabled, the LCD will display < >. Reading from or writing to a memory card IMPORTANT • Do not put your computer in standby or sleep mode when a memory card is inserted in a card slot. Also, do not remove or switch memory cards when your computer is in standby or sleep mode. • Insert only one memory card at a time into the machine.
8 Press [OK]. CARD PROTECT ON 9 10 11 12 2] or [3 3] to select to disable overwriting or to enable overwriting. Use [2 Press [OK]. Press [Stop/Reset] to return to standby mode. Press [Copy], [Fax], or [Scan] to select a mode other than photo print mode. • To avoid damage to data being accessed on a memory card, you cannot overwrite in photo print mode. 13 Insert a memory card into the appropriate slot.
Chapter 5 Copying Documents you can copy For information on the types of documents you can copy, their requirements, and details on loading them, see Chapter 2. Making copies 5 1 Load the document on the platen glass or Fax Model Copying Follow this procedure to make color or black & white copies: ADF. • For details on how to load documents, see p. 2-2. 2 3 4 Press [Copy]. Use the numeric keys to enter the number of copies. Adjust any necessary settings for your document.
Adjusting the image quality (resolution) Refer to Making copies on p. 5-1 and in step 4, adjust the image quality as follows: 1 2 Press [Image Quality]. 2] or [3 3] to select the image quality. Use [2 • In black & white mode, select: – for text-only documents. – for photographs. – for high-speed copying at a lower resolution.* • In color mode, select: – for color text-only documents.** – for color photographs.
Reducing or enlarging a copy You can reduce or enlarge copies in three different ways: using preset copy ratios, using custom copy ratios, or automatically reducing or enlarging an image to fit on the print media size selected. NOTE • For legal-size documents, the lowermost section of the document may not be copied. Using preset copy ratios Refer to Making copies on p. 5-1 and in step 4, adjust the copy ratio as follows: 1 Press [Enlarge/Reduce].
Advanced copy features Copying two pages on a single page This feature allows you to reduce two pages to fit onto one page. NOTE • Before using this feature, print or delete any documents in memory you no longer need. This will maximize the amount of memory available for this feature. Also, setting the image quality setting to or will use less memory ( p. 5-1). • You can only use this feature when the print media size setting is set to or .
Borderless copying This feature allows you to copy colored images that fill the entire page without borders. Follow this procedure to make a borderless copy: 1 2 3 4 Load the document on the platen glass. Press [Copy]. Use the numeric keys to enter the number of copies. step 4, p. 5-1). Adjust any necessary settings for your document ( • The image quality setting is fixed to . You cannot change this setting. • You cannot use the [COLOR] or [B&W] key. Copying is fixed to color copying.
9 Press [Start]. NOTE • You can select the width cropped from the borders of the original image ( , p. 13-5). Repeating an image on a page This feature allows you to copy an image several times onto a single page. You can set the machine to automatically select the number of times it repeats the image ( p. 5-7), or you can specify the number ( below).
Copying your image Follow this procedure to automatically or manually repeat an image on a page: 1 Load the document on the platen glass or Fax Model ADF. • Fax Model If you will be selecting the setting to automatically select the number of repeats, load your document on the platen glass. You cannot use the ADF. 2 3 4 5 6 Press [Copy]. Use the numeric keys to enter the number of copies. step 4, p. 5-1). Adjust any necessary settings for your document ( Press [Menu]. Press [OK].
Creating a mirror image This feature allows you to make a mirror copy of a document. Use this feature when copying onto T-shirt transfers so that the image appears the right way when ironed onto fabric. Follow this procedure to make a mirror copy: 1 2 3 4 5 6 Load the document on the platen glass or Fax Model ADF. Press [Copy]. Use the numeric keys to enter the number of copies. step 4, p. 5-1). Adjust any necessary settings for your document ( Press [Menu]. Press [OK]. SPECIAL COPY 1.
Shrinking an image to fit the page If the original image fills the entire page, this feature will slightly reduce the image so that it fits on the output print media. Same size print media NOTE • Your original document and the print media loaded in the multi-purpose tray must be the same size. For details on setting the print media size, see p. 3-6. Follow this procedure to copy an entire image onto a page: Load the document on the platen glass or Fax Model 5 ADF. Copying 1 2 3 4 5 6 Press [Copy].
Chapter 6 Registering information in your machine Guidelines for entering numbers, letters, and symbols Follow this procedure when you come to a step that requires you to enter a name or number: 1 T] to switch to uppercase letter mode (:A), lowercase letter mode (:a), or Press [T number mode (:1). • You can see what mode you are in by the character indicated on the top right corner of the LCD. :A Registering information in your machine 2 6 Use the numeric keys to enter the character.
Registering sender information When you receive a fax, the name of the person or company who sent you the fax, their fax/ telephone number, and the date and time of transmission may be printed in small type at the top of each page. This information is called the Sender information or the Transmit Terminal Identification (TTI). Similarly, you can register your details in your machine so that whenever you send a fax, the other party knows who sent it, and when it was sent.
Entering the date and time IMPORTANT • If your machine is connected to a computer and you start the computer or disconnect and connect the USB cable, the date and time will be read from your computer. Follow this procedure to enter the date and time: 1 2 3 Press [Menu]. 2] or [3 3] to select . Use [2 Press [OK]. USER DATA 1.TEL REGISTRATION 2] or [3 3] to select . Use [2 Press [OK] three times.
Registering your fax/telephone number and name Follow this procedure to register your fax/telephone number and name: 1 2 3 Press [Menu]. 2] or [3 3] to select . Use [2 Press [OK]. USER DATA 1.TEL REGISTRATION 4 5 6 7 2] or [3 3] to select . Use [2 Press [OK] twice. 2] or [3 3] to select . Use [2 Press [OK]. UNIT TELEPHONE # TEL= 8 Use the numeric keys to enter your fax/telephone number (max. 20 digits, including spaces).
Setting the telephone line type Before using your machine, make sure you have set the correct telephone line type for your telephone line. If you are unsure of your telephone line type, contact your telephone company. For ISDN or ADSL connections, contact the telephone company or service provider to confirm your line type. NOTE • You can print the USER’S DATA LIST to check the current setting ( p. 10-5). Follow this procedure to set the telephone line type: 1 2 3 Press [Menu].
Dialing through a switchboard A PBX (Private Branch Exchange) is an on-site telephone switchboard. If your machine is connected through a PBX or other telephone switching system, you have to dial the outside line access number first, and then the number of the party you are calling. To facilitate this procedure, you can register the PBX access type and the outside line access number under the [R] key so that you only need to press this key before dialing the fax/ telephone number you want to reach.
13 14 15 Press [Redial/Pause] to enter a pause. Press [OK]. Press [Stop/Reset]. Setting the summer time Some countries adopt the summer time system that shifts the clock time forward or back at certain periods of the year. You can set your machine to automatically change the time by registering the day and time that summer time begins and ends in your country. This feature is only available in some countries. Follow this procedure to enable/disable the summer time: Press [Fax]. Press [Menu].
13 2] or [3 3] to select the week when the summer time starts. Use [2 • Select from the following: – – – – – (fourth or fifth week depending on the month) 14 Press [OK] twice. DAY SUNDAY 15 16 2] or [3 3] to select the day when the summer time starts. Use [2 Press [OK] twice. TIME 01:00 17 Use the numeric keys to enter the time (in 24-hour format) when the summer time compensation is made. • Precede single digits with a zero.
25 Use the numeric keys to enter the time (in 24-hour format) when the summer time compensation is made. • Precede single digits with a zero. 26 Press [OK].
Chapter 7 Speed dialing Speed dialing methods Speed dialing allows you to dial fax/telephone numbers by simply pressing one or a few keys. The following speed dialing methods are available: One-touch speed dialing Register a fax/telephone number for one-touch speed dialing ( p. 7-2), then to dial the number, simply press the one-touch speed dialing key assigned to that number. Group dialing Register a group of fax numbers for group dialing ( p.
Registering one-touch speed dialing Before you can use one-touch speed dialing ( p. 7-8), you need to register the recipients’ numbers. Follow this procedure: 1 2 3 Press [Menu]. 2] or [3 3] to select . Use [2 Press [OK] three times. 1-TOUCH SPD DIAL 01= 4 2] or [3 3] to select a one-touch speed dialing key (01 to 08). Use [2 • You can also select a key by pressing the one-touch speed dialing key. 5 Press [OK] twice.
Changing or deleting an entry Follow the procedure for registering one-touch speed dialing ( p. 7-2), and do the following: To change a registered number: In step 6, use [2] to delete the registered number, then use the numeric keys to enter the new number. To change a registered name: In step 8, use [2] to delete the registered name, then use the numeric keys to enter the new name. To delete an entire entry: In step 6, press and hold [2] to clear the registered number, press [OK], then [Stop/Reset].
Registering coded speed dialing Before you can use coded speed dialing ( p. 7-8), you need to register the recipients’ numbers. Follow this procedure: 1 2 3 Press [Menu]. 2] or [3 3] to select . Use [2 Press [OK] twice. TEL REGISTRATION 1.1-TOUCH SPD DIAL 4 5 2] or [3 3] to select . Use [2 Press [OK]. CODED SPEED DIAL 0 0 = 6 2] or [3 3] to select a coded speed dialing code (00 to 99).
Changing or deleting an entry Follow the procedure for registering coded speed dialing ( p. 7-4), and do the following: To change a registered number: In step 8, use [2] to delete the registered number, then use the numeric keys to enter the new number. To change a registered name: In step 10, use [2] to delete the registered name, then use the numeric keys to enter the new name. To delete an entire entry: In step 8, press and hold [2] to clear the registered number, press [OK], then [Stop/Reset].
Registering group dialing Before you can use group dialing ( p. 7-8), you need to register the recipients’ numbers. Follow this procedure: NOTE • You can only group numbers that have already been registered for one-touch or coded speed dialing ( pp. 7-2, 7-4). 1 2 3 Press [Menu]. 2] or [3 3] to select . Use [2 Press [OK] twice. TEL REGISTRATION 1.1-TOUCH SPD DIAL 4 5 2] or [3 3] to select . Use [2 Press [OK].
10 Use the numeric keys to enter a name for the group (max. 16 characters, including spaces). • For details on how to enter or delete characters, see p. 6-1. • The name you enter here will appear in speed dialing lists. 11 12 Press [OK]. To continue registering other groups, repeat the procedure from step 6. -orPress [Stop/Reset] to return to standby mode. NOTE • For a list of the entries you have made, print the group dialing list ( p. 7-9).
Using speed dialing Using speed dialing is easy. Simply do the following when you want to dial a number or group registered for speed dialing: One-touch speed dialing: 1 Press the one-touch speed dialing key assigned to the number you want to dial (01 to 08). Coded speed dialing: 1 Press [Coded Dial]. 2 Use the numeric keys to enter the two-digit code assigned to the number you want to dial (00 to 99).
Printing speed dialing lists You can print lists of the recipients registered for speed dialing. You may want to keep these lists near your machine to refer to them when dialing. Follow this procedure to print speed dialing lists: 1 2 3 4 Press [Fax]. Press [Menu]. 2] or [3 3] to select . Use [2 Press [OK]. REPORTS/LISTS 1.ACTIVITY REPORT 5 6 2] or [3 3] to select . Use [2 Press [OK]. SPEED DIAL LIST 1.1-TOUCH LIST 2] or [3 3] to select the list you want to print.
Chapter 8 Sending faxes Documents you can fax For information on the types of documents you can fax, their requirements, and details on loading them, see Chapter 2. Sending methods There are two methods of sending faxes from your machine: Memory sending ( below) Manual sending ( p. 8-2) Memory sending 8 Sending faxes You should normally use memory sending to send documents fast and efficiently. Follow this procedure for memory sending: 1 Load the document on the platen glass or ADF.
Manual sending Use manual sending when you want to talk to the recipient before sending a document, or if the recipient does not have a fax machine that can receive automatically. NOTE • With manual sending, you cannot use the platen glass to send documents. • You will need to connect a telephone to your machine if you want to talk to the recipient before sending a document.
Improving faxed images There are several settings that allow you to improve the quality of faxed documents. Setting color or black & white transmission Follow the procedure for sending a document ( p. 8-1) and set color or black & white sending as follows when required to do so: For color sending: Press [Color] to turn on its light. For black & white sending: Press [B&W] to turn on its light. The setting automatically reverts to black & white after a document is sent or canceled.
Adjusting the scan contrast Contrast is the degree of difference between light and dark. A high contrast setting will make blacks darker and whites brighter, whereas a low contrast setting will make the differences between black and white less marked. Follow the procedure for sending a document ( p. 8-1) and adjust the contrast as follows when required to do so: 1 2 3 Press [Contrast]. 2] or [3 3] to select the contrast. Use [2 Press [OK].
Redialing a busy number There are two methods of redialing: Manual redialing and Automatic redialing. Manual redialing Press [Redial/Pause] to redial the last number entered with the numeric keys. To cancel manual redialing: Press [Stop/Reset]. Automatic redialing When using memory sending to send a document and the recipient’s line is busy, your machine will redial the number after an interval. Your machine allows you to customize automatic redialing settings to suit your needs (see below).
8 9 2] or [3 3] to select . Use [2 Press [OK]. AUTO REDIAL ON 10 2] or [3 3] to select to enable automatic redialing or to disable it. Use [2 If you selected in step 10: 11 Press [OK]. 12 Press [Stop/Reset]. If you selected in step 10: 11 Press [OK] twice. REDIAL TIMES 2TIMES 12 13 Use the numeric keys to enter the number of times you want the machine to redial. Press [OK] twice. REDIAL INTERVAL 2MIN.
Sending the same document to several recipients (sequential broadcasting) Your machine allows you to send the same document to a maximum of 109 recipients in one operation.
Documents stored in memory NOTE • If there are no documents stored in memory, the machine will revert to standby mode when you select . Printing a list of documents in memory The machine can print a list of documents stored in memory (DOC. MEMORY LIST) showing the transaction number (TX/RX NO), transaction mode, recipient name, number of pages, date, and set time of each document. This will help you select a document in memory you wish to delete or print.
9 T] to print the first page only, or [#] to print all pages • If printing a document, press [T of the document. T]. • If deleting a document, press [T 10 To continue printing or deleting other documents in memory, repeat the procedure from step 7. -orPress [Stop/Reset] to return to standby mode. Checking a document’s details When you have to select a document in memory to be printed or deleted, you can check its details in the LCD as follows: PRINT DOCUMENT TX/RX NO.
Special dialing Dialing through a switchboard For details on dialing through a switchboard, see p. 6-6. Switching temporarily to tone dialing Many information services for banks, airline reservations, hotel reservations, etc. require tone dialing for their services. If your machine is connected to a rotary pulse line, follow this procedure to set the machine temporarily for tone dialing: 1 2 3 4 Press [Fax]. Press [Hook] or lift the handset if you have connected a telephone to your machine.
Restricting use of your machine By enabling this feature, you can prevent unauthorized use of your machine to make calls and send faxes. Enabling restriction Follow this procedure to enable restriction of your machine: 1 2 3 Press [Menu]. 2] or [3 3] to select . Use [2 Press [OK]. USER DATA 1.TEL REGISTRATION 4 5 2] or [3 3] to select . Use [2 Press [OK]. FAX SETTINGS 1.USER SETTINGS 6 7 2] or [3 3] to select . Use [2 Press [OK].
Canceling restriction Follow this procedure to cancel restriction of your machine: 1 2 3 Press [Menu]. 2] or [3 3] to select . Use [2 Press [OK]. USER DATA 1.TEL REGISTRATION 4 5 2] or [3 3] to select . Use [2 Press [OK]. FAX SETTINGS 1.USER SETTINGS 6 7 2] or [3 3] to select . Use [2 Press [OK]. TX SETTINGS 1.ECM TX 8 9 2] or [3 3] to select . Use [2 Press [OK].
Chapter 9 Receiving faxes Setting the receive mode Follow this procedure to set the receive mode: 1 2 3 Press [Fax]. Press [Menu]. Press [OK]. RECEIVE MODE FAX ONLY MODE 2] or [3 3] to select the receive mode: Use [2 • Select: – to automatically receive faxes only. Voice calls will be disconnected. – * if you have subscribed to the Telstra FaxStream™ Duet service (Australia) or the Telecom FaxAbility service (New Zealand).
Receiving faxes automatically: FAX ONLY MODE Choose this mode if: • you have a dedicated telephone line for fax use only. • you only want to receive faxes automatically with your machine. You will need to: • connect your machine to a dedicated telephone line ( Set-Up Sheet). • set ( p. 9-1). When you receive a fax call: The machine will receive the fax automatically. When you receive a voice call: You will not be able to answer the call.
Network Switch System Operation The procedure for using the network switch system is almost the same as when using your machine over a normal telephone line. When you receive calls, however, the machine will respond slightly differently as described below: When you hear the telephone call ring pattern: Pick up the handset and talk normally. If you hear a slow beep, it means the call is from a fax machine trying to send a fax. Press [Start] to receive the fax.
When you receive a fax call: The machine will ring. Pick up the handset and if you hear a beep, press [Start] on the machine to receive the fax. If you are far from your machine, dial 25 (the remote receiving ID) on your telephone and hang up. When you receive a voice call: The machine will ring. Pick up the handset to answer the call. NOTE • You can customize remote receiving by enabling/disabling it, or by changing the remote receiving ID ( , p. 13-5).
Customizing FAX/TEL AUTO SW You can customize this mode to control precisely how your machine handles incoming calls. You can adjust the time the machine takes to check whether a call is a fax or voice call, the length of time the machine rings when it is a voice call, and the action the machine must take if no one answers a voice call. Follow this procedure to customize : 1 2 3 Press [Menu]. 2] or [3 3] to select . Use [2 Press [OK]. USER DATA 1.
14 2] or [3 3] to select whether the machine switches to receive mode or Use [2 disconnects the call if no one answers a voice call after the specified time in step 12. • Select: – to switch to receive mode. – to disconnect the call. 15 16 Press [OK]. Press [Stop/Reset]. Polling receiving With this feature, your machine can call another fax machine and request that it sends a document to it; in other words, it “polls” that fax machine.
Chapter 10 Reports and lists Summary of reports and lists The table below shows the reports and lists that can be printed from your machine. Refer to the pages indicated for more details. Description Details USER’S DATA LIST Lists the current settings of your machine and the registered sender information. ACTIVITY REPORT Shows recent facsimile transactions performed by your machine. p. 10-2 You can enable or disable automatic printing of this report after every 20 transactions.
ACTIVITY REPORT Printing the ACTIVITY REPORT The machine is factory-set to print an ACTIVITY REPORT after every 20 transactions. If you want to print an ACTIVITY REPORT before it is automatically printed, follow this procedure: 1 2 3 4 Press [Fax]. Press [Menu]. 2] or [3 3] to select . Use [2 Press [OK] twice. Adjusting the ACTIVITY REPORT setting If you do not want the machine to automatically print an ACTIVITY REPORT after every 20 transactions, disable the setting.
Adjusting the TX REPORT setting Your machine can print a TX (transmission) report after sending a document. You can set it to print every time it sends a document, or only when an error occurs. Alternatively, you can disable printing of a report. Follow this procedure to adjust this setting: 1 2 3 Press [Menu]. 2] or [3 3] to select . Use [2 Press [OK]. USER DATA 1.TEL REGISTRATION 4 5 2] or [3 3] to select . Use [2 Press [OK]. FAX SETTINGS 1.
Adjusting the RX REPORT setting Your machine can print an RX (reception) report after receiving a document. You can set it to print every time it receives a document, or only when an error occurs. Alternatively, you can disable printing of a report. Follow this procedure to adjust this setting: 1 2 3 Press [Menu]. 2] or [3 3] to select . Use [2 Press [OK]. USER DATA 1.TEL REGISTRATION 4 5 2] or [3 3] to select . Use [2 Press [OK]. FAX SETTINGS 1.
Printing the USER’S DATA LIST The USER’S DATA LIST allows you to check the current settings of your machine as well as the registered sender information ( p. 6-2). Follow this procedure to print the USER’S DATA LIST: 1 2 3 4 Press [Fax]. Press [Menu]. 2] or [3 3] to select . Use [2 Press [OK]. REPORTS/LISTS 1.ACTIVITY REPORT 5 6 2] or [3 3] to select . Use [2 Press [OK].
Chapter 11 Maintenance Replacing ink tanks When to replace an ink tank If one of the following messages appears in the LCD, replace the necessary ink tank(s) as described on p. 11-2: . . . . . . . .Cyan ink tank empty . . . . . . . .Magenta ink tank empty . . . . . . . .Yellow ink tank empty . . . . . . .Black ink tank empty If more than one ink tank is empty, several letters may appear (e.g. ).
Replacing an ink tank This section describes how to replace an ink tank. Before replacing an ink tank, be sure to read the section When to replace an ink tank ( p. 11-1). CAUTION • Do not replace ink tanks while the machine is printing or performing another operation. Follow this procedure to replace an ink tank: 1 2 Make sure the power is turned on. Press [Open] q and lift up the scanning unit w. w • The printhead holder automatically moves to the center of the machine.
Maintaining the printhead NOTE • Before doing the following, open the scanning unit, press “PUSH” on the ink tanks and check that they are securely inserted. Check how much ink is left and if there is none, replace the ink tank ( p. 11-1). Flowchart of printhead maintenance If print quality deteriorates, follow this procedure: Step 1 Print the nozzle check pattern ( p. 11-4). This pattern allows you to check if the ink is coming out of the printhead nozzles correctly and if the printhead is aligned.
Printing the nozzle check pattern The nozzle check pattern shows if each printhead nozzle is operating properly. NOTE • You can also print the nozzle check pattern from your computer ( Software Guide). Follow this procedure to print the nozzle check pattern from the machine: 1 2 3 4 Load A4 plain paper in the multi-purpose tray. Press [Menu]. 2] or [3 3] to select . Use [2 Press [OK] twice.
Aligning the printhead To align the printhead after you have just installed it, follow the procedure in the Set-Up Sheet. If you have printed the nozzle check pattern ( p. 11-4) and determined that the printhead needs aligning, align it from the operation panel ( below) or from the software ( Software Guide). Follow this procedure to align the printhead from the operation panel: 1 2 3 4 Load A4 plain paper in the multi-purpose tray. Press [Menu]. 2] or [3 3] to select . Use [2 Press [OK].
11 When the horizontal pattern has been adjusted, the machine will print a vertical pattern. 12 In column L on the printout, note which box has the most solid image. Note the value 2] or [3 3] to enter it. next to this box and use [2 CHANGE V VALUE L 0 GOOD SAMPLE Most solid box 13 14 11-6 Press [OK]. Repeat steps 12 and 13 for column M.
Cleaning your machine This section describes the necessary cleaning procedures for your machine. CAUTION • Be sure to turn off the power and disconnect the power cord before cleaning the machine. • Fax Model Print any documents stored in memory before disconnecting the power cord, since p. 8-8). documents in memory are erased when the power is disconnected ( • Do not use tissue paper, paper towels, or similar materials for cleaning; they can stick to the components or generate static charges.
CAUTION • Do not touch the round shaft A, transparent film B, film cable C, ink absorber (sponge part) D, or any metal parts. AB C D 3 Use a dry cloth to wipe away any stray drops of ink, scraps of paper, and dust, especially from the black panel E. E 4 Close the scanning unit until it locks into place. 5 Reconnect the power cord and turn on the power.
4 When you are finished, close the feeder cover until it clicks. 5 Reconnect the power cord and turn on the power. Cleaning the roller Clean the roller when envelopes do not feed correctly. Follow this procedure to perform roller cleaning: 1 2 3 4 Remove any print media from the multi-purpose tray. Press [Menu]. 2] or [3 3] to select . Use [2 Press [OK]. MAINTENANCE 1.NOZZLE CHECK 5 6 7 2] or [3 3] to select . Use [2 Press [OK].
Chapter 12 Troubleshooting Problems installing and removing software See below if you were unable to install or remove the software. [MP Drivers/MP Toolbox] Cannot install the software. 1. Have you followed the instructions in the Set-Up Sheet to install the software? If you have not followed the installation procedure correctly, try reinstalling the software. If there was an error during installation and installation was not completed, restart your computer and try reinstalling the software. 2.
Cannot use the software after upgrading to Windows XP. If the software was installed in Windows 98/Me/2000 and you upgraded to Windows XP without removing the software, the machine may not be able to be recognized. Remove the software and then reinstall it ( Software Guide). In [Device Manager], green mark “?” is displayed (Windows Me). Under [Device Manager], green mark “?” is displayed on [USB Composite Device] in [USB (Universal Serial Bus) Controller] in Windows Me.
7. Is there an application error or General Protection Fault error displayed on the computer? Is the application you are using to print with compatible with the operating system? Refer to the application’s documentation. If the application is not compatible, generally you will be unable to print. Has the application been allocated enough memory? If other applications are open, close them to increase the available memory.
Paper curls. P 1. Remove the printed page after 30 to 60 seconds. The paper may curl if you use thin paper and print images that use a large quantity of ink such as photographs or pictures. Leave the printed page in the paper output tray for 30 to 60 seconds and remove when the ink has dried. 2. Is intensity set too high? The paper may curl or rub if intensity is set too high in the printer driver. In the [Properties] dialog box, on the Main tab, click [Manual] in Color Adjustment, then click [Set].
The ink empty message is displayed differently on the printer status monitor to how it is displayed on the machine’s display. While you are printing from your computer, if the ink empty message is displayed on the printer status monitor and on the machine’s display, press [Resume] on the machine and cancel the job. On the printer status monitor, the message changes to [Ink low] and you can continue printing for a short period of time.
Copy quality is poor (or documents are printed with streaks). 1. Are you copying a document or photograph printed from your machine? Image quality may be poor when you copy a document or photograph printed from your machine. Try printing the photograph from the memory card, or the document from your computer. p. 11-7) and the Fax Model ADF area ( p. 11-8). 2. Clean the scanning area ( p. 11-4). 3. Clean the printhead ( 4.
8. After installing the software, did you install a TWAIN-compatible application? If this is the case, the TWAIN system file is replaced with something inappropriate and you will be unable to scan images. If this happens, remove the software and reinstall ( Software Guide). 9. Is the machine recognized in the [Scanners and Cameras] windows [Control Panel]? Follow this procedure to check if the machine icon is present in [Scanners and Cameras] of the Control Panel: 1.
The image you have scanned looks dirty (or documents are printed with streaks). Software Guide). 1. If the image looks grainy, increase the scan resolution ( 2. Display the image at 100%. Some applications do not display an image well at small sizes. Try displaying the image at 100% magnification. 3. There is moire when you scan printed material. In ScanGear MP, click [Descreen] ( Software Guide). 4. Set the monitor display colors to 16-bit or higher.
Problems receiving faxes See below if you are having problems receiving faxes. Cannot receive a fax, cannot print a fax. 1. Is there anything displayed in the LCD? If nothing is displayed, see p. 12-14. 2. Is the Alarm light blinking? If it is blinking, see p. 12-18. 3. Is the machine making a noise and is the In Use/Memory light blinking? A telephone (or other peripheral device such as an answering machine or computer modem) is connected to the L jack. Reconnect to the t jack ( Set-Up Sheet). 4.
Cannot receive faxes automatically. 1. Is , *, , or receive mode displayed on the bottom left of the LCD? If is displayed, you cannot receive faxes unless you pick up the handset and either press [Start] or dial the remote receiving ID. If you want to receive faxes automatically which means not having to do anything when you are sent a fax, set the receive mode to , *, , or ( p. 9-1).
Problems sending faxes See the items marked with machine. See the items marked with your computer. M (machine) if you are having problems sending a fax from the C (computer) if you are having problems sending a fax from Cannot send a fax. M C M C M C M C M C M M M C M C M M C 1. Is the machine making a noise and is the In Use/Memory light blinking? The telephone line is connected to the t jack. Reconnect to the L jack ( Set-Up Sheet). 2.
Repeated errors occur when you send a fax. M C , p. 13-4). 1. Reduce the transmission start speed ( If there is a bad line or connection, reducing the transmission start speed may correct the error. Telephone problems See below if you have problems using the telephone. Cannot dial. 1. Is there anything displayed in the LCD? If nothing is displayed, see p. 12-14. 2. Is the Alarm light blinking? If it is blinking, see p. 12-18. 3.
“?” is printed in the index. Yellow “?”: The photograph data is large. Printing of this photograph may take a long time when printing in single frame, frame range, or all frame mode. Red “?”: The photograph data is damaged and cannot be printed on your machine. Cannot write to the memory card (write protect error displayed in Windows). 1. Is the machine in photo print mode and the setting set to ? Switch to a different mode and set the setting to ( p. 4-15).
In Windows Explorer, you cannot display [Thumbnails] (Windows 2000). In Windows 2000, if you display the contents of a memory card in Windows Explorer, and change the display to [Thumbnails] on the [View] menu, the images may not display and the computer may freeze. This is a problem that occurs with USB card readers in general, and not just with this machine. If you want to change the display to [Thumbnails] in Windows Explorer, set the setting to ( p. 4-15).
If the power disconnects unexpectedly User data and speed dialing settings are stored using the internal battery if there is a power failure or if you accidentally disconnect the power cord. However, all documents stored in memory will be deleted. If the power disconnects, the following will apply: • You will not be able to send or receive faxes, or make copies. • If a telephone is connected to the machine, you may be able to receive and/or make voice calls (depending on your telephone).
2 Gently gather the jammed paper to the center of the opening and then remove it. CAUTION • Be careful not to touch the components inside the machine. • If the jammed paper tears while you are pulling and you cannot remove the torn pieces, turn the machine off then on with the [ON/OFF (1 sec.)]. The jammed pieces will automatically be ejected. 3 Close the scanning unit until it locks into place. 4 Press [Resume].
3 Open the feeder cover. 4 Raise the paper release lever A and slide the page under the roller towards the feeder cover. A 5 Pull out the jammed page from the ADF. 6 Lower the paper release lever A and then close the feeder cover. • If [Stop/Reset] is pressed during scanning and the document remains in the ADF, wait for the machine to return to standby mode, then press [Resume]. Documents left in the ADF will be ejected automatically.
If the nozzle check pattern does not print properly Refer to Maintaining the printhead, p. 11-3. Interpreting the messages When the Alarm light blinks Check the message in the LCD. If there is a message, follow the instructions and correct the error. Then to resume operation, press [Resume]. The Alarm light will turn off. If the error remains, turn off the machine and disconnect the power cord. Wait 15 seconds, then reconnect the power cord and turn on the power.
LCD messages Message (Error code) Cause Action Fax Model The machine is waiting to redial the other party’s number because the line was busy or the recipient did not answer when you tried to send a document. Wait for the machine to automatically p. 8-5 redial the number. If you want to cancel automatic redialing, wait until the machine starts dialing the number, press [Stop/Reset], then follow the instructions in the LCD. Bk INK EMPTY The black ink tank in the printhead is empty.
Message (Error code) Cause Action Details Fax Model The feeder cover may not be closed properly. Close the feeder cover properly. p. 12-16 CHECK DOCUMENT The document is not loaded Remove the document from the ADF properly in the ADF, or there may and reload it. be a document jam. Clear the document jam if necessary. p. 2-2 p. 12-16 CHECK PAPER SIZE The print media size in the multi-purpose tray and that specified in the print media size setting are different.
Message (Error code) Cause Action Details INSERT PHOTO CARD There is no memory card in the memory card slot. If you want to use the photo print function, insert a memory card into the appropriate slot. p. 4-2 INVALID KEY/SETTING An invalid key was pressed or an Check the key or setting you want to invalid setting was selected. enter. LOAD PAPER (PRESS START KEY) The multi-purpose tray is empty. Load paper in the multi-purpose tray.
Message (Error code) Cause Action Fax Model In manual sending, you entered a speed dialing number that is assigned to a group. Use regular dialing, or enter a Chapter 7 one-touch speed dialing key or coded speed dialing code that only has one fax/telephone number registered. NOT AVAILABLE PROBLEM READING CARD The data on the memory card REINSERT MEMORY CARD may be inaccessible. Details Check the data on the memory card in your digital camera.
If you cannot solve the problem If you have a problem with your machine that you cannot solve with the information provided in this chapter, contact your local authorized Canon dealer or the Canon help line. CAUTION • If the machine makes strange noises, emits smoke or strange smells, unplug it immediately and contact your local authorized Canon dealer or the Canon help line. Do not attempt to disassemble or repair the machine yourself.
Chapter 13 Machine settings Printing a list to check the current settings Before changing any settings, you can print the USER’S DATA LIST to check the current settings of your machine. For details, see p. 10-5. Accessing the machine settings Follow this procedure to change a setting: 1 Refer to the lists on the following pages to find the setting you want to change. 2 If there is a reference for the setting q, refer to that page or guide for details.
Settings Menu: SPECIAL COPY Name Function key: [Copy] Description Setting Details 1. 2 on 1 Copies two pages on one page (A4- or letter-size only). — p. 5-4 2. BORDERLESS COPY Copies without any borders (A4-, letter-, 4” × 6”, or 5” × 7”-size only). — p. 5-5 3. IMAGE REPEAT Prints multiple copies of an image on a single sheet. — p. 5-6 AUTO Automatically selects the number of repetitions. — MANUAL Manually selects the number of repetitions.
Menu: USER DATA Fax Model Description 1. TEL REGISTRATION Fax Model Setting [Fax] Details — — 1. 1-TOUCH SPD DIAL Registers one-touch speed dialing. — p. 7-2 2. CODED SPEED DIAL Registers coded speed dialing. — p. 7-4 3. GROUP DIAL Registers group dialing. — p. 7-6 — — — — 1. DATE & TIME Sets the current date and time. — 2. DATE SETUP Selects the date format displayed in the LCD and printed on faxes you send. DD/MM YYYY YYYY MM/DD MM/DD/YYYY 2. FAX SETTINGS 1.
Name Description 2. REPORT SETTINGS 1. TX REPORT Setting Details — — Enables/disables automatic printing of a transmission report after sending. PRINT ERROR ONLY p. 10-3 OUTPUT YES OUTPUT NO PRINT WITH IMAGE If you select or
Name Description 4. RX SETTINGS Setting — — 1. ECM RX* Enables/disables Error Correction Mode (ECM) during reception. ON OFF 2. FAX/TEL AUTO SW If you select as the receive mode, — customizes its settings. Details p. 9-4 1. RING START TIME Selects the time the machine takes to check whether a call is a fax or voice call. 8 SEC (0 to 30) 2. F/T RING TIME Selects the ring length for voice calls. 22 SEC (10 to 60) p. 9-6 3.
Name Description 4. SYSTEM SETTINGS Setting Details — 1. Fax Model AUDIBLE TONES 1. KEYPAD VOLUME Selects the beep volume when pressing keys on the operation panel. 0 (off)/1/2/3 2. ALARM VOLUME Selects the alarm volume. 0 (off)/1/2/3 2. CARD PROTECT Enables/disables overwriting memory card/stick data in ON all modes except photo print mode. OFF 3. DISPLAY LANGUAGE Selects the language for LCD messages and reports. 4. Fax Model SUMMER TIME* Enables/disables the summer time.
Fax Model Menu: REPORTS/LISTS Name Function key: [Fax] Description Setting Details 1. ACTIVITY REPORT Prints an ACTIVITY REPORT. — 2. SPEED DIAL LIST — — Prints the 1-TOUCH SPD DIAL LIST. — Selects the order of the destinations in the list. : Prints the list in alphabetical order. : Prints the list in key order. YES=(T) NO=(#) Prints the CODED SPEED DIAL LIST. — Selects the order of the destinations in the list. : Prints the list in alphabetical order.
Name Description SINGLE FRAME Setting Details — — FILE NO: Selects the file number. 0001 to 9999 NUMBER OF PRINTS Selects the number of copies. 1 to 99 COPIES SELECT PAPER SIZE Selects the print media size for the photograph. A4 LTR 4" × 6" 5" × 7" SELECT PAPER TYPE Selects the print media type for the photograph. PHOTO PAPER PRO PLAIN PAPER BORDERLESS PRINT If you select , enables/disables borderless printing for the photograph. FRAME RANGE p.
Appendix Specifications General specifications Power source Power consumption Weight (Components attached) Dimensions 200–240V, 50/60 Hz • Maximum: Approx. 42.1 W Fax Model Approx. 50.8 W • Standby: Approx. 8.6 W Fax Model Approx. 10.6 W 10.9 kg/24 lb. Fax Model 12.8 kg/28.2 lb. 578 mm (22 #/4") 496 mm (19 !/2") 439 mm (17 !/4") Fax Model 340 mm (13 #/8") 253 mm (10") 326 mm (12 !/8") 558 mm (22") A Environmental conditions Appendix Specifications Specifications • Temperature: 15º–27.
Printable areas Note on printing area illustrations: Printing area: Canon recommends that you print within (dark shade) this area. Printable area: The area where it is possible to print. (light shade) However, printing in this area can adversely affect print quality or paper feed precision. • Paper printable areas: A4 size: 203.2 × 289 mm (8 × 11 #/8 in.) B5 size: 175.2 × 249 mm (6 &/8 × 9 &/8 in.) A5 size: 141.2 × 202 mm (5 %/8 × 8 in.) Letter size: 203.2 × 271.4 mm (8 × 10 #/4 in.) Legal size: 203.
• Banner paper printable areas: A4 size: 203.2 × 1774 mm (8 × 69 &/8 in.) Letter size: 203.2 × 1668.4 mm (8 × 65 #/4 in.) 33.0 mm (1 #/8") 3.0 mm (!/8") 5.0 mm (!/4") 3.4 mm (!/8") 3.4 mm (!/8") Min. 2 sheets Max. 6 sheets Recommended print area Scanned area Max. 4.0 mm (Max. !/8") Printable area Max. 4.0 mm (Max. !/8") imageCLASS MP700, legal size: Max. 8.0 mm (Max. #/8") Fax Model Color fax: Max. 6.0 mm (Max. !/4") Max. 4.5 mm (Max. !/4") A4 Letter Legal Max. 4.5 mm (Max.
Print specifications Printing method Paper handling Print media size and weight Recommended print media Print speed Print width Printing resolution Bubble jet on-demand Automatic feed p. 3-1 p. 3-1 • Black printing: Fast: 22 pages/minute Standard: 13.0 pages/minute • Color printing: Fast: 14 pages/minute Standard: 9.0 pages/minute (Based on Canon standard pattern) • Max. 203.2 mm (8 in.) • Borderless printing: 216.0 mm (8 !/2 in.) Max.
Fax Model Fax specifications Applicable line Compatibility Data compressing system Modem type Modem speed Appendix Specifications A-5 A Specifications Public Switched Telephone Network (PSTN) G3 MH, MR, MMR, JBIG, JPEG Fax modem 33600/14400/9600/7200/4800/2400 bps Automatic fallback Transmission speed • Black & white: Approx. 3 seconds/page at 33.6 Kbps, ECM-MMR, transmitting from memory (Based on Canon FAX Standard Chart, standard mode.) • Color: Approx. 1 minute/page at 33.
Telephone specifications Connection Telephone/answering machine (CNG detecting signal)/data modem Specifications subject to change without notice.
Index inside machine 11-7, 11-8 interior 11-7 to 11-9 printhead 11-4 roller 11-9 scanning area 11-7 CLEAR PAPER JAM message 12-20 Coded Dial key 1-5 CODED SPEED DIAL LIST 7-9, 10-1 Coded speed dialing changing entry 7-5 deleting entry 7-5 list 7-9 registering 7-4 using 7-8 Color copying 5-1 key 1-5 sending 8-3 Components 1-3 to 1-6 Computer problems printing from 12-2 to 12-5 problems turning on 12-2 Contrast adjusting for copying 5-2 adjusting for sending 8-4 key 1-4 Copy key 1-4 Copying 5-1 adjusting expo
Date entering 6-3 printing 4-14 Density. See Contrast Dialing methods 8-4 through switchboard 6-6 DOC. MEMORY LIST 8-8, 10-1 DOC. TOO LONG message 12-20 Document cover 1-3 guides 1-3 loading 2-2 output slot 1-3 problems 2-1 removing jams 12-16, 12-17 requirements 2-1 tray 1-3 DPOF printing 4-12, 4-13 ECM RX message 12-20 ECM TX message 12-20 Enlarge copying 5-3 Enlarge/Reduce key 1-4 Envelopes 3-1 loading 3-7, 3-8 Fax key 1-4 Resolution.
guidelines 3-4 loading 3-7 to 3-9 recommended 3-1 to 3-4 setting size 3-6 setting type 3-6 Printhead aligning 11-5, 11-6 cleaning 11-4, 11-7 holder 1-3 maintaining 11-3 Printing problems 12-2 to 12-5 PROBLEM READING CARD message 12-22 Problems cannot solve 12-23 copying 12-12 documents 2-1 installing software 12-1 power 12-14 printing from computer 12-2 to 12-5 receiving faxes 12-8, 12-10 removing software 12-1 scanning 12-6, 12-8 sending 12-11, 12-12 telephone 12-12 turning on computer 12-2 using memory ca
Scan contrast.