
Product specifications


39Routine Maintenance
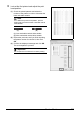
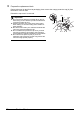
5 Look at the third printout and adjust the print
head position.
(1) Check the printed patterns and select the
number of the pattern in column W that has the
least noticeable streaks.
(E) Less noticeable horizontal white streaks
(F) More noticeable horizontal white streaks
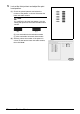
(2) Similarly, select the number of the pattern in
column X that has the least noticeable streaks,
then click OK.
(3) Confirm the displayed message and click OK.
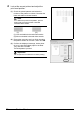
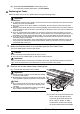
1 Make sure that the printer is on and then load two sheets of A4 or Letter-sized plain
paper in the Rear Tray.
Set the Paper Thickness Lever to the right. For details on the Paper Thickness Lever, refer to
“Front View” in “Main Components” of the User’s Guide on-screen manual.
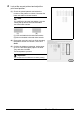
2 Print the pattern.
(1) Open the Canon IJ Printer Utility dialog box.
(2) Select Custom Settings in the pop-up menu.
(3) Select the Align heads manually check box, and then click Send.
(4) Confirm the displayed message and click OK.
(5) Select Test Print in the pop-up menu.
(6) Click Print Head Alignment.
Note
If it is difficult to pick the best pattern, pick the
setting that produces the least noticeable white
streaks.
(E) (F)