User's Guide Read this guide first. Please read this guide before operating this product. After you finish reading this guide, store it in a safe place for future reference. Downloaded from ManualsPrinter.
Downloaded from ManualsPrinter.
iR5075/iR5075N iR5065/iR5065N iR5055/iR5055N User's Guide Downloaded from ManualsPrinter.
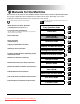
Manuals for the Machine The manuals for this machine are divided as follows. Please refer to them for detailed information. The manuals supplied with optional equipment are included in the list below. Depending on the system configuration and product purchased, some manuals may not be needed. Guides with this symbol are printed manuals.
• UFR II Printer Driver Installation and Instructions • Mac OS X PS Printer Driver Installation and Instructions • Mac OS X UFR II Printer Driver Installation and Instructions • Fax Driver Installation and Instructions • Installing MEAP Applications and Using the Login Service UFR II Driver Guide Mac PS Driver Guide Mac UFR II Driver Guide Fax Driver Guide MEAP SMS Administrator Guide • To view the manual in PDF format, Adobe Reader/Adobe Acrobat is required.
Contents Preface. . . . . . . . . . . . . . . . . . . . . . . . . . . . . . . . . . . . . . . . . . . . . . . . . . . . . . . . . . . . . . . . . . vi How To Use This Manual . . . . . . . . . . . . . . . . . . . . . . . . . . . . . . . . . . . . . . . . . . . . . . . . . . . vi Symbols Used in This Manual . . . . . . . . . . . . . . . . . . . . . . . . . . . . . . . . . . . . . . . . . . . . . . vi Legal Notices . . . . . . . . . . . . . . . . . . . . . . . . . . . . . . . . . . . . . . . . . . . . . . . .
What This Machine Can Do . . . . . . . . . . . . . . . . . . . . . . . . . . . . . . . . . . . . . . . . . . . . . . . 1-10 System Configuration and Parts . . . . . . . . . . . . . . . . . . . . . . . . . . . . . . . . . . . . . . . . . . . 1-13 Optional Equipment. . . . . . . . . . . . . . . . . . . . . . . . . . . . . . . . . . . . . . . . . . . . . . . . . . . . 1-13 External View and Internal View . . . . . . . . . . . . . . . . . . . . . . . . . . . . . . . . . . . . . . . . . .
Preface Thank you for purchasing the Canon iR5075/iR5075N/iR5065/iR5065N/iR5055/iR5055N. Please read this manual thoroughly before operating the machine to familiarize yourself with its capabilities, and to make the most of its many functions. After reading this manual, store it in a safe place for future reference. This paper manual contains the things you must read before using this machine and basic operations. For the further details of the operations, please refer to the attached disc manual.
Legal Notices Product Name Safety regulations require the product's name to be registered. In some regions where this product is sold, the following name(s) in ( ) may be registered instead. iR5075/iR5075N (F149800) iR5065/iR5065N/iR5055/iR5055N (F149801) CE This CE Marking shows compliance of this equipment with Directive 2005/95/EC and Divective 2004/108/EC. EMC Directive This equipment conforms with the essential requirements of EC Directive 2004/108/EC.
Laser Safety This product is certified as a Class I laser product under IEC60825-1:1993 and EN60825-1:1994. This means that the product does not produce hazardous laser radiation. Since radiation emitted inside the product is completely confined within protective housings and external covers, the laser beam cannot escape from the machine during any phase of user operation. Do not remove protective housings or external covers, except as directed by the equipment's Reference Guide.
CAUTION Use of controls, adjustments, or performance of procedures other than those specified in this manual may result in hazardous radiation exposure. International Energy Star Program As an ENERGY STAR® Partner, Canon Inc. has determined that this machine meets the ENERGY STAR® Program guidelines for energy efficiency. The International ENERGY STAR® Office Equipment Program is an international program that promotes energy saving through the use of computers and other office equipment.
R&TTE Directive This equipment (F149800/F149801) conforms with the essential requirements of EC Directive 1999/5/EC and is usable in EU. We declare that this product conforms with the EMC requirements of EC Directive 1999/5/ EC at nominal mains input 230 V, 50 Hz although the rated input of the product is 220 V 240 V, 50/60 Hz. Use of shielded cable is necessary to comply with the technical requirements of EMC Directive.
Trademarks Canon, the Canon logo, CLC, iR, iW, MEAP, and the MEAP logo are trademarks of Canon Inc. Adobe, Adobe Acrobat, PostScript, and PostScript3 are trademarks of Adobe Systems Incorporated. Macintosh and Mac OS are trademarks of Apple Computer, Inc. Active Directory, Microsoft, Windows, and Windows NT are registered trademarks of Microsoft Corporation in the United States and other countries.
THIS SOFTWARE IS PROVIDED BY THE REGENTS AND CONTRIBUTORS "AS IS" AND ANY EXPRESS OR IMPLIED WARRANTIES, INCLUDING, BUT NOT LIMITED TO, THE IMPLIED WARRANTIES OF MERCHANTABILITY AND FITNESS FOR A PARTICULAR PURPOSE ARE DISCLAIMED.
THIS SOFTWARE IS BEING PROVIDED "AS IS", WITHOUT ANY EXPRESS OR IMPLIED WARRANTY. IN PARTICULAR, NEITHER THE AUTHOR NOR AT&T MAKES ANY REPRESENTATION OR WARRANTY OF ANY KIND CONCERNING THE MERCHANTABILITY OF THIS SOFTWARE OR ITS FITNESS FOR ANY PARTICULAR PURPOSE. (d) Copyright (C) 1993 by Sun Microsystems, Inc. All rights reserved. Developed at SunPro, a Sun Microsystems, Inc. business. Permission to use, copy, modify, and distribute this software is freely granted, provided that this notice is preserved.
THE SOFTWARE IS PROVIDED "AS IS", WITHOUT WARRANTY OF ANY KIND, EXPRESS OR IMPLIED, INCLUDING BUT NOT LIMITED TO THE WARRANTIES OF MERCHANTABILITY, FITNESS FOR A PARTICULAR PURPOSE AND NONINFRINGEMENT. IN NO EVENT SHALL THE AUTHORS OR COPYRIGHT HOLDERS BELIABLE FOR ANY CLAIM, DAMAGES OR OTHER LIABILITY, WHETHER IN AN ACTION OF CONTRACT, TORT OR OTHERWISE, ARISING FROM, OUT OF OR IN CONNECTION WITH THE SOFTWARE OR THE USE OR OTHER DEALINGS IN THE SOFTWARE.
* apache@apache.org. * * 5. Products derived from this software may not be called "Apache", nor may * "Apache" appear in their name, without prior written permission of the * Apache Software Foundation. * * THIS SOFTWARE IS PROVIDED "AS IS'' AND ANY EXPRESSED OR IMPLIED * WARRANTIES, INCLUDING, BUT NOT LIMITED TO, THE IMPLIED * WARRANTIES OF MERCHANTABILITY AND FITNESS FOR A PARTICULAR * PURPOSE ARE DISCLAIMED.
(h) Copyright (C) 1999, 2000, 2002 Aladdin Enterprises. All rights reserved. Disclaimers The information in this document is subject to change without notice. CANON INC. MAKES NO WARRANTY OF ANY KIND WITH REGARD TO THIS MATERIAL, EITHER EXPRESS OR IMPLIED, EXCEPT AS PROVIDED HEREIN, INCLUDING WITHOUT LIMITATION, THEREOF, WARRANTIES AS TO MARKETABILITY, MERCHANTABILITY, FITNESS FOR A PARTICULAR PURPOSE OF USE OR NON-INFRINGEMENT. CANON INC.
Legal Limitations on the Usage of Your Product and the Use of Images Using your product to scan, print or otherwise reproduce certain documents, and the use of such images as scanned, printed or otherwise reproduced by your product, may be prohibited by law and may result in criminal and/or civil liability. A non-exhaustive list of these documents is set forth below. This list is intended to be a guide only.
Important Safety Instructions Please read these "Important Safety Instructions" thoroughly before operating the machine. As these instructions are intended to prevent injury to the user or other persons or destruction of property, always pay attention to these instructions. Also, since it may result in unexpected accidents or injuries, do not perform any operation unless otherwise specified in the manual.
• Do not install the machine in the following locations: - A damp or dusty location - A location near water faucets or water - A location exposed to direct sunlight - A location subject to high temperatures - A location near open flames • Do not remove the machine's leveling feet after the machine has been installed, as this may cause the machine to fall or tip over, resulting in personal injury. Power Supply WARNING • Do not damage or modify the power cord.
Handling WARNING • Do not attempt to disassemble or modify the machine. There are high-temperature and high-voltage components inside the machine which may result in a fire or electrical shock. • If the machine makes strange noises, or gives off smoke, heat, or strange smells, immediately turn OFF the main power switch, and disconnect the power cord from the power outlet. Then, contact your local authorized Canon dealer.
• Do not place your hands, hair, clothing, etc., near the exit and feed rollers. Even if the machine is not in operation, your hands, hair, or clothing may get caught in the rollers, which may result in personal injury or damage if the machine suddenly starts printing. • Do not place your hands in the part of the tray where stapling is performed (near the rollers) when a finisher is attached, as this may result in personal injury. • The laser beam can be harmful to human bodies.
• Do not remove the following caution labels which are attached to the machine. • If the laser beam escapes from the machine, exposure may cause serious damage to your eyes. xxii Important Safety Instructions Downloaded from ManualsPrinter.
Maintenance and Inspections WARNING • When cleaning the machine, first turn OFF the main power switch, then disconnect the power cord. Failure to observe these steps may result in a fire or electrical shock. • Disconnect the power cord from the power outlet regularly, and clean the area around the base of the power plug's metal pins and the power outlet with a dry cloth to ensure that all dust and grime is removed.
• Do not dismantle the toner cartridge, as dismantling it may cause toner dust to scatter on your skin or clothes. Immediately brush the toner off your clothes (but do not wash the clothing with hot water, which may cause the toner to set in the fabric). If toner gets into your eyes or mouth, wash them immediately with cold water and seek immediate medical treatment. • Handle the toner cartridge carefully. Avoid contact with any toner that is released from the cartridge.
About the Electronic Instruction Manuals Contents of Documentation Kits Multi-lingual Documentation Kit IInstruction Manual Disc This contains the multilingual versions of the following guides. ■ Easy Operation Guide • Basic Features Contains the basic operation instructions of the Copy, Mail Box, Send, Remote UI, and Printer functions. • To Suit Your Needs Contains the basic settings of the Additional Functions screen.
User Manual Disc Menu The User Manual Disc Menu is software that enables you to select and view PDF Manuals included on the Disc via your computer screen. Follow the instructions below to use the User Manual Disc Menu. System Requirements The User Manual Disc Menu can be used in the following system environments. Windows Macintosh OS Windows 98/Me Windows 2000 (Service Pack 3 or later) Windows XP (Service Pack 1a) Windows Server 2003 Windows Vista Mac OS 9.x Mac OS X Application Adobe Reader v.5.
Using The Disc Menu This section describes how to use the Disc Menu. When you insert the User Manual Disc provided into the Disc drive, the Language Selection screen is displayed. Clicking a language on this screen displays the following menu. (The sample screenshot shown here is for Windows users.) NOTE For Macintosh users, double-click the [START] icon to start the Disc Menu. The Language Selection screen is displayed.
Periodic Inspection of the Breaker This machine has a breaker that detects excess current or leakage current. Be sure to test the breaker once or twice a month using the following procedure. IMPORTANT • Make sure that the main power is turned OFF before inspecting the breaker. • If a malfunction occurs after an inspection, contact your local authorized Canon dealer. Checking the Breaker 1 Push the test button with the tip of a ball-point pen, or similar object. 1 IMPORTANT Briefly push the test button.
3 Switch the breaker lever to ON ("I" side). ON ( I side) OFF ( side) 3 4 Press the main power switch to "I" side. 5 Fill in the check sheet, located on p. 4-6, to document your periodic inspections of the breaker. 4 Periodic Inspection of the Breaker Downloaded from ManualsPrinter.
xxx Periodic Inspection of the Breaker Downloaded from ManualsPrinter.
Before You Start Using This Machine 1 CHAPTER This chapter describes what you should know before using this machine, such as parts and their functions, and how to turn ON the main power. Installation Location and Handling . . . . . . . . . . . . . . . . . . . . . . . . . . . . . . . . . . . . . . . . . . . . . . . . . . .1-2 Installation Precautions. . . . . . . . . . . . . . . . . . . . . . . . . . . . . . . . . . . . . . . . . . . . . . . . . . . . . . . . . . . . . . . . . . . .
Installation Location and Handling This section describes precautions for installation location and handling. We recommend that you read this section prior to using this machine. Before You Start Using This Machine 1 Installation Precautions Avoid Installing the Machine in the Following Locations ■ Avoid locations subject to extremes of temperature and humidity, whether low or high.
■ Avoid poorly ventilated locations. This machine generates a slight amount of ozone during normal use. Although sensitivity to ozone may vary, this amount is not harmful. Ozone may be more noticeable during extended use or long production runs, especially in poorly ventilated rooms. It is recommended that the room be appropriately ventilated, sufficient to maintain a comfortable working environment, in areas of machine operation. ■ Avoid locations where a considerable amount of dust accumulates.
■ Avoid exposing the machine to rapid changes in temperature. If the room in which the machine is installed is cold but rapidly heated, water droplets (condensation) may form inside the machine. This may result in a noticeable degradation in the quality of the copied image, the inability to properly scan an original, or the copies having no printed image at all. Before You Start Using This Machine 1 ■ Avoid installing the machine near computers or other precision electronic equipment.
Select a Safe Power Supply ■ Plug the machine into a 220-240 V AC outlet. ■ Make sure that the power supply for the machine is safe, and has a steady voltage. ■ Do not connect the power cord to a multiplug power strip, as this may cause a fire or electrical shock. ■ The power cord may become damaged if it is often stepped on or if heavy objects are placed on it. Continued use of a damaged power cord can lead to an accident, such as a fire or electrical shock.
Provide Adequate Installation Space ■ Provide enough space on each side of the machine for unrestricted operation. The optional Copy Tray-L1 is attached. 1 Before You Start Using This Machine 100 mm or more 1,278 mm 1,448 mm The optional Saddle Finisher-AD2, Document Insertion/Folding Unit-F1, Puncher Unit-AS1, and Paper Deck-AE1 are attached. 100 mm or more 1,278 mm 2, 591 mm 1-6 Installation Location and Handling Downloaded from ManualsPrinter.
Moving the Machine ■ If you intend to move the machine, even to a location on the same floor of your building, contact your local authorized Canon dealer beforehand. Do not attempt to move the machine yourself. Before You Start Using This Machine 1 Handling Precautions ■ Do not attempt to disassemble or modify the machine. ■ Some parts inside the machine are subject to high-voltages and temperatures. Take adequate precautions when inspecting the inside of the machine.
■ Be careful not to spill liquid or drop any foreign objects, such as paper clips or staples inside the machine. If a foreign object comes into contact with electrical parts inside the machine, it might cause a short circuit and result in a fire or electrical shock. Before You Start Using This Machine 1 ■ If there is smoke, or unusual noise, immediately turn the main power switch OFF, disconnect the power cord from the outlet, and call your local authorized Canon dealer.
OFF 1 CAUTION Canon recommends that data stored on the product's hard disk drive be duplicated or backed up to prevent its loss in the event of failure or other malfunction of the hard disk drive. Neither Canon nor any service provider will be liable for damages for loss of data stored on the product's hard disk drive. (See the terms of the product's Limited Warranty for more details.) Installation Location and Handling Downloaded from ManualsPrinter.
What This Machine Can Do All the elements you will ever need in a digital multitasking machine. Before You Start Using This Machine 1 Copy Send Mail Box The iR5075/iR5075N/iR5065/iR5065N/iR5055/iR5055N incorporates a rich array of input and output features that can greatly enhance your efficiency. Equipped with features that meet the needs of document work in a digitized office, the iR5075/iR5075N/iR5065/iR5065N/ iR5055/iR5055N represents the ultimate in digital multitasking machines.
See the Sending and Facsimile Guide The Send function enables you to send scanned image or document data to file servers, or send it by e-mail or I-fax. A variety of file formats are supported (PDF and TIFF), which offer you greater flexibility in accommodating the digital workplace environments.
Using the Remote User Interface See the Remote UI Guide You can control functions, such as confirming the status of the machine, job operations, and printing instructions for data saved in inboxes, all from your PC's web browser. Web Browser 1 Before You Start Using This Machine Network Scanning* See the Network ScanGear User's Guide The Network Scan function enables you to use the iR5075/iR5075N/iR5065/iR5065N/iR5055/iR5055N as a conventional scanner.
System Configuration and Parts Optional Equipment Before You Start Using This Machine 1 b a c d System Configuration and Parts Downloaded from ManualsPrinter.
e j i Before You Start Using This Machine 1 h g f a Copy Tray-L1 f Puncher Unit-AS1/AU1 b Shift Tray-D1 g Staple Cartridge-D3 c Card Reader-C1 h Staple-J1 d Paper Deck-AD1/Paper Deck-AE1 i Saddle Finisher-AD2 e Document Insertion/Folding Unit-F1/Document Insertion Unit-E1/Paper Folding Unit-E1 j Finisher-AD1 1-14 System Configuration and Parts Downloaded from ManualsPrinter.
External View and Internal View The optional Finisher-AD1 and Puncher Unit-AS1 are attached. a 1 Before You Start Using This Machine b c j d i e h g f a Feeder f Main Unit's Lower Right Cover b Control Panel g Paper Drawers 3 and 4 c Stack Bypass h Paper Drawers 1 and 2 d Main Unit's Upper Right Cover i Test Button e Main Power Switch j Breaker System Configuration and Parts Downloaded from ManualsPrinter.
The optional Saddle Finisher-AD2 and Puncher Unit-AS1 are attached. a Before You Start Using This Machine 1 b c d e a Platen Glass d Fixing Unit (Unit 1) b Toner Replacement Cover e Duplexing Unit (Unit 2) c Front Cover 1-16 System Configuration and Parts Downloaded from ManualsPrinter.
Control Panel Parts and Functions 1a b 2 3 5 6 7 8 9 d 1 0 Log In/Out r q po n m lk a Energy Saver key Press to set or cancel the Energy Saver mode. b Control Panel Power Switch (Sub Power Supply) Press to turn the control panel ON or OFF. When the control panel power switch is held for more than three seconds, it initiates the Shutdown mode. When turned OFF, the machine is in the Sleep mode. c Edit Pen Use when operating the touch panel display, such as to enter characters.
Touch Panel Display a b c d e Before You Start Using This Machine 1 g f Page 1 of the BasicFeatures Screen (Group A) h i MEAP Application Screen j Page 2 of the Basic Features Screen (Group B) a Copy f System Monitor Press this key to access the machine's copy functions. b Send Press this key to access the machine's sending and facsimile functions. c Mail Box Press this key to access the machine's mailbox functions.
NOTE • The top of the touch panel display may differ according to the optional equipment that is attached to the machine.
• The meanings of the icons that appear in the Job/Print Status Display Area (on the bottom left of the screen) are described below: Icon (Type of Job) Description Copy Job Send/Fax Job Mail Box Job 1 Printer Job Before You Start Using This Machine Report Job Network Scan Job Remote Copy Job Additional Functions Job Icon (Machine Status) Description Error Paper Jam Staple Jam Replace Toner Cartridge 1-20 System Configuration and Parts Downloaded from ManualsPrinter.
Main Power and Control Panel Power How to Turn ON the Main Power 1 Make sure that the power plug is firmly inserted into the power outlet. WARNING Do not connect or disconnect the power cord with wet hands, as this may result in electrical shock. 2 Press the main power switch to the " I " side. The main power switch is located on the right side of the machine. The main power indicator on the control panel lights when the main power switch is turned ON.
IMPORTANT If the main power indicator on the control panel does not light even though the main power switch is ON, be sure to check the breaker to see if it is OFF. (See "When the Power Does Not Turn ON," in the Reference Guide.) 3 1 The screens on the right are displayed while the system software is loading.
● If login authentication by a login service (SDL or SSO) is not set, and MEAP is selected as the initial function in Common Settings (from the Additional Functions screen). Before You Start Using This Machine 1 ❑ The Start Up screen is displayed until the machine is ready to scan. ❑ After the Start Up screen disappears, the MEAP Start Up screen is displayed. You can press [➞] to switch to the Basic Features screen to use the Copy, Mail Box, etc.
● If login authentication by a login service (SDL or SSO) is set: Before You Start Using This Machine 1 ❑ The Start Up screen is displayed until the machine is ready to scan. ❑ After the Start Up screen disappears, the MEAP Start Up screen is displayed regardless of the Set as Initial Function settings. IMPORTANT • If you turn OFF the main power, wait at least 10 seconds before turning the main power back ON. • Do not turn the main power OFF, if you want to send or receive I-fax or fax documents.
Things You Must Do Before Using This Machine IMPORTANT • If you attempt to use the machine without registering the necessary information correctly, the machine may not function properly. • Network settings have to be specified in order to send scanned documents to an e-mail address, an I-fax address, or a file server. (See the Network Guide.) Selecting the Type of Telephone Line Set the type of telephone line that is connected to the machine.
Setting the Current Date and Time You can set the current date and time. The current date and time settings are used as standard timer settings for functions that require them. Before You Start Using This Machine 1 • GMT: The time at the Greenwich Observatory in England is called GMT (Greenwich Mean Time). • Time Zone: The standard time zones of the world are expressed globally in terms of the difference in hours ( up to 12 hours) from GMT ( 0 hours).
● If you are setting Daylight Saving Time: ❑ Press [On] ➞ [Start Date]. ❑ Select the month and day from the Month and Day drop-down lists, respectively. ❑ Press [ ] or [+] to enter the time of day you want Daylight Saving Time to take effect ➞ press [OK]. ❑ Press [End Date] ➞ make the settings in the same way as [Start Date] ➞ press [OK]. NOTE 3 Press [OK]. Registering Your Machine's Fax Number You must store the machine's fax number.
Registering Sender Names For fax, you can register any name as the sender's name, such as the section or department's name, or an individual's name. The registered sender's name can be displayed on the touch panel display of the recipient's machine and/or printed at the top of the documents that you send as the sender's information.
Registering the Unit's Name Your name or company's name must be registered as the unit's name (a department name is optional). For example: •Your name: John Smith •Company name: Canon When you send a document via e-mail, fax, or I-fax, the unit name that you registered is displayed or printed as the sender's name at the recipient's machine. Some fax models also display sender information on the touch panel display during transmission.
• If the Domain Authentication user authentication system of SSO (including when performing Domain Authentication with the 'Domain Authentication + Local Device Authentication' user authentication system) is set as the login service and you are sending an I-fax: - The e-mail address that you registered in the Device Information settings for this machine is displayed in the From field, and the e-mail address that you registered for Active Directory or iW Accounting Manager is displayed in the Sender field on
Displaying a Help Screen ■ Main Menu This is the first screen displayed when you press . Press [Using the Help Function] to display an explanation of how to use the Help. NOTE Press after selecting a mode of the Copying or Mail Box function to bring up a guidance screen with an explanation of that mode. ■ List Screen Displays a list of the functions selected on the main menu. Displaying a Help Screen Downloaded from ManualsPrinter.
■ Explanation Screen Displays a detailed explanation of the function selected on the list screen. Press [Try It] to jump to the screen for setting the selected function. Press [Display more detailed settings.] to display more detailed information and related topics. 1 NOTE Before You Start Using This Machine The [Try It] key is only displayed on the Explanation Screen for some Copy functions. Example: The procedure for making a copy of a photo. 1 Press [Making Copies] ➞ [Original Type Settings].
Routine Maintenance 2 CHAPTER This chapter describes how to load paper, and replace toner. Loading Paper. . . . . . . . . . . . . . . . . . . . . . . . . . . . . . . . . . . . . . . . . . . . . . . . . . . . . . . . . . . . . . . . . . .2-2 Replacing the Toner Cartridge . . . . . . . . . . . . . . . . . . . . . . . . . . . . . . . . . . . . . . . . . . . . . . . . . . . . . .2-6 2-1 Downloaded from ManualsPrinter.
Loading Paper If the selected paper has run out during printing, a screen prompting you to load paper appears on the touch panel display. 2 IMPORTANT Routine Maintenance • A screen prompting you to load paper also appears if the selected paper drawer is not fully inserted into the machine. Make sure that the paper drawer is properly in place. • Do not load nonstandard paper sizes into the paper drawers. • Do not load the following types of paper into the paper drawers. Doing so may cause a paper jam.
1 Press and release the button on the paper drawer in which you want to load paper. 2 Routine Maintenance 2 Grip the handle, and pull out the paper drawer until it stops. Loading Paper Downloaded from ManualsPrinter.
3 Open a package of paper, and remove the paper stack. CAUTION When loading paper, take care not to cut your hands on the edges of the paper. IMPORTANT Rewrap any remaining paper in its original package, and store it in a dry place, away from direct sunlight. 2 NOTE Routine Maintenance • For high quality printouts, use paper recommended by Canon. • Before loading paper, always fan the sheets several times, and align the edges to facilitate feeding.
NOTE • Paper Drawers 1 and 2 hold approximately 1,500 sheets of paper (80 g/m2). • Paper Drawers 3 and 4 hold approximately 550 sheets of paper (80 g/m2). • If there are instructions on the package of paper about which side of the paper to load, follow those instructions. • When the paper is loaded into the paper drawer, the side facing down is the one printed on. • If problems occur, such as poor print quality or paper jams, try turning the paper stack over, and reload it.
Replacing the Toner Cartridge When there is only a small amount of toner remaining in the machine, the following message appears on the touch panel display, as shown. You can continue printing, but at this time you should purchase new toner cartridge to have it available when needed. Routine Maintenance 2 When the toner runs out completely and prints can no longer be made, a screen with instructions on how to replace the toner cartridge, like the one shown, appears on the touch panel display.
IMPORTANT • Use only toner cartridges intended for use with this machine. • Do not replace toner cartridges until the message prompting you to do so appears. NOTE • When the message appears, the remaining toner is low. It is recommended that you get a new toner cartridge ready for replacement before the toner runs out. • Complete instructions on how to replace the toner cartridge can be accessed by pressing [Previous] or [Next] on the touch panel display.
3 Remove the toner cartridge, supporting it with both hands. WARNING Do not burn or throw used toner cartridges into open flames, as this may cause the toner remaining inside the cartridges to ignite, resulting in burns or a fire. CAUTION 2 Routine Maintenance Do not touch the tip of the toner cartridge or subject it to shock by hitting it. Doing so may cause the toner cartridge to leak. 4 2-8 Remove the red protective cap from the new toner cartridge by twisting it.
5 Insert the new toner cartridge. Ribbed End of the Toner Cartridge IMPORTANT Ridges of the Tray 2 Routine Maintenance • Make sure the ribbed end of the toner cartridge with the ridges of the tray. (You cannot load a toner cartridge which is not made for this machine because the ribbed end of the toner cartridge will not align with the ridges of the tray.) • Only use toner cartridges intended for use in this machine. • Insert the toner cartridge horizontally into the machine.
6 Return the locking lever to its original position. 6 CAUTION When returning the locking lever to its original position, be careful not to get your fingers caught, as this may result in personal injury. IMPORTANT Make sure to return the locking lever all the way to the 'Lock' position. (Otherwise, the toner cartridge will not be inserted properly.) Routine Maintenance 2 7 Close the toner replacement cover.
Troubleshooting 3 CHAPTER This chapter explains what to do in response to a paper jam and an error message display. Clearing Paper Jams. . . . . . . . . . . . . . . . . . . . . . . . . . . . . . . . . . . . . . . . . . . . . . . . . . . . . . . . . . . . . .3-2 List of Error Messages . . . . . . . . . . . . . . . . . . . . . . . . . . . . . . . . . . . . . . . . . . . . . . . . . . . . . . . . . . . .3-7 List of Error Codes without Messages . . . . . . . . . . . . . . . . . . . . . . . . . . . . . . . . .
Clearing Paper Jams The screen indicating the location of the paper jam and instructions on how to clear the paper jam appears on the touch panel display. This screen repeatedly appears on the touch panel display until the paper jam is entirely cleared. WARNING There are some areas inside the machine which are subject to high-voltages.
NOTE If paper is jammed in several locations, remove the jammed paper in the order indicated on the touch panel display. 1 Inspect all paper jam locations indicated on the touch panel display, and remove any jammed paper. See the appropriate pages below for instructions on finding and removing jammed paper. Or, you can follow the instructions on the touch panel display. If jammed paper tears while it is being removed, be sure to remove any remaining pieces from inside the machine.
● If a paper jam occurs inside an optional unit: ❑ See the instructions on the following section. a Paper Deck-AD1 (See "Paper Deck-AD1/Paper Deck-AE1 (Optional)," in the Reference Guide.) b Paper Deck-AE1 (See "Paper Deck-AD1/Paper Deck-AE1 (Optional)," in the Reference Guide.) b 3 Troubleshooting c Finisher-AD1 (See "Inside the Top Cover of the Finisher-AD1/Saddle Finisher-AD2 (Optional)," or "Output Delivery Unit of the Finisher-AD1/Saddle Finisher-AD2 (Optional)," in the Reference Guide.
e Document Insertion/Folding Unit-F1 (See "Insertion Unit (Optional)," "Inside the Insertion Unit (Optional)," or "Document Insertion/Folding Unit-F1/ Paper Folding Unit-E1 (Optional)," in the Reference Guide.) e f Document Insertion Unit-E1 (See "Insertion Unit (Optional)," or "Inside the Insertion Unit (Optional)," in the Reference Guide.) f 3 Troubleshooting g Paper Folding Unit-E1 (See "Document Insertion/ Folding Unit-F1/Paper Folding Unit-E1 (Optional)," in the Reference Guide.
2 After you have removed all of the jammed paper at the locations indicated on the touch panel display, restore all levers and covers to their original positions. 3 Continue to follow the procedure and instructions displayed on the touch panel display. Once you have removed all of the jammed paper in locations other than the feeder, printing or copying resumes. If there is paper that still needs to be removed, a screen indicating how to clear that paper jam appears on the touch panel display.
List of Error Messages List of Error Codes without Messages If a job or operation does not complete successfully, check the error code, and perform the necessary operations according to the error code displayed. You can check the error code on the Details screen under [Log] from the System Monitor screen. (See "Job Details," in the Reference Guide.) Perform the necessary procedures according to the error code.
# 037 Cause Documents could not be received because there was insufficient memory available. Remedy Erase unnecessary documents and documents with errors from memory to increase the amount of available memory. (See Chapter 2, "Introduction to the Mail Box Functions," in the Copying and Mail Box Guide, and Chapter 6, "Receiving Documents," in the Sending and Facsimile Guide.) #099 3 Cause Copying/printing was interrupted. Remedy Try copying/printing again.
# 711 Cause The inbox memory is full. Remedy Erase the unnecessary documents stored in the inbox. (See Chapter 2, "Introduction to the Mail Box Functions," in the Copying and Mail Box Guide, and Chapter 6, "Receiving Documents," in the Sending and Facsimile Guide. # 712 The maximum number of documents are already stored in the inbox. Remedy Erase the unnecessary documents stored in the inbox.
# 823 Cause Unable to connect with the remote copy printers. Remedy Check the network, and try again. If the machine still does not operate correctly, contact your system manager. # 824 3 Cause A communication error occurred with the remote copy printers. Remedy Check the network, and try again. If the machine still does not operate correctly, contact your system manager.
# 851 There is insufficient memory remaining in the system. Remedy Check the system's available memory, and delete any unnecessary documents stored in inboxes. Cause 2 The machine's memory is full. Remedy Erase unnecessary documents and documents with errors from memory to increase the amount of available memory. (See Chapter 2, "Introduction to the Mail Box Functions," in the Copying and Mail Box Guide, and Chapter 6, "Receiving Documents," in the Sending and Facsimile Guide.
# 853 Cause 1 When trying to print a large number of pages, the job is not performed due to insufficient memory resources. Remedy Reduce the number of pages to print, or perform the print job again when no other jobs are reserved. Cause 2 The job could not be processed, because it was cancelled from the printer driver while the print data was being sent to the machine. Remedy Try printing again.
# 855 Cause Device information could not be delivered because a language that the client machine does not support was included in the device information. Remedy Contact your local authorized Canon dealer. # 856 Cause The job was cancelled because there was not enough free space on the hard disk to store the temporary data. Remedy Contact your System Manager. 3 Cause Data reception timed out, or the job was cancelled at the host.
# 860 3 Cause 1 A paper jam occurred during printing. Remedy Try printing again. Cause 2 Recovery printing was not performed. Remedy Try printing again. Cause 3 You tried to print on a transparency sheet made for colour copies. Remedy Load transparencies made for black-and-white copies into the machine and then try printing again. Troubleshooting # 861 Cause An error occurred while processing PDL data or image data. Remedy Confirm the print settings you made when printing from a computer.
# 863 Cause An error occurred while processing PDL data or image data. Remedy Check the settings, and try printing again. # 864 Cause 1 The external controller or controller board is not attached, or is not functioning properly. Remedy Contact your System Manager. Cause 2 The external controller or controller board cannot be recognized correctly. Remedy Contact your System Manager. 3 Cause The Mail Box function is restricted. Remedy Contact your System Manager.
Troubleshooting 3 3-16 List of Error Messages Downloaded from ManualsPrinter.
Appendix 4 CHAPTER This chapter provides other useful information. Multifunctional Operations . . . . . . . . . . . . . . . . . . . . . . . . . . . . . . . . . . . . . . . . . . . . . . . . . . . . . . . . .4-2 Available Paper Stock . . . . . . . . . . . . . . . . . . . . . . . . . . . . . . . . . . . . . . . . . . . . . . . . . . . . . . . . . . . . .4-4 Check Sheet for the Periodic Inspection of the Breaker . . . . . . . . . . . . . . . . . . . . . . . . . . . . . . . . . . .
Multifunctional Operations The iR5075/iR5075N/iR5065/iR5065N/iR5055/iR5055N offers the user many functions, such as printing, scanning, copying, and sending, which can be used together. The following table provides you with the details of multifunctional operations.
*1 The machine's performance may be affected if image processing, such as compression, enlargement/reduction, and rotation, are carried out. *2 The output order of competing jobs varies, depending on whether an optional finisher is attached. - When an optional finisher is attached: one set is output alternately for each job - When an optional finisher is not attached: one page is output alternately for each job *3 The machine's processing speed may be slower.
Available Paper Stock The paper types that can be used with this machine are shown in the following table. Icons indicating the type of paper loaded in each paper drawer can be displayed on the paper selection screen if you store that information in the machine beforehand. (See "Identifying the Type of Paper in a Paper Source," in the Reference Guide.
: Available : Unavailable Paper Source Paper Size Width x Length A3 297 mm x 420 mm A4 297 mm x 210 mm A4R 210 mm x 297 mm A5R 148 mm x 210 mm Free Size 99 mm x 148 mm to 297 mm x 432 mm Paper Drawer 1 and 2 Paper Drawer 3 and 4 Stack Bypass Paper Deck (optional) *1 *1 *1 Available only if the optional Paper Deck-AE1 is attached to the machine.
Check Sheet for the Periodic Inspection of the Breaker Copy this page for future use, and store it in a safe place near the machine in order to document your periodic inspections of the breaker. ■ How to Inspect the Breaker Periodically Follow the procedure described in "Periodic Inspection of the Breaker," on p. xxviii, once or twice a month. ■ How to Fill in This Check Sheet Fill in the date of inspection and the name of the inspector.
Downloaded from ManualsPrinter.
Canon Canon Inc. 30-2, Shimomaruko 3-chome, Ohta-ku, Tokyo 146-8501, Japan Europe, Africa and Middle East Canon Europa N.V. P.O. Box 2262, 1180 EG Amstelveen, Netherlands Specifications subject to change without notice. © Canon Europa N.V. 2007 Downloaded from ManualsPrinter.com Manuals Canon Middle East FZ-LLC P.O. Box 27616 Dubai United Arab Emirates email: info@canon-me.