
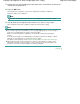
Instruction manual
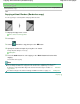

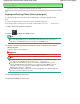


1.
Number of copies
Specify by using the
+
or
-
button.
2.
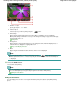
Selection photo
Select the photo you want to print by using the button.
3.
Print settings
By pressing the right Function button, the print settings confirmation screen is displayed.
On the print settings confirmation screen, you can change the settings of page size, media type,
and print quality and so on.
Setting Items
4.
Change view
By pressing the center Function button, you can change the view, switch the display mode, or
select the menu to display the cropping edit screen.
Using Useful Display Functions
5. Menu
By pressing the left Function button, the Photo menu screen is displayed.
Note
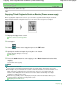
If you specify the number of copies for each photo, use the button to display the photo you
want to print and use the
+
or
- button to specify the number of copies when the desired photo
is displayed.
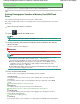
6.
Press the
Color
button.
The machine starts printing.
Note
To cancel printing, press the
Stop button.
You can add the print queue by pressing the right Function button while printing.
Adding the Print Queue
Adding the Print Queue
You can display photo selection screen again and add the print queue (Queue print) while printing
photos.
Page 408 of 941 pagesViewing and Printing Photos (Select photo print)