
Instruction manual


Advanced Guide
>
Scanning > Scanning with Using the Operation Panel of the Machine > Setting Items on the Operation
Panel of the Machine
U049
Setting Items on the Operation Panel of the Machine
You can change the scan settings such as the scan size, resolution, or data format.
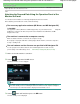
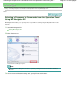
When the Scan standby screen is displayed, press the right Function button to select the setting item.
Use the
to select the setting item, the
button to specify the setting, then press the
OK
button.
Note
When Auto scan is selected for Doc.type to forward the scanned data to the computer, the scan
setting cannot be specified.
Depending on the scan menu on the Save/Forward to screen, some setting items cannot be
selected. This section describes the setting items when you select Memory card on the Save/
Forward to screen.
The setting item cannot be selected is displayed grayed out.
Depending on the setting item, some settings cannot be specified in combination with the setting of
other setting item, the document type selected for Doc.type, or the scan menu on the Save/Forward
to screen. If the setting cannot be specified in combination is selected, Error details is displayed on
the LCD. In this case, press the left Function button to confirm the message, then change the
setting.
The settings of the scan size, resolution, and data format are retained even if the machine is turned
off.
When scanning starts in the scan menu that is not available with the specified setting, The
specified function is not available with current settings. is displayed on the LCD. Change the
setting, follow the on-screen instructions.
When you forward the scanned data to the computer or attach the data to an e-mail, you can specify
the destination and file name using MP Navigator EX. Refer to Scanner Button Settings Tab (Save to
PC)
for the settings when forwarding the data to PC, and refer to
Scanner Button Settings Tab
(Attach to E-mail)
for the settings when attaching the data to an e-mail.
If you scan originals from the computer, you can scan with advanced settings. Refer to
Let's Try
Scanning for scanning from the computer.
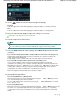
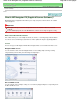
1.
Scan size
Select the size of the original on the Platen Glass.
2.
Format
Select the data format of the scanned data.
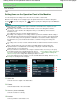
3.
Scan res (Scan resolution)
Select the resolution for scanning.
4.
Preview
Select to preview the scanned data or not.
Page 474 of 941 pagesSetting Items on the Operation Panel of the Machine