Canon I N S T R U C T I O N English Edition
P © .
r 21. Range-Viewfinder Eyepiece 22. Light Meter Sensitivity j'V; 23. 24. 25. 26. 27.
Thank yon for buying the Canon 7. The Canon 7 is the newest and finest member of the Canon family. It is the result of more than 25 years of unique optical and mechanical precision. We, of Canon, are proud of the C non 7. . .and we hope you will be, too. Sincerely yours. Dr. T.
Contents Page Page Canon 7 Specifications Winding Film and Cocking Shutter 6 7-10 Film Winding Shutter Button Exposure Counter Dial Shutter Button Safety Device Shutter Button Safety Lock Exposure Setting How to Hold the Canon 7 Flash Synchronization 24-25 Self-timer 26 Double Exposures 27 28-31 Changing Lens Distance Scale Depth-of-Field Infra-Red Photography Film Plane Mark 29 Loading Film into the Magazine 32-33 Canon Lenses 34-35 16-17 Range-Viewfinder Range-Viewfinder Selector Fil
Model 7 Specifications Model 7 accepts Canon’s unique bayonet-mount Canon lens 50 mm F 0.95 as well as all thread-mount Canon lenses from 25 mm to 1000 mm. All metal focal plane shutter. Single-pivot, rigid shutter speed dial equally calibrated from 1/1000 to 1 sec., B & T plus self-timer. Lens : Shutter: Exposure Meter: Built-in light meter coupled to shutter speed dial. Sensitivity range is from LV6 to LV19 for ASA 100. Finder; Universal viewfinder for 35, 50, 85, 100, and 135 mm Canon lenses.
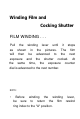
Winding Film and Cocking Shutter FILM WINDING . . . Pull the as will winding shown in then be lever until the pictures. advanced to it stops The the film next exposure and the shutter cocked. At the same time, the exposure counter dial is advanced to the next number. NOTE: • Before be sure winding to the return winding the ring index to the "A" position.
«The cally to lever when the the vi/ill released. original body. It will from the body. film from camera lever to is be But automati will not i.e. you in original to 1/4"—1/2" can advance position. use, return close about this not its It position, the the return When return position the against the body. • Instead of one full stroke, several short strokes can be also used to wind the film. The lever locks when winding is complete.
R- I, I K-J ^ igji SHUTTER B U T T O N . . . When the shutter button is pressed, the film can be wound again with the lever after the shutter is actuated. * Cable release can be attached to the shutter button. EXPOSURE COUNTER D I A L . . The film is advanced whenever the film winding lever is completely wound and the exposure counter dial is advanced by one number indicating the number of exposed films. The exposure counter when the back cover is opened.
Cano^^ SHUTTER BUTTON SAFETY DEVICE., The shutter button's safety device locks the shutter if the film is wound. Unintentional double'exposures cannot occur. Red Dot SHUTTER BUTTON SAFETY LOCK . .. After the shutter is cocked, if you put the index of the rewind ring on the red dot, the shutter button is locked, and you cannot button safety with release the is pressed. device shutter when carrying cocked. This you to attach the shutter is cocked ating it.
Exposure Setting Exposure adjustment is the shutter speed and iia.: ; done by the lens Correct exposure is easily the coupled, built-in light meter. adjusting aperture. determined by SETTING THE SHUTTER SPEED . . . Turn the shutter speed dial and set the desired shutter speed figure to the index mark. Index Mark The shutter can be adjusted to speeds of 1 second, 1/2, 1/4, 1/8, 1/16, 1/30, 1/60, 1/125, 1/250, 1/500, and 1/1000 of a second as well as B ” tbulb; and “ T ” (time) exposures and " X.
QÍ Canon \ f SETTING THE LENS APERTURE . .. The lens aperture adjusts the light volume that reaches the film and also the depth of-field (see page 30). The required "F” stop can be obtained by turning the lens aperture ring until the figures align with the index mark. The following table shows the between aperture value and exposure time relation Lens Ring Aperture Lens aperture 0.95 1.2 1.4 1.8 2 3.5 4 5.6 Relative exposure time t/4 1/3 1/2 1/1.
USING THE LIGHT METER . . When the light meter is faced in the direction of the subject, the needle in the light meter indicator window moves ac cording to the light condition of the subject. The correct exposure can be obtained by the following steps ; ^ Light Meter Aperture Scale Guide Line Needle When the shutter dial is pre set to the the aperture scale on the light meter Then set the lens aperture ring accordingly.
2. When the lens aperture ring is pre set to the desired "F" stop: Turn the shutter dial and match the aperture reading on the meter indicator window to the guide line where the needle rests. The shutter dial should be set where it click-stops. NOTE; • • The light meter cannot be used for " B ” and “T” exposures or when using speedlight. When using the light meter, be sure that YOUR HAND DOES NOT COVER THE PHOTOCELL. CHANGING THE SENSITIVITY OF THE LIGHT METER. . .
Film Speed Indicator Button SETTING THE FILM SPEED . . When using the light meter, the speed of the film used should be set on the film speed indicator window on the shutter speed dial. In order to set the film pressing the speed, turn the shutter the film speed indicator speed of the film used is speed dial button. In not indicated while case on the window, it may be set between two figures. •Using ASA 100 I.
Focusing The lens has a position. Release the stopper and "stopper" at the infinity the lens by pressing rotating the lens barrel. The lens will move back and forth by rotating the lens barrel, which is coupled to the rangefinder, enabiing you to focus. Canon teiephoto ienses do not have a stopper. .tit ♦ RANGE-VIEWFINDER . . .
RANGE-VIEWFINDER SELECTOR . . , When you finder, you will look figure. The figure through see a the white indicates range-view- frame the and focal a length of the lens, and the view seen within the white frame in the viewfinder is that which will be recorded on the film The field of view indicated by a white frame varies according to the focal length of the lens used when the range-viewfinder selector is shifted.
1 2. To open the back cover, turn the magazine opening key counter-clockwise. Pull down the hinged-back lock while holding the slide the back cover end of with your fingers. The camera back cover will then swing open. 3 Rotate the groove. Then inside the film sprocket, 18 take-up-spool engage groove.
Canon 7 accepts any standard 35 mm film cartridge as well as the Canon Film Magazine V. which is available as an accessory. 4 Lift up the rewind crank. Put the film cartridge into the recess directly beneath the rewind crank. Press the film rewind crank again to lock the film cartridge in place. ^ With your thumb on the knurled lower end of the take-up-spool, turn the spool clockwise until the film is taut. 6 Close the back cover, which locks automatically.
^■Then turn the magazine opening key clockwise to “close,” and return former position. Do not turn the magazine opening key before closing the back cover. 8. Wind the iever and press the shutter button with the twice you wiii have cleared the two frames exposed to ing. . . and the exposure counter dial will advance iever again and you are ready for the first shot. • The the fiim is properly loaded and film wind lever is wound. If the film was not loaded properly.
How To Hold The Canon 7 It is important to hold the camera properly in order to obtain clear-and-sharp pic tures. Hold the camera in a vertical or horizontal position . . look through the viewfinder and focus. Press the shutter button gently after composing your picture. These steps are important: 1 Hold the camera snugly in both hands. 2- The camera should be pressed firmly to your cheek or forehead. 3 When using in a horizontal position, both elbows should be pressed against your body.
Unloading Film 1 2 Turn the film rewind ring to " R ” from the "A” position. Raise by the the rewind arrow. crank Watch the to its rotation operating of the position film and transport turn indicator the film. When the rotation suddenly stops .. . then stop rewinding immediately. 22 3 Return the film rewind ring to “A." 4 Turn the magazine opening key to the left. 5 Open the back cover by pulling down the back cover lock outward.
When you have finished a roii of film and tension on your finger. You should then the camera in this manner: 6 you try to advance the film, you will feel stop winding and remove the film from Pull out the rewind crank as far as it will go and take out the film cassette or magazine. Be sure to put the lens cap on before rewinding the film. If the film is forcibly wound after all exposures have been completed, it will be impossible to rewind the film.
Flash Synchronization When the directly socket, and pressed, the Canon into Flash the when it is various Unit flash the speeds is fitted connector shutter automatically shutter V-2 unit button adjusted of is for synchro flash operation. A lens hood is also necessary taking flash pictures. TYPE OF FLASH BULB *’ EPType *'M” Type " в ” I'T5—1 sec. *'F " Type В ” 1/30—1 sec. Speediight (Electronic F[ashJ 24 SHUTTER SPEED “ В " 1/1000—1 sec.
• For electronic flash, turn shutter dial to " X.” •When using miniature size type bulbs (for example; Philips, etc.), be sure the speed dial is set at 1/15 sec.
Perfect electric contact is made when the Canon Flash Unit V-2 is attached to the flash unit con nector socket. No external wiring is neces sary and all synchronization is done automatically in the camera itself. To extend the flash unit from the camera, or to connect a speedlight unit of non-Canon make, use a Canon Extension Cord Va (15-ft.) or Vb (3-ft.). When using a clip-on-type speedlight on the Canon 7, the Canon Flash Unit Coupler, or Accessory Coupler, should be used.
25
Self-Timer When you are self-timer ted, until be done The as lever it shutter photograph, turned or device will seconds later. • be before shutter to counter-clockwise, can timing the ready after will button be as further. cocking start is no the . can shutter. as . the illustra This operating pressed. actuated turn and approximately soon the 10 • Once you have cocked the self-timer, it cannot be released unless the shutter button is pressed.
Double Exposures Canon Model 7 is not designed to take double exposures; owever, it can be done by the following steps : 1 2 First, turn the film rewind ring to " R ” from "A” position. While watching the film transport indicator, turn the film rewind and stop when the film transport indicator has made about one-and-a-half turns. crank to the right 3. Return the rewind ring to position "A.” 4.
Special Care of Lenses CHANGING LENS . . . The lens mounting flange of the Canon 7 is equipped with both the Canon standard screw-in-mount and Canon special bayonet-mount M. To detach a screwin-type lens other than the F 0.95, 50 mm lens) from the camera, hold the lens barrel at its base and turn counter-clockwise iillustrated by small arrow''. To re place a lens, keep lens cap on but remove the dust cap from the lens.
• Do not change your lens in the strong replacement lens at hand. Then quickly your shadow as a shield from the direct light. light. change When the changing lens in your the lens, shade have ... the or use DISTANCE SCALE . . . The distance scale indicates the distance It is not necessary to check the scale sary for infrared photography, which depth-of-field. between for is the focused normal photography ; explained later on, subject and the film.
DEPTH-OF-FIELD SCALE . . . The depth-of-field scale shows you the range of subjects which will be in sharp focus on the film. This range will vary with the “F” stop selected. For example: The depth-of-field will be deeper. . . the smaller the lens aperture the shorter the lens focal length the farther the distance of the subject. The depth-of-field will be shallow... With an "F” stop of camera will give you feet away from the F5.6, and the subject you a sharply focused picture camera.
Canoi^^ INFRARED PHOTOGRAPHY . .. The letter red film. the “R” subject opposite the you the lens barrel until the 25-feet on the depth-of-field scale using this film, in are the focusing distance distance posite when is When the subject away, For have the of all normal Canon way. lenses. Read This off the is for infra distance of on the lens is op example, focused lens the shown mark reading mark.
Loading Film Into The Magazine The Canon Film Magazine V is designed to hold 5-1/4 It consists of three parts : center spool, inner shell, and outer shell. 1 To inner disassemble shell the clockwise magazine, until both place the your inner finger shell and feet on (1,53m) the outer of button shell 35mm and slots film. turn the are super center spool. imposed and the safety disengaged. Draw out the inner shell.
3. Wind 5-1/4 feet of film around the center exposures ... 3-1/4 feet for 20 exposures ... not touch the emulsion (dull) side with your fingers. 4. To assemble the magazine, first insert with the beginning of the film sticking out of the slot. 5. Place the center spool into the inner Inner and outer shell slots should be clokwise until it clicks into the locked position. 6. When the film trim it, as illustrated.
World-Famous Canon Lenses Canon lenses are held in the highest esteem by professional and discerning amateur photographers the world over for their unsurpassed, unique optical design and precision engineering. Before leaving the factory, each lens must meet exacting quality tests to insure the highest resolu tion, contrast, brilliance, and color fidelity.
Specifications for Screw-in Mount Lenses ** Type Wide-Angle 25 mm F 3.5 28 mm F 2.8 35 mm F 1.5 35 mm F 2 Normal-Focus •50 mm F0.95 50 mm F 1.2 50 mm F 1.4 50 mm F 1.8 Long Focus 85 mm F 1.8 Telephoto 100 mm F 2 100 mm F 3.5 135 mm F 3.5 •*M135 mm F 2.5 Long Telephoto 200 mm F 3.5 ••M200mm F 3.5 Extra-Long Telephoto 400 mm F 4.5 600 mm F 5.6 800 mm F 8 1000 mm Fll Angle of View Magni fication Number of Elements Net Weight (oz.) (gm.
Proper Care of your Camera Moisture and dust are harmful to your for a camera. It should be taken out removed from into the light and fresh air from time to time. If your camera is to be stored long time, it should be the beach, its case. Silica gel or another drying agent should be placed alongside it. When you use your camera on a rainy day, or at moisture and salt air wiping. Do not adhere to it, which can result in stains, rust, and corrosion.
Now That You Are Completely Familiar With Your Camera, Follow These Simple Steps. 1. Remove the lens cap. 2. Advance the film. I ________ i C'. •! -. ^ 4. Compose your picture. 5. Focus. 3. Select correct shutter speed and lens aperture. B il: 6. Press the shutter button gently.
г 0'^her Members of the Canon Family CANON MOTOR ZOOM 8 EEE MICROPHOTO UNIT CANON REFLEX ZOOM 8-3 CANON DEMI CINE CANONE! 8 copy STAND 3
Accessories CAMERA HOLDER L
CANON RELEASE
_ U CAMERA COMPflgY/ INC. 312 S?nrnomaruko-ch^, Olila-lcu, Tokyo, jopan CANON U.S. BRANCH 554 Fifth Avenue, New York 36, N.Y., U.S.A. (^lON S.A. GENEVE Hes$e, Geneve, Switzerland 1 CANON I^IN AMERICA Apoftado 7022, Via Espana 120, Panama, R.