PUB. DIE-177 DV NETWORK SOLUTION DISK Version 1 Software Instruction Manual This software is for use with Windows® XP only.
Read Carefully Before Using CANON SOFTWARE LICENCE AGREEMENT IMPORTANT: READ CAREFULLY AND UNDERSTAND ALL OF THE RIGHTS AND RESTRICTIONS DESCRIBED IN THIS CANON SOFTWARE LICENCE AGREEMENT (the “Agreement”). This Agreement is a legal agreement between you, either an individual or entity, and Canon Inc. (“Canon”) governing your use of this software program including related “online” or electronic documentation, if any (the “Software”).
Canon, Canon’s subsidiaries and affiliates, their distributors and dealers do not warrant that the functions contained in the Software will meet your requirements or that the Software will be free from defects or viruses or that the operation of the Software will be uninterrupted or error free. Canon does not warrant that any data transfer through the internet using the Software will be complete or accurate.
Contents Read Carefully Before Using .......................................................................................... 2 CANON SOFTWARE LICENCE AGREEMENT ................................................................... 2 Read This First ................................................................................................................. 5 Required Accessories .....................................................................................................
Read This First Disclaimer ¡ While every effort has been made to ensure that the information contained in this guide is accurate and complete, no liability can be accepted for any errors or omissions. Canon reserves the right to change the specifications of the hardware and software described herein at any time without prior notice.
Read This First Required Accessories You need following items for using the Software: • Digital Camcorder • DV NETWORK SOLUTION DISK (Supplied) • DV (IEEE1394) Cable (Optional) CV-150F (4-pin - 4-pin) or CV-250F (4-pin - 6-pin) Refer to the instruction manual of your computer for the type of the DV cable. 4-pin: 6-pin: • Speaker or Headphones (when using DV Messenger) Requirements for Using the DV Messenger To use DV Messenger, it is required that Windows XP is installed and Windows Messenger 4.
System Requirements OS: CPU: RAM: Free Hard Disk Space: Display: Interface: Others: Microsoft Windows XP Home Edition or Professional Proper operation is not guaranteed on an OS that has been upgraded from a previous version.
What Can Be Accomplished With the Software This topic introduces the main features of the software contained on the DV NETWORK SOLUTION DISK. AV/C Camera Storage Subunit-WIA Driver Canon camcorders only (refer to the table on the next page) The AV/C Camera Storage Subunit-WIA Driver is a software that allows you to use your camcorder as a card reader/writer by connecting camcorder and computer, both equipped with a DV (IEEE1394) terminal, with a DV (IEEE1394) cable.
* Requirements: AV/C Camera Storage Subunit-WIA Driver: Can be used with camcorders with an asterisk (*) below. Camcorder operation: Camcorders listed below can be operated from with the DV Messenger. File transfer: If your contact has a camcorder with an asterisk (*) below, you can transfer files from the memory card in the camcorder of your contact to your computer.
Installing the Software Installing from the DV NETWORK SOLUTION DISK With this procedure, the DV Messenger will be installed and the driver files for the AV/C Camera Storage Subunit-WIA Driver will be copied to your computer. For the installation procedure of the AV/C Camera Storage Subunit-WIA Driver, see p. 12. Installation Precautions: ¡ DV Messenger cannot be installed with Windows Messenger older than version 4.5.
4. ••••••••••••••••••••••••••••••••••••••••••••••••••••••••••••••••••••••••••••••••••••••••••••• 5. 6. ••••••••••••••••••••••••••••••••••••••••••••••••••••••••••••••••••••••••••••••••••••••••••••• 7. ••••••••••••••••••••••••••••••••••••••••••••••••••••••••••••••••••••••••••••••••••••••••••••• Select the components and click [Next]. E Read the license agreements and click [Yes].
Installing the Software 8. ••••••••••••••••••••••••••••••••••••••••••••••••••••••••••••••••••••••••••••••••••••••••••••• Click [Finish]. • The installation is complete. Installing the AV/C Camera Storage Subunit-WIA Driver Installation Precautions: ¡ Install the driver files from the DV NETWORK SOLUTION DISK first before installing the driver ( 10). ¡ Close any programs that are running before installing the driver. ¡ Do not turn off the camcorder until the driver installation is complete.
6. ••••••••••••••••••••••••••••••••••••••••••••••••••••••••••••••••••••••••••••••••••••••••••••• Check if the driver has been installed correctly. E • From the [start] menu, select [My Computer] and check if the camera icon appears. If the camera icon does not appear, the installation has not been completed properly. Uninstall ( 16) and reinstall the driver ( 10). Caution: ¡ Still images/movies recorded onto the memory card or downloaded to the hard disk are important original data files.
Installing the Software ■ Setting the Application Not to Start Automatically When you install the driver, the computer is set to automatically start an application each time you connect the camcorder to the computer. Use the following procedures to change the setting. 1. 2. 3. ••••••••••••••••••••••••••••••••••••••••••••••••••••••••••••••••••••••••••••••••••••••••••••• 4. 5. ••••••••••••••••••••••••••••••••••••••••••••••••••••••••••••••••••••••••••••••••••••••••••••• 6. 7.
Notes: ¡ To start a WIA-compliant application automatically, select [Start this program] and click [OK]. ¡ If the started application displays a message such as [TWAIN data source not found. Reinstall the scanner software.], select [WIA-Canon Camera Storage] and use the WIA-TWAIN Driver.
Uninstalling the Software Uninstall the software if it has not been installed correctly or if it is not required anymore. Caution: ¡ Close all programs that are running before uninstalling. Uninstalling the DV Messenger 1. ••••••••••••••••••••••••••••••••••••••••••••••••••••••••••••••••••••••••••••••••••••••••••••• 2.
4. 5. 6. ••••••••••••••••••••••••••••••••••••••••••••••••••••••••••••••••••••••••••••••••••••••••••••• From the [start] menu, select [Control panel]. E ••••••••••••••••••••••••••••••••••••••••••••••••••••••••••••••••••••••••••••••••••••••••••••• Click [Printers and Other Hardware]. ••••••••••••••••••••••••••••••••••••••••••••••••••••••••••••••••••••••••••••••••••••••••••••• Click [Scanners and Cameras].
Uninstalling the Software 7. ••••••••••••••••••••••••••••••••••••••••••••••••••••••••••••••••••••••••••••••••••••••••••••• Right-click the mouse button on the camera icon and select [Delete]. • When the camera icon does not appear, refer to “Troubleshooting the Driver Uninstall” below. 8. ••••••••••••••••••••••••••••••••••••••••••••••••••••••••••••••••••••••••••••••••••••••••••••• In the confirmation dialog, click [Yes]. • [#(number)] may appear after [Canon Camera Storage Device].
3. 4. 5. 6. ••••••••••••••••••••••••••••••••••••••••••••••••••••••••••••••••••••••••••••••••••••••••••••• Click [System]. E ••••••••••••••••••••••••••••••••••••••••••••••••••••••••••••••••••••••••••••••••••••••••••••• Click the [Hardware] tab on the [System Properties]. ••••••••••••••••••••••••••••••••••••••••••••••••••••••••••••••••••••••••••••••••••••••••••••• Click the [Device Manager] button.
Uninstalling the Software 2. In the confirmation dialog, click [OK] and close [System Properties] and [Device Manager]. • Remove all copies of the [Canon Camera Storage Device] icon that appear in the [Other devices] or [Imaging devices] categories, or that appear more than once in one category. 7. ••••••••••••••••••••••••••••••••••••••••••••••••••••••••••••••••••••••••••••••••••••••••••••• From the [start] menu, select [My Computer] and double-click the [C:], [WINDOWS] and [INF] folders in succession.
8. ••••••••••••••••••••••••••••••••••••••••••••••••••••••••••••••••••••••••••••••••••••••••••••• Double-click the [Oem*.inf] file. E • A number such as “0” or “1” appears in place of the asterisk (*) above. You will also find another file called [Oem*.pnf], which will have the same number as the [Oem*] file. The two constitute one set. There may be many file sets starting with “Oem”. • The Windows Notepad program will start and show the file contents.
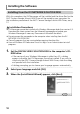
Connecting the Camcorder to a Computer Connection Precautions: ¡ Make sure the camcorder is being powered by the compact power adapter before connecting it to a computer. ¡ Do not connect any devices to the camcorder‘s USB terminal when connecting the camcorder to the computer using the DV terminal.
Downloading Still Images/Movies to a Computer Cautions: Downloading with the [Scanner and Camera Wizard] You can download still images/movies from the memory card to the computer using the [Scanner and Camera Wizard] (only images recorded to the memory card with your Canon camcorder). 1. ••••••••••••••••••••••••••••••••••••••••••••••••••••••••••••••••••••••••••••••••••••••••••••• Insert a memory card to the camcorder. • Make sure to close the memory card cover after inserting a memory card. 2. 3.
Downloading Still Images/Movies to a Computer 4. ••••••••••••••••••••••••••••••••••••••••••••••••••••••••••••••••••••••••••••••••••••••••••••• Connect the camcorder to the computer using the DV cable ( 22). • The [Scanner and Camera Wizard] starts automatically. • If the program does not start automatically, select [My computer] on the [start] menu, right-click the mouse button in the camera icon and click [Get pictures]. 5.
7. ••••••••••••••••••••••••••••••••••••••••••••••••••••••••••••••••••••••••••••••••••••••••••••• Specify file name and destination and click the [Next] button. • Downloading of the selected still images starts. • When download is complete, a dialog confirming to finish appears. 8. ••••••••••••••••••••••••••••••••••••••••••••••••••••••••••••••••••••••••••••••••••••••••••••• 9.
Downloading Still Images/Movies to a Computer Downloading with Windows Explorer With Windows Explorer, still images/movies can be downloaded from memory card to computer. 1. 2. 3. ••••••••••••••••••••••••••••••••••••••••••••••••••••••••••••••••••••••••••••••••••••••••••••• 4. ••••••••••••••••••••••••••••••••••••••••••••••••••••••••••••••••••••••••••••••••••••••••••••• From the [start] menu, select [My Computer].
••••••••••••••••••••••••••••••••••••••••••••••••••••••••••••••••••••••••••••••••••••••••••••• Keep the mouse clicked on the thumbnail and move it to the desired folder (drag and drop). E OR 5. ••••••••••••••••••••••••••••••••••••••••••••••••••••••••••••••••••••••••••••••••••••••••••••• 6. ••••••••••••••••••••••••••••••••••••••••••••••••••••••••••••••••••••••••••••••••••••••••••••• Right-click the mouse on the image and select [Copy].
Uploading Files from the Computer to the Memory Card Cautions: ¡ If you are using an SD Memory Card, make sure the protect switch is set to allow recording. ¡ When uploading files to the memory card, keep the file name within 8 characters. Depending on the extension (4 characters or more), files may not be uploaded. ¡ Files cannot be uploaded to the memory card by dragging and dropping them into a folder in the memory card. ¡ Files may not be uploaded to the memory card depending on file type and size.
Preparations for the DV Messenger Before you use the DV Messenger, check whether the camcorder is correctly connected to the computer. You also need to disable the firewall ( 30). E Connecting Precautions: ¡ Make sure the camcorder is being powered using the power adapter before connecting it to a computer. ¡ If you are connecting the camcorder to the computer using the DV cable, do not connect any other devices to the camcorder's USB terminal. ¡ Do not connect two or more camcorders to the same computer.
Preparations for the DV Messenger 6. ••••••••••••••••••••••••••••••••••••••••••••••••••••••••••••••••••••••••••••••••••••••••••••• 7. ••••••••••••••••••••••••••••••••••••••••••••••••••••••••••••••••••••••••••••••••••••••••••••• Click [Next]. Confirm that your camcorder is displayed and click [Cancel]. • If you are using a Canon camcorder, check if [Canon DV Device] is displayed. • If [Canon DV Device] does not appear, click to display the device list and check if [Canon DV Device] is listed.
1. ••••••••••••••••••••••••••••••••••••••••••••••••••••••••••••••••••••••••••••••••••••••••••••• 2. ••••••••••••••••••••••••••••••••••••••••••••••••••••••••••••••••••••••••••••••••••••••••••••• 3. ••••••••••••••••••••••••••••••••••••••••••••••••••••••••••••••••••••••••••••••••••••••••••••• From the [start] menu, select [Control Panel]. E Click [Network Connections]. 31 DV Messenger Click [Network and Internet Connections].
Preparations for the DV Messenger 4. ••••••••••••••••••••••••••••••••••••••••••••••••••••••••••••••••••••••••••••••••••••••••••••• Select the network you are using, right-click the mouse button and select [Properties]. • You can identify the network you are using by checking which [Status] is [Enabled]. • If [1394 Connection] is listed, select a connection other than [1394 Connection]. If [Status] is not shown, select [Details] from the [View] menu. 5.
Videoconferencing Starting the DV Messenger E Caution: ¡ The DV Messenger will not start when you have signed in to Windows Messenger. In such case, sign out of Windows first and start DV Messenger. ¡ Do not update Windows Messenger while DV Messenger is started. ¡ Do not connect two or more digital camcorders to the computer. ••••••••••••••••••••••••••••••••••••••••••••••••••••••••••••••••••••••••••••••••••••••••••••• 1 . Set the camcorder to TAPE CAMERA mode. 2. Connect to the Internet. 3.
Videoconferencing • To use the DV Messenger, both you and your contact need to be online. – If your contact is already online when you sign in: A message will be send automatically to your contact notifying that you have signed in. Message on the Computer Screen of Your Contact – If your contact signs in when you are already online: A message appears automatically notifying you that your contact has signed in.
3. ••••••••••••••••••••••••••••••••••••••••••••••••••••••••••••••••••••••••••••••••••••••••••••• 4. ••••••••••••••••••••••••••••••••••••••••••••••••••••••••••••••••••••••••••••••••••••••••••••• Click [Next]. E Select your camcorder and click [Next]. • If you are using a Canon camcorder, select [Canon DV Device]. ••••••••••••••••••••••••••••••••••••••••••••••••••••••••••••••••••••••••••••••••••••••••••••• When the video picture appears, click [Next].
Videoconferencing 6. ••••••••••••••••••••••••••••••••••••••••••••••••••••••••••••••••••••••••••••••••••••••••••••• 7. ••••••••••••••••••••••••••••••••••••••••••••••••••••••••••••••••••••••••••••••••••••••••••••• Read the explanation for speaker and microphone settings and click [Next]. Set [Microphone] and click [Next]. • If you are using a Canon camcorder, select [Canon DV Device]. • The installed sound device appears for [Speaker]. Proceed with the setting unchanged. 8.
9. ••••••••••••••••••••••••••••••••••••••••••••••••••••••••••••••••••••••••••••••••••••••••••••• Check if the microphone volume is correctly indicated and click [Next]. E • In TAPE CAMERA mode: Direct your voice into the microphone of your camcorder and check if the volume indicator operates correctly. • In TAPE PLAY (VCR) mode: Play back the tape and check if the volume indicator operates correctly. • Sound input with the camcorder via IEEE1394 connection cannot be adjusted with the volume lever.
Videoconferencing 2. ••••••••••••••••••••••••••••••••••••••••••••••••••••••••••••••••••••••••••••••••••••••••••••• Select your contact and click [Select]. • Only online registered members will be listed. • You can only perform a videoconference with members who have a camcorder connected and are using DV Messenger. • The [Conversation] window appears. • A connecting request is send to your contact and a dialog appears on your computer screen that DV Messenger is waiting for response.
■ Starting a Videoconference by Accepting an Invitation 1. ••••••••••••••••••••••••••••••••••••••••••••••••••••••••••••••••••••••••••••••••••••••••••••• E If your contact clicks on [Remote] and selects you as the contact, a connecting request appears on your computer screen. When the connecting request dialog appears, click [Yes]. • The communication between your and your contact's DV Messenger starts and you can now operate the camcorder of your contact from the DVM panel. 2.
Screen Displays DVM Panel This is the DV Messenger‘s control panel. Use the buttons on this window to operate the camcorder connected to your computer and the camcorder connected to the computer of your contact. 1 2 7 3 4 5 1 2 3 4 5 6 7 40 [Local] Button 8 6 Displays the control panel of your camcorder. This button cannot be selected if a non-Canon camcorder is connected. [Remote] Button Displays the control panel of the camcorder connected to your contact's computer.
8 [Close] Button This closes the DVM panel. To display it again, double-click the DV Messenger icon on the taskbar, or click the DV Messenger icon and select [Open Control Panel] from the displayed menu. This does not end the DV Messenger ( 50). E Taskbar When DV Messenger is started, the [DV Messenger] task and [DV Messenger] icon appear on the taskbar. 1 DV Messenger task 2 DV Messenger icon Appears when the DV Messenger panel is displayed or minimized.
Screen Displays DV Messenger Icon Menu When you click the DV Messenger icon in the taskbar, a list of menus appears. 1 2 3 4 5 1 2 3 4 About DV Messenger Help Topics Control Panel Open Disconnect 5 Exit 42 Displays the version of the DV Messenger. Displays the DV Messenger's help topics. Displays the DV Messenger panel on the screen. Disconnects the communication between you and your contact. The [Conversation] window disappears. Exits the DV Messenger.
Operating Camcorders With DV Messenger You can operate the camcorder connected to your computer and the computer connected to your contact's computer with the DV Messenger. If you wish to operate the camcorder of your contact, ask your contact to place a ✓ (checkmark) to the before [Allow Remote Control].
Operating the Camcorders With DV Messenger In [CAMERA] Mode If the camcorder connected to your computer is set to TAPE CAMERA mode, you can send live video recording to your contact and perform a videoconference ( 33). You can also adjust the camcorder's zoom and focus from the DVM panel. 1. ••••••••••••••••••••••••••••••••••••••••••••••••••••••••••••••••••••••••••••••••••••••••••••• Set your camcorder to TAPE CAMERA mode. • Unload the cassette when using the camcorder in TAPE CAMERA mode. 2.
In [VCR] Mode E If the camcorder connected to your computer is set to TAPE PLAY (VCR) mode, you can send video and sound recorded on a tape to your contact. You can also adjust the tape speed from the DVM panel while monitoring the picture in the [Conversation] window. If the camcorder of your contact is set to TAPE PLAY (VCR) mode, click the [Remote] button to control the tape operation of your contact's camcorder from your DVM panel.
Operating the Camcorders With DV Messenger ■ The [VCR] Operating Buttons 2 1 3 4 8 7 9 1 2 3 4 5 6 7 8 9 46 Video picture from the tape in your or your contact‘s camcorder 5 6 Playback Reversed Playback Playback Pause Stop Rewind Fast Forward Frame Advance Plays back the tape. Plays back the tape in reverse. Pauses the playback. Stops the playback. Rewinds the tape. Fast-forwards the tape. Plays back the tape frame by frame. Can only be used during playback pause.
In [CARD] Mode (File Transfer) E If the camcorder connected to your contact‘s computer is equipped with a file transfer function, and the camcorder is set to CARD PLAY (VCR) mode, you can transfer files recorded on the memory card in that camcorder to your computer. Cautions: ¡ Obtain the permission of your contact first before transferring files.
Operating the Camcorders With DV Messenger 4. ••••••••••••••••••••••••••••••••••••••••••••••••••••••••••••••••••••••••••••••••••••••••••••• Select the file you wish to transfer by placing a checkmark to the next to the thumbnail. • Depending on the speed of your Internet connection, it may take time until the thumbnails appear. • If you move the mouse pointer on the thumbnail, the file information appears. • Thumbnails may not appear with images not recorded with the camcorder of your contact. 5.
Changing the Mode of the Camcorder This section describes the procedure for changing the mode of the camcorder during communication. E Caution: ¡ The settings for camera and microphone in the [Audio Tuning Wizard] may be changed when you change the mode of your camcorder. In such case, reset with the [Audio Tuning Wizard] before clicking [Start Camera]. 1. ••••••••••••••••••••••••••••••••••••••••••••••••••••••••••••••••••••••••••••••••••••••••••••• 2. 3.
Ending the DV Messenger Ending the Communication with Your Contact 1. ••••••••••••••••••••••••••••••••••••••••••••••••••••••••••••••••••••••••••••••••••••••••••••• Right-click the mouse on the [Remote] button of the DVM panel. OR Click the DV Messenger icon on the taskbar and select [Disconnect] from the displayed menu. • The communication with your contact ends and the [Conversation] window closes. If you wish to communicate with another contact, select the contact after clicking the [Remote] button.
Troubleshooting AV/C Camera Storage Subunit-WIA Driver E Regarding Installation of the AV/C Camera Storage Subunit-WIA Driver ? The Canon camcorder is connected to the computer via a DV cable, but is not recognized by the computer. ➜ Check if the camcorder is set to CARD PLAY (VCR) mode. ➜ If the IEEE1394 port did not come preinstalled, check if the IEEE1394 adapter is correctly installed. ➜ Check if the DV (IEEE1394) cable is correctly connected. ➜ Check if a USB cable is connected to the camcorder.
Troubleshooting ➜ Check if the POWER switch is in a position other than OFF. ➜ You have not performed the [Windows Messenger Audio Update]. Please consult Microsoft for details ? The DVM panel does not change to [CARD] mode even if the camcorder is set to CARD PLAY (VCR) mode. ➜ If you are using a Canon camcorder, check if the AV/C Camera Storage Subunit-WIA Driver is correctly installed. 1. Set your camcorder to CARD PLAY (VCR) mode. 2. From the [Start] menu, click [My Computer]. 3.
➜ Check the position of the speaker volume lever in the [Conversation] window. Move the lever to the right until the volume indicator on the right operates. E ➜ Check if the sound device is set to [Mute] in the [Control Panel]. 1. From the [Start] menu, select [Control Panel]. 2. Select [Sounds, Speech, and Audio Devices]. 3. Click [Adjust the System Volume].
Troubleshooting 4. Check if [Device Volume] is set to [Mute]. ➜ Click [Stop Camera] and interrupt the videoconference. Ask your contact to check his/her microphone settings in the [Audio Tuning Wizard]. ? My contact is receiving the video picture, but not the sound. ➜ If you are using a camcorder supporting the memory card function, check if the camcorder is set for recording to a tape (e.g. the TAPE/CARD switch is set to TAPE). ➜ Check the position of the microphone volume lever.
? Cannot set the sound to mute. ➜ Sound may still be send to your contact even if the microphone volume lever is moved completely to the left and the volume lever indicates that it is set to mute. Move the lever to the right and back to the left; no sound should be send to your contact now. ? There are anomalous noises when the tape is set to playback pause or played back using the speed controls.
Troubleshooting ➜ If the memory card cover is open, file transfer may not work. Ask your contact to close the memory card cover. ➜ If a application software using the file transfer function (such as [Scanner and Camera Wizard]) is started on the computer of your contact, you cannot use the file transfer function. Ask your contact to close the applications.
MEMO ○ ○ ○ ○ ○ ○ ○ ○ ○ ○ ○ ○ ○ ○ ○ ○ ○ ○ ○ ○ ○ ○ ○ ○ ○ ○ ○ ○ ○ ○ ○ ○ ○ ○ ○ ○ ○ ○ ○ ○ ○ ○ ○ ○ ○ ○ ○ ○ ○ ○ ○ ○ ○ ○ ○ ○ ○ ○ ○ ○ ○ ○ ○ ○ ○ ○ ○ ○ ○ ○ ○ ○ ○ ○ ○ ○ ○ ○ ○ ○ ○ ○ ○ ○ ○ ○ ○ ○ ○ ○ ○ ○ ○ ○ ○ ○ ○ ○ ○ ○ ○ ○ ○ ○ ○ ○ ○ ○ ○ ○ ○ ○ ○ ○ ○ ○ ○ ○ ○ ○ ○ ○ ○ ○ ○ ○ ○ ○ ○ ○ ○ ○ ○ ○ ○ ○ ○ ○ ○ ○ ○ ○ ○ ○ ○ ○ ○ ○ ○ ○ ○ ○ ○ ○ ○ ○ ○ ○ ○ ○ ○ ○ ○ ○ ○ ○ ○ ○ ○
MEMO ○ ○ ○ ○ ○ ○ ○ ○ ○ ○ ○ ○ ○ ○ ○ ○ ○ ○ ○ ○ ○ ○ ○ ○ ○ ○ ○ ○ ○ ○ ○ ○ ○ ○ ○ ○ ○ ○ ○ ○ ○ ○ ○ ○ ○ ○ ○ ○ ○ ○ ○ ○ ○ ○ ○ ○ ○ ○ ○ ○ ○ ○ ○ ○ ○ ○ ○ ○ ○ ○ ○ ○ ○ ○ ○ ○ ○ ○ ○ ○ ○ ○ ○ ○ ○ ○ ○ ○ ○ ○ ○ ○ ○ ○ ○ ○ ○ ○ ○ ○ ○ ○ ○ ○ ○ ○ ○ ○ ○ ○ ○ ○ ○ ○ ○ ○ ○ ○ ○ ○ ○ ○ ○ ○ ○ ○ ○ ○ ○ ○ ○ ○ ○ ○ ○ ○ ○ ○ ○ ○ ○ ○ ○ ○ ○ ○ ○ ○ ○ ○ ○ ○ ○ ○ ○ ○ ○ ○ ○ ○ ○ ○ ○ ○ ○ ○ ○ ○ ○
CANON INC. Canon Europa N.V. P.O. Box 2262, 1180 EG Amstelveen, the Netherlands Canon UK Ltd. Helpdesk Tel No.: 08705 143 723 (Calls may be recorded) Fax No.: 08705 143 340 Canon Australia Pty Ltd 1 Thomas Holt Drive, North Ryde, Sydney, New South Wales, Australia Sales :Telephone 1800 816 001 Service :Telephone 1800 809 714 Infoline (software support) :Telephone (02) 9805 2864 www.canon.com.